Carnz' 500cc Blaster Project

Status
Not open for further replies.

CARNZ

New Member
Jun 17, 2010
1,391
24
0
36
BALTIMORE
www.facebook.com
Hey everyone, I've been figuring this out for a while now and I figured its time to start a build thread on here so people can see what i've been working on. This is going to take some time because college is back in now, but I'll start with what I have done and whats still in the works.

Got my 2000 Blaster in June and it was plenty of fun for a basically stock quad. Only mods were a DG silencer, UNI filter, and Mud tires on the back.
2cxb2bs.jpg

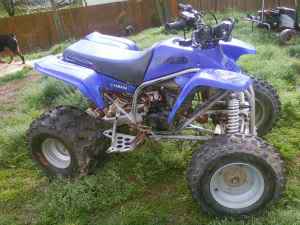
It had no brakes as the rear cable was stretched and the front shoes were gone. Got the VITO's shorty rear brake cable and rebuilt the caliper and that was good to go, could lock up the rears no problem. Finally replaced the front shoes as well to actually have front and rear brakes lol.

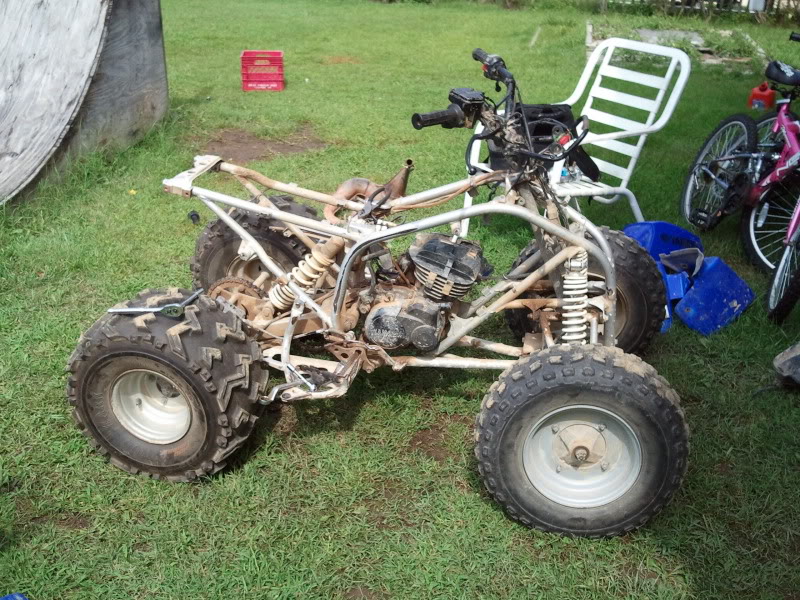
Went mud riding one day and flew thru a huge puddle(more like a pond lolol) and hydrolocked the engine. Yay for cracked piston! 8-|

Decided instead of rebuilding the 200, I'll swap it! And this is where my idea started to come to life. 510ccs of power! :D

2010-08-19111944.jpg


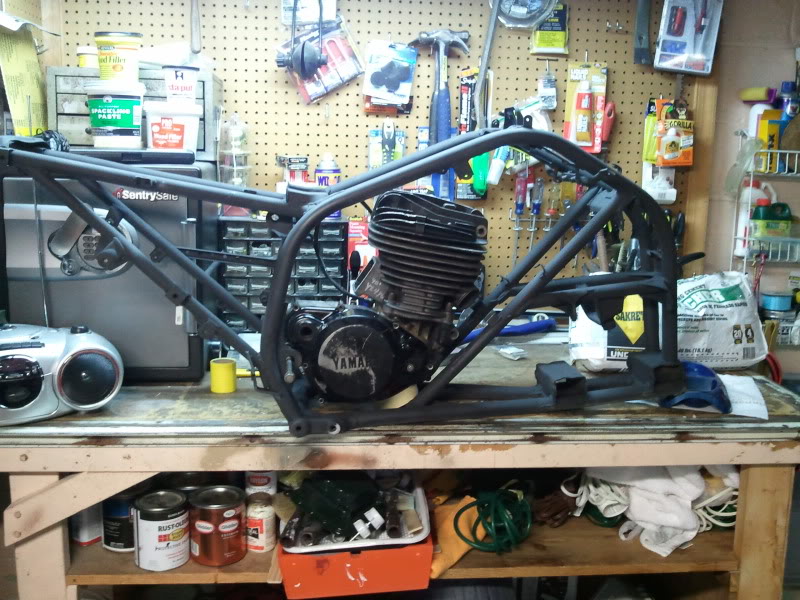
Picture halfway thru the teardown.

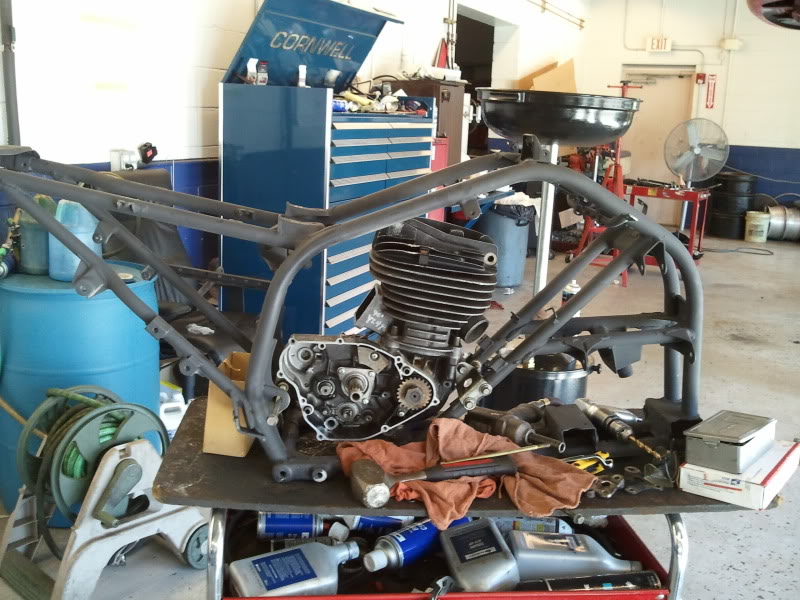
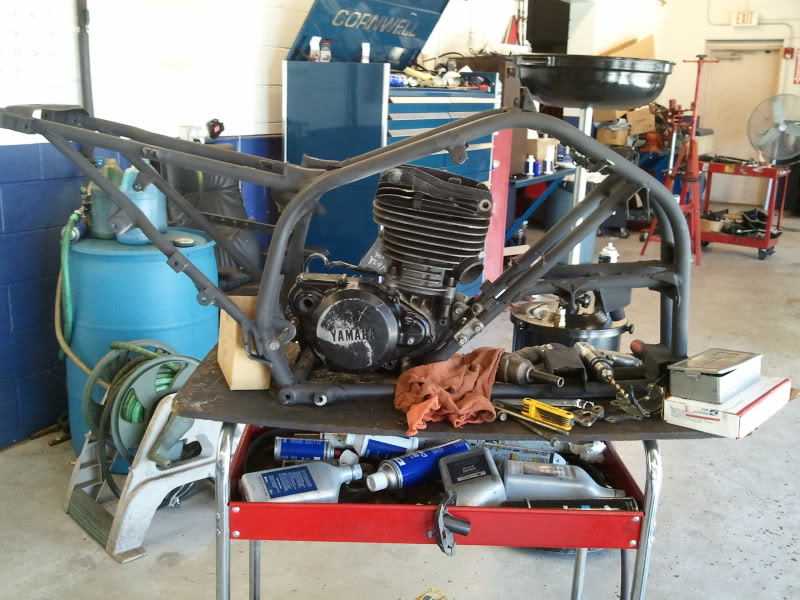
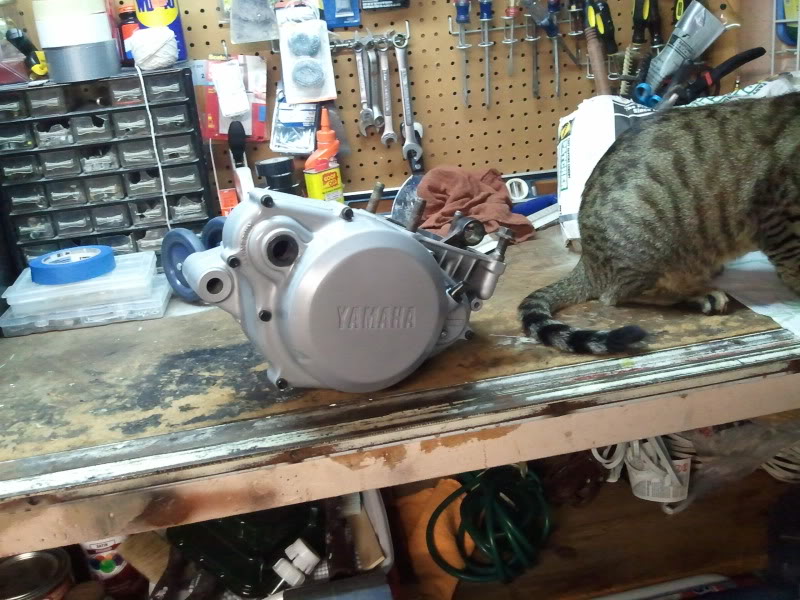
I knew that the YZ490 engine wasnt a simple drop-in swap, so I threw the bottom end and jug in the frame just so see how it fit before any modifications and surprisingly its not too hateful right from the start.

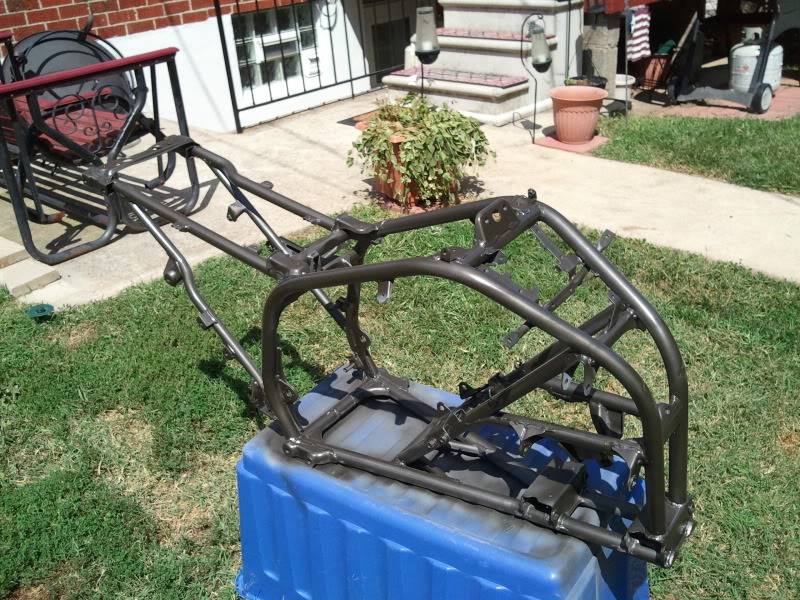
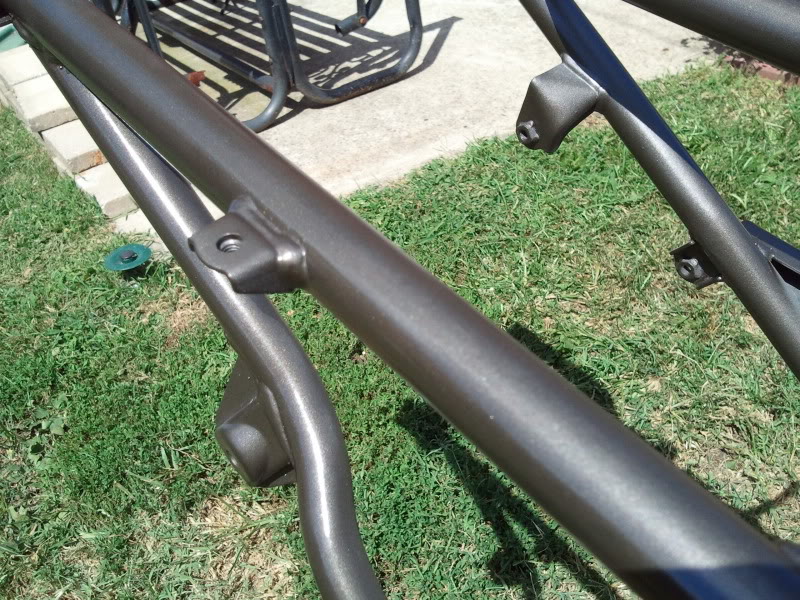
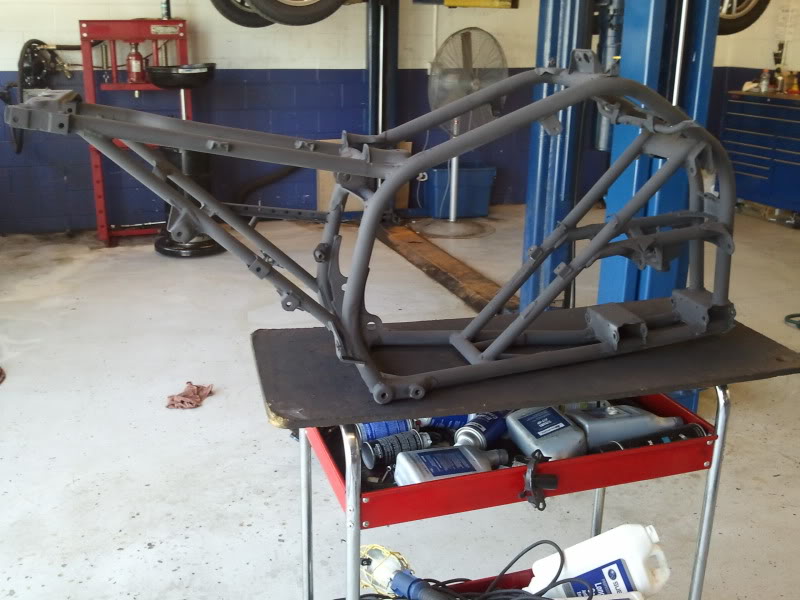
After the initial look, i cut the stock mounts off the frame and decided to prime it while i had it all apart.
2010-08-28114306.jpg

2010-08-28135023.jpg


continuing in the next post stay tuned lol
 
Last edited:
  • Like
Reactions: LOCSTA
Re: Carnz' Blaster Project

After priming the frame and cutting the old mounts off, i set the engine in again just to have a look.
2010-08-28181850.jpg


Not too bad, looks like the room will be there for this!

I purchased a set of OEM 1984 YZ490 engine mount brackets and even though I could only use two they proved to be great for the $10 i spent on them!

I measured up some points then drilled straight thru the frame to install the mounts.
2010-09-04102352.jpg

2010-09-04105145.jpg


The clearance on the side port exhaust is actually pretty good and after looking at the pipe layout I dont think it will be a serious issue at all getting this worked out!

I havent done anything else yet as i've been quite busy but I did paint the frame today finally!
2010-09-06135857.jpg

2010-09-06135843.jpg


Using the following parts:
1981 IT465 bottom end and transmission
1983 YZ490 Cylinder and Head
1983 IT490 Magneto
VForce3 Reed System
modified DG Vintage MX Pipe
Keihin 38mm PWK Air Stryker Carb
Wiseco 89mm Bore Piston (makes it 510ccs)
Ken O'Connor Aggressive Port Job

Stay tuned for more updates!
 
Last edited:
freaking awesome broo!! my question is will those bolts in the frame be enough to hold all that stress?? I woulnd reinforce em in some way..but then again im no expert
 
Laid the fuel tank on the frame today and saw the place i need to modify it, just a small portion in the center area needs to be raised up. Along with this I am going to space the rear of the tank with some shims.

Thought about possibly using another mount setup for the bottom-most mount on the engine, but undecided, possibly going to wait and see how this works out first. Its in there SOLID right now.

Those OEM mounts were bent like they were designed to put this motor in the blaster, once i mounted them on both sides of the frame they were spaced almost perfectly to hold the engine in place.

I'll try to get some more updates soon, but running short on time!

Thanks for the interest guys. Blasterforum will be the first to know when its all finished and running, and i will include video!
 
Wow looking nice! Good luck.

Biggest part will be the pipe, its allways the downfall to these hybrids. Your best bet is to mock up a stock yz490 pipe, then cut it up and twist and turn it till it fits, don't and or take away any length it will screw things up and it will never run right.
 
wow awesome build, when its all said and done make sure you get a high strength chain...if there is such a thing...while at busco i saw paulie drop his chain a couple of times cause of all the power.
 
Good job on the bolt on motor mounts.
It will be unlikely to break bolts but highly likely to break the welds on the motor mounts.
It's goin to vibrate pretty bad no way around it.
Go with solid mounts and have the crank re-built and balanced.
It has happened to me and at 2 other guys who tryed similar swaps- don't re-build the crank and it will fail.
In my case taking out a new bore and piston.
Ditch the antique stock Mikuni VM and get yourself a Keihin PWK.
These 3 tidbits of advice are the most important things to follow for any old dirtbike motor swap.
Everything else do it your way lol
Looking good so far man B)
 
u know i was thinking that, the guy said it was a WR, but the id number on the top is 4V6 which is consistent with the early IT/YZ. the head wasnt bolted on it was just set on for fitment lol. editing previous info to show update. i wasnt 100percent sure but if you're certain i will take your word for it.

i bought the bottom end seperate from the cyl and head so who knows lol

EDIT: did some more research last night and my bottom end is a 1981 IT465. Cyl and Head are 83 YZ490
 
Last edited:
Good job on the bolt on motor mounts.
It will be unlikely to break bolts but highly likely to break the welds on the motor mounts.
It's goin to vibrate pretty bad no way around it.
Go with solid mounts and have the crank re-built and balanced.
It has happened to me and at 2 other guys who tryed similar swaps- don't re-build the crank and it will fail.
In my case taking out a new bore and piston.
Ditch the antique stock Mikuni VM and get yourself a Keihin PWK.
These 3 tidbits of advice are the most important things to follow for any old dirtbike motor swap.
Everything else do it your way lol
Looking good so far man B)

Yeah I'm expecting some vibrations, was considering adding some rubber bushings to the mounting to help dampen it a bit, but I want to keep engine movement to a minimum. I really wanted to stay away from having to weld the frame up so i figured the bolt-on style would be best.
I never did get the stock Mikuni, I have a Keihin PWK38mm air stryker carb for it :)

I wasnt sure about the crank this thing spins and feels great the way it is right now(no up and down play, minimal side to side movement, bearings feel nice and smooth).
 
Hey just a small update: made my wiring harness and re-wired the magneto, setup the cdi and voltage rectifier/regulator. Running a small battery to help power a hid lighting system. Also my new clutchassembly arrived today, waiting on my ebc clutch plates and vesrah heavy duty clutch springs. Otherwise haven't done much more due to college.

Its coming together nicely though!
 
Got tired of looking at the haggard clutch cover and bottom end cases today so I decided to re-paint them

Pics:
2010-09-18184655.jpg

2010-09-18184714.jpg


Jug and Head will be done as well after port work and head mods are done!
 
Status
Not open for further replies.