New Swingarm In Progress

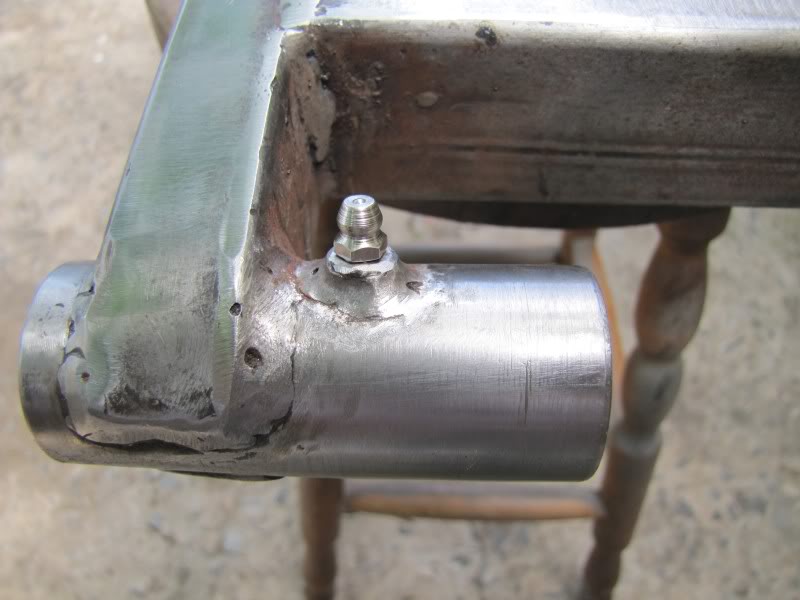
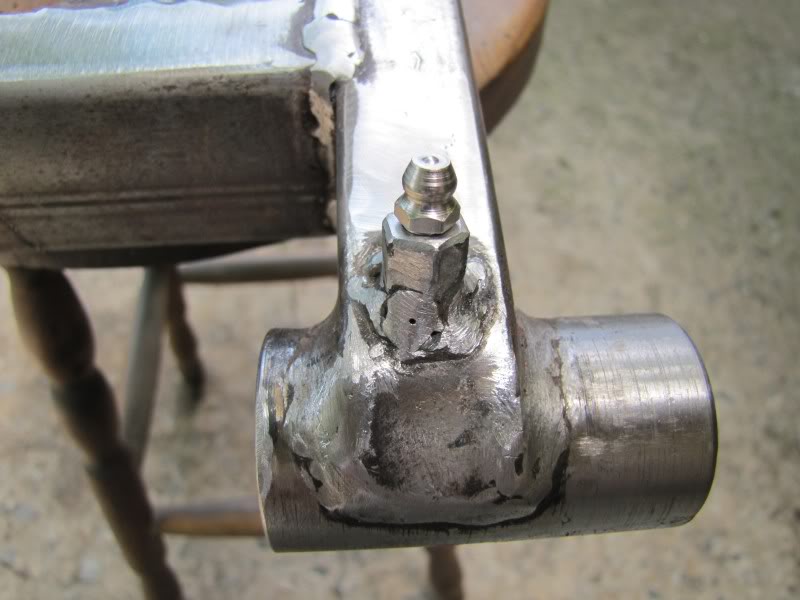
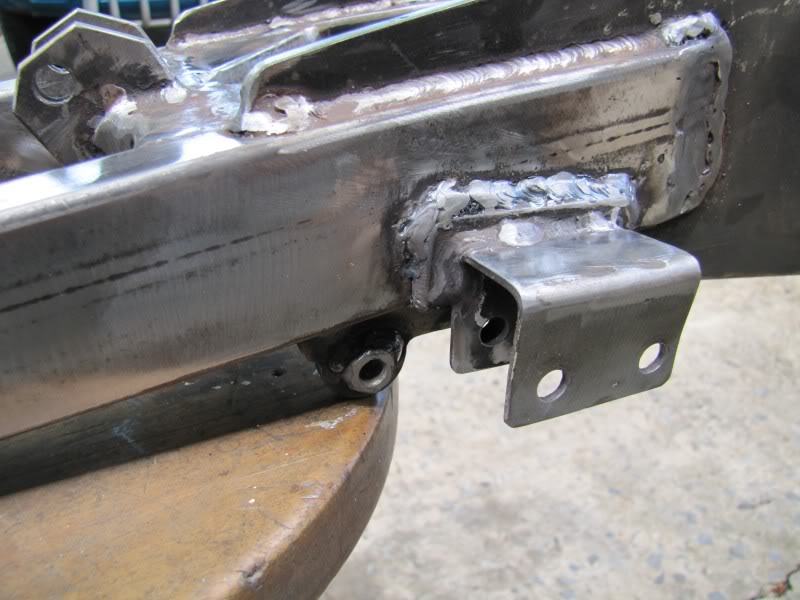
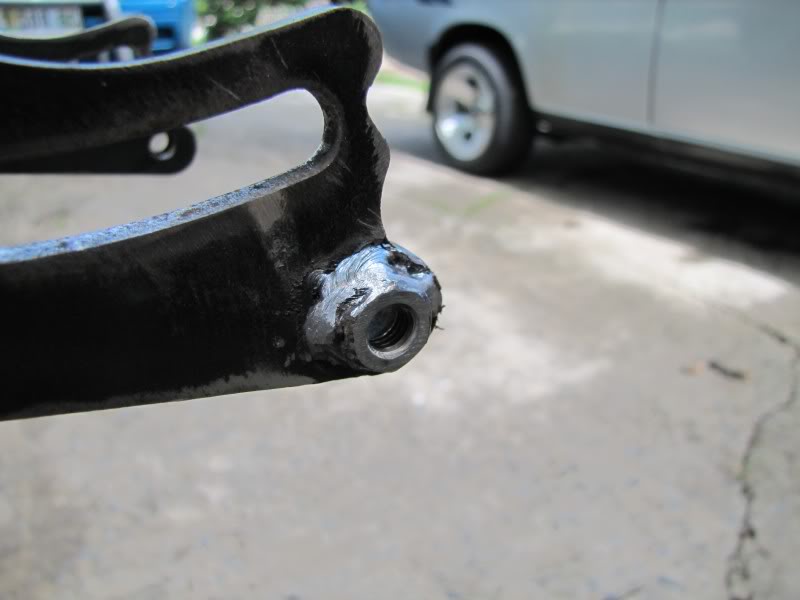
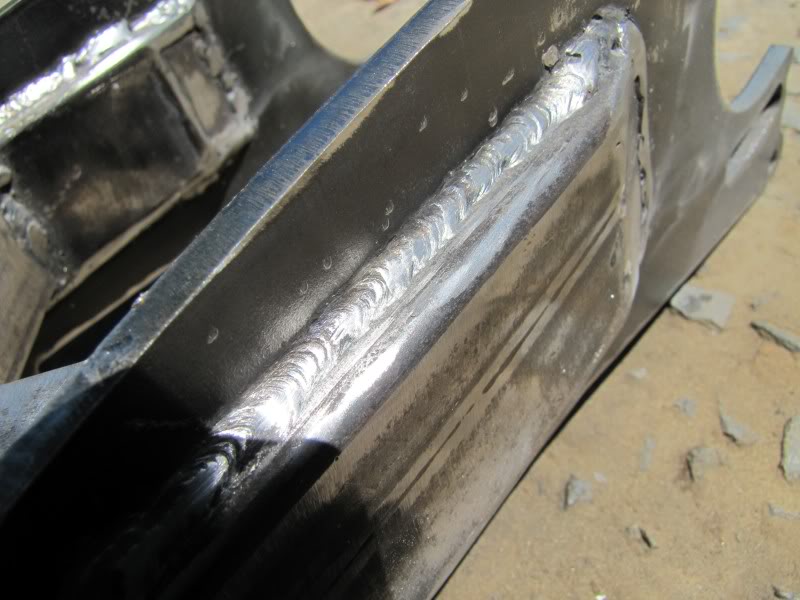
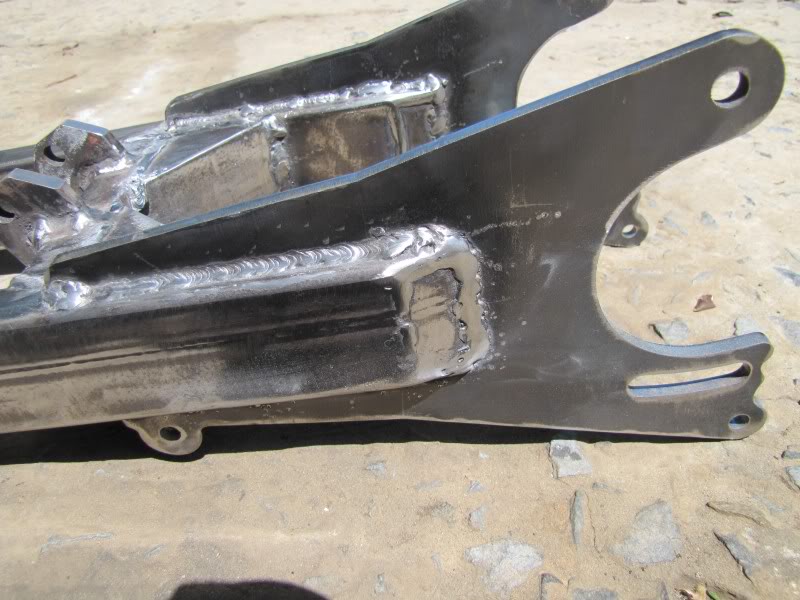
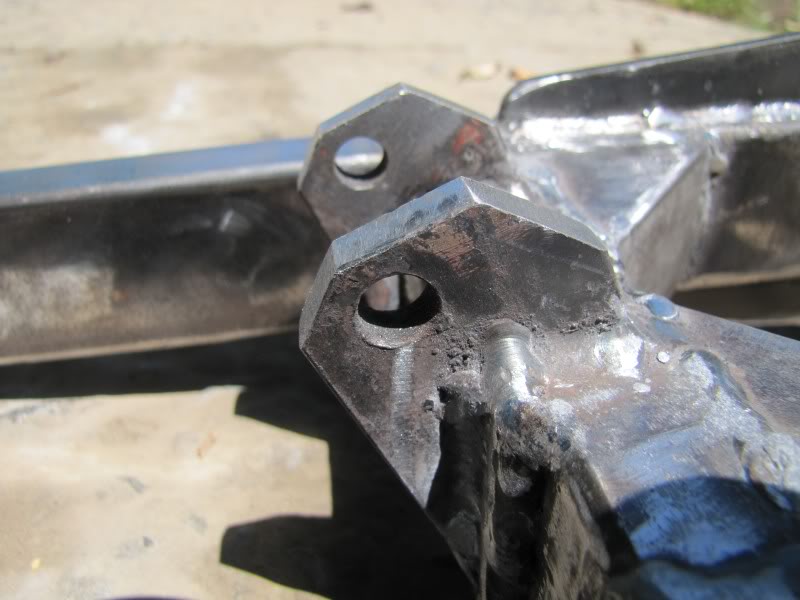
Well Slick, your logic is ideal...A welded box should be water tight...but all it takes is a tiny pin hole and its overs...thats why my stock swinger rusted to pieces. This is the very reason I do not like powder coating. one little imperfection and water gets in.

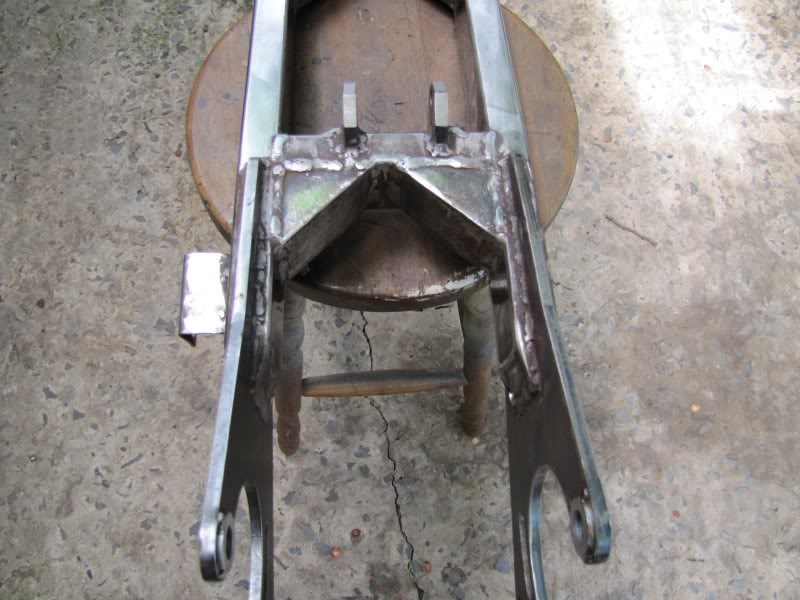
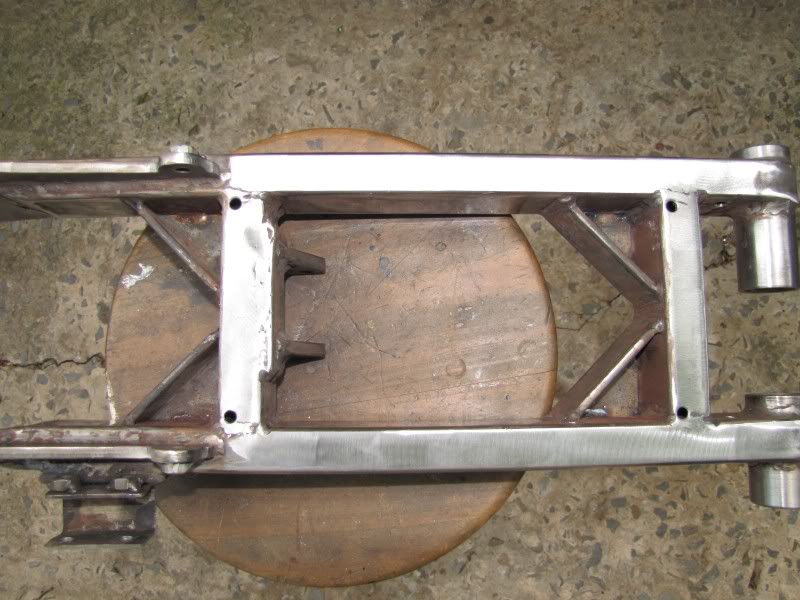
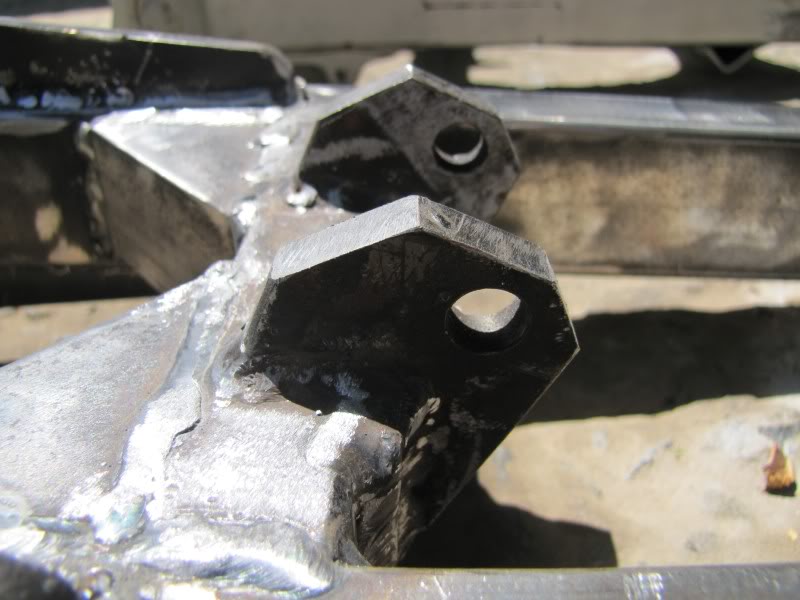
I did consider that the angle iron gap will collect mud...but at least it will dry out and it will not sweat inside like a box will. Also, he angle iron is stronger that a piece of squre tubing with one side removed. this is what angle iron is made for with its reinforced bend. Also i considered weight. however, because of the angle irons thickness, its actually about the same

@ Pickels - Lase cutting was R250 +VAT = R285 ($36 +- ) they have a minimum fee so if you have a smallish order as mine was, you just pay that (R285) possibly, you will find i could have cut 4 wings for this price!

This is where I went:

Welcome to Zenith Installations
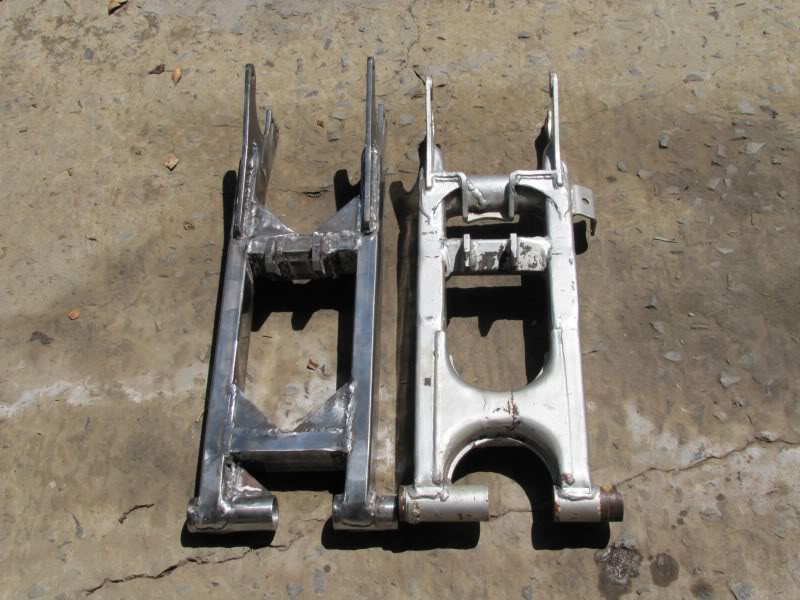
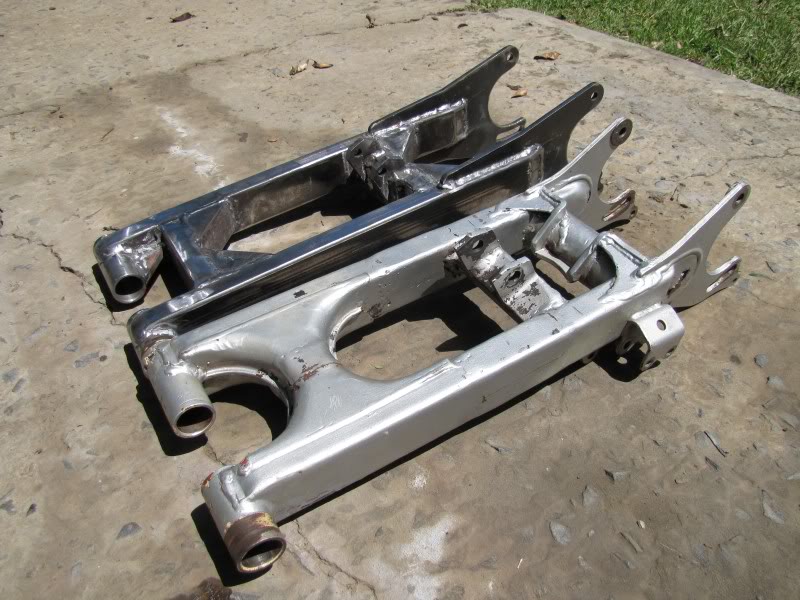
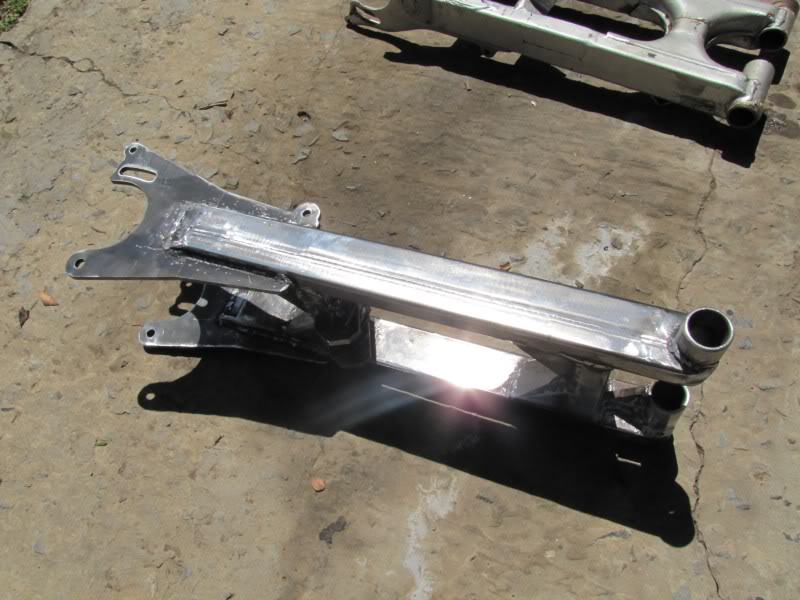
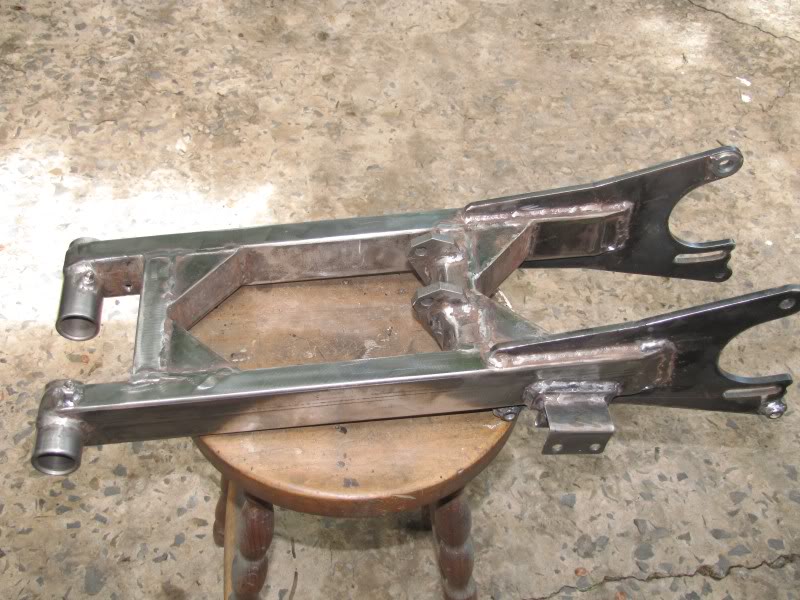
 
UPDATE:

Got it all seam welded and ground down. All thats left now is to attach the chain guide bracket whose placement may be a bit tricky. Also, the two washers need to be tacked onto the top ears of the wings for the carrier (spacers)

Following that, it will be complete and will need to be painted!

IMG_2323.jpg


While we were doing this whole thing, i decided to make it +15mm more than i did the stock one, which was +85mm (I wasnt initially keen on a full +4 so went for a +3/1/2, now i made it the full +4)

IMG_2324.jpg


IMG_2325.jpg


IMG_2326.jpg


IMG_2327.jpg


Cut the shock mounts to give it some 'style'

IMG_2328.jpg


IMG_2329.jpg
 
ok so i assume you are all very interested in this and are eagerly awaiting news..

well truth be told...ive scrapped the whole thing...


NOT! :) no news is good news right? it means i have been feverishly arcing away and filing till early morning running on little more than coffee and the vibey tunes of the night shift on the old tape deck panasonic coupled to a set of old hi-fi speakers mounted amidst a dusty and cluttered garage ceiling. The very thought of a robust and secure swingarm inducing a focused mindset aimed soley on the prize at the expense of all reason and at the same time plummeting my conscience into the abyss that is fabrication...

Well you could think that, or i could just tell you that i have been simply doing some finishing welds and cool geometry stunts with a compass, arcs, radii and pythagoras in order to locate the chain guide bracket correctly!

I have got the chain guide on now and now am in the process of making a plan fitting some grease nipples to the front tubes so that my current bushes and future bearings will last much longer.

I have also been looking into coating options...I was just going to spray it..but I figured id look into electroplated galvanizing. it looks really good and im thinking of going that route. it would come out silver which i can polish to a chrome like finish. Real chrome plating is hard to find here and can olny be done up in Johannesberg which is a bit of a mission.

Pics up soon. hang on to your seats i know you are all biting your finger nails waiting for it....(sarcasmRme) ;)
 
you did not fool me! i knew the guy that installed a yfz450 front end on a blaster did NOT scrap a nice swingarm build!!!
 
OK! so i have some news, well finally got it all sorted out and today i sent it off to be coated with electroplated galvanizing, but before I sent it, i took some pics.

You can see i have attached the chain guide, this was quite technical to get in the correct position...

IMG_2332.jpg


I also added some grease nipples so that i can grease the bearings or in my case bushes...

IMG_2334.jpg


The other side took some thought..due to the rectangular tubing encasing the round, drilling through it meant it opened a cavity between the round and square tubing, this obviously was a problem and needed a clever solution...

Here, the hole was made, the round tube had thread tapped into it, a old bolt was drilled down the ceter and screwed into the thread, and welded onto the round tube, then, a threaded rod coupler was threaded over the cut off bolt thread with a hole in it and that was welded closed around the rectangular tubing. then the grease nipple was screwed into that!

IMG_2333.jpg


Here the spacer washers are shown

IMG_2335.jpg


Chain guide:

IMG_2336.jpg


Skid plate nuts:

IMG_2337.jpg


IMG_2338.jpg


Drainage holes (slao to allow the coating to plate the inside of the tubes)

IMG_2339.jpg


IMG_2341.jpg


New and longer braided brake line

IMG_2343.jpg
 
  • Like
Reactions: Blaaster
ja i think cost saving was their concern but then again they did put them in all the a-arms as well as the steering stem!

They guy who is doing the plating says he will acid bath it first to remove all the oxidization which is very apparent in these pics! I should have it back tomorro and hopefully fitted as well, thursday I hope to take it out and do some testing in the bush
 
The other side took some thought..due to the rectangular tubing encasing the round, drilling through it meant it opened a cavity between the round and square tubing, this obviously was a problem and needed a clever solution...

Here, the hole was made, the round tube had thread tapped into it, a old bolt was drilled down the ceter and screwed into the thread, and welded onto the round tube, then, a threaded rod coupler was threaded over the cut off bolt thread with a hole in it and that was welded closed around the rectangular tubing. then the grease nipple was screwed into that!

Now thats using ones head, that deserves a little green!