wwholden's head mod and arbor

wwholden

Member
Nov 17, 2011
962
7
54
Dayton, Ohio
Since all this great info has been floating around on the forum about doing your own head mod I decided to give it a try. First I made my arbor made from stainless scrap I had. Pretty nice if I dont say....

Cutting the Head: Toroidal Based
Im posting this for other members who know more about this than I do, to please correct me or guide me in making this better.

First I cleaned up the gasket sealing surface and brought it down flush with the casting. The head had some run out in it thats why in the pics the cut isn't perfectly centered around the spark plug but its all flush where the sealing gasket makes contact and thats what matters. Then I dived in to make a 68mm ring 8 thousands deep. The 8 thousands came from: (.040"-.032" head gasket thickness)... Not sure what the purpose was but thats how I was told to do it. :-/ Then I set my compound rest to 11 degrees and cut the squish band back to that 8 thousand deep ring. Then I was told to cut the combustion chamber a diameter thats 55% of the bore size at relatively the same angle as the stock combustion chamber angle. I have a bore size of 60 over or 67.5mm and from playing around I found that the stock combustion chamber appeared to be at 60 degrees. So I then set my compound rest to 60 degrees and started cutting away until I reached 37mm (67.5mm x 55%) in diameter. Then I sanded the head and polished lightly with a fine scotch bright pad.

Now like I said Im sure I have mistakes in this but Im learning. I wanted to give it a try and see where this gets me. Now I know your suppose to cc the head but I havent had a chance to do that yet. Since both my blasters are in rebuilds currently Im giving this head to 92f150300six to try out and give me an ass dyno report compared to his stock head. And see if this is any better or worse.

So here's the pics....
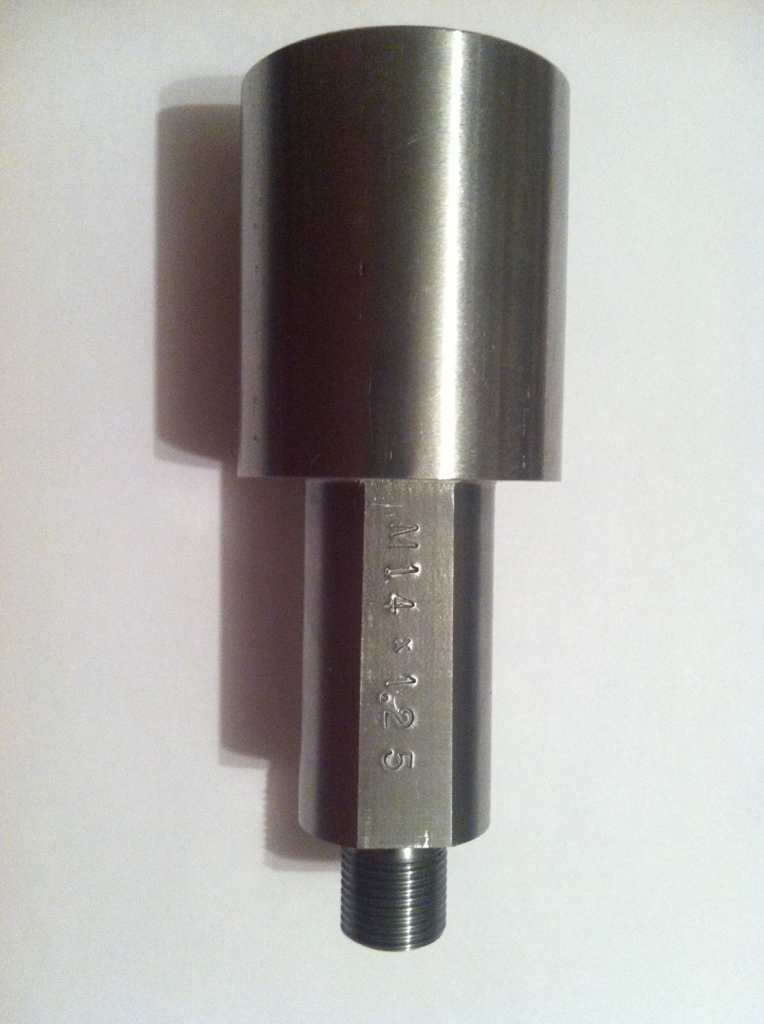
My Arbor:
I used a lage diameter piece of stainless so it would be easier for my three jaw chuck to grab and center it with less run out. Has 7/8 flats milled on it to be able to use a 7/8 open end wrench.
A7F87653-0192-46AE-B920-077E6885AFF5-28226-00000ACAE3480E86.jpg

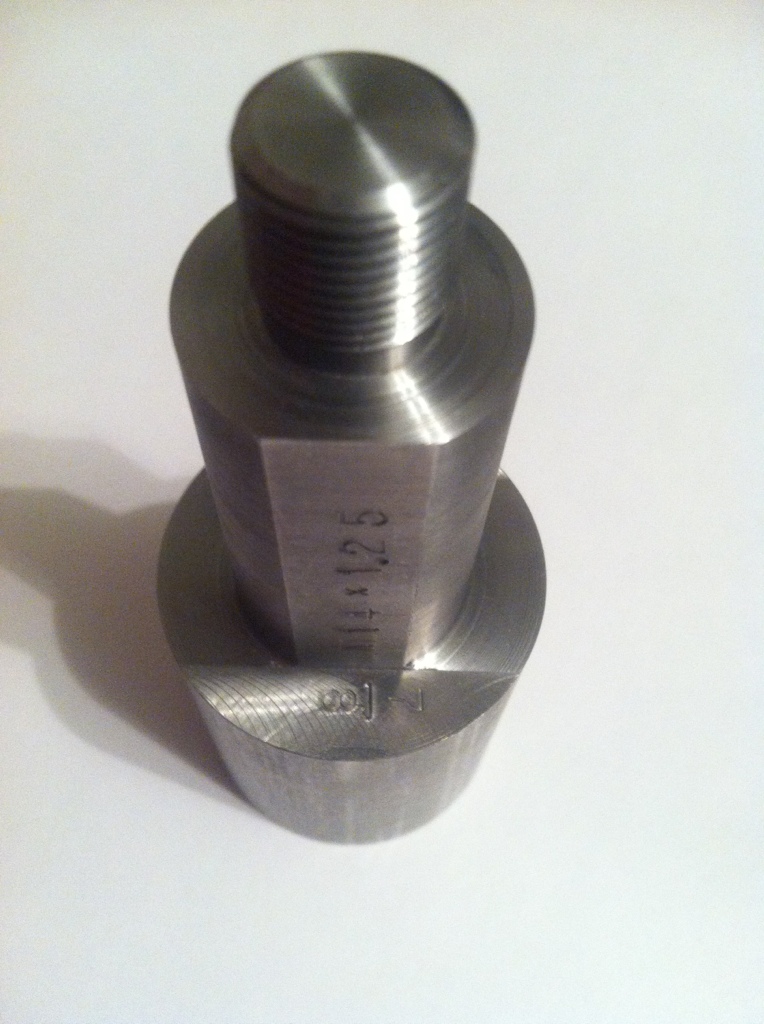
Also stamped my name on one side and the thread size and pitch on the other.
285DFDCA-188A-4A55-AF4C-C6AA94BB44CC-28226-00000ACADDFB045B.jpg


On the lathe:
After cutting the 11 degree squish band.
F9C35BE4-24F0-4687-BE84-12B4E88B8AF5-28226-00000ACABF2947A0.jpg

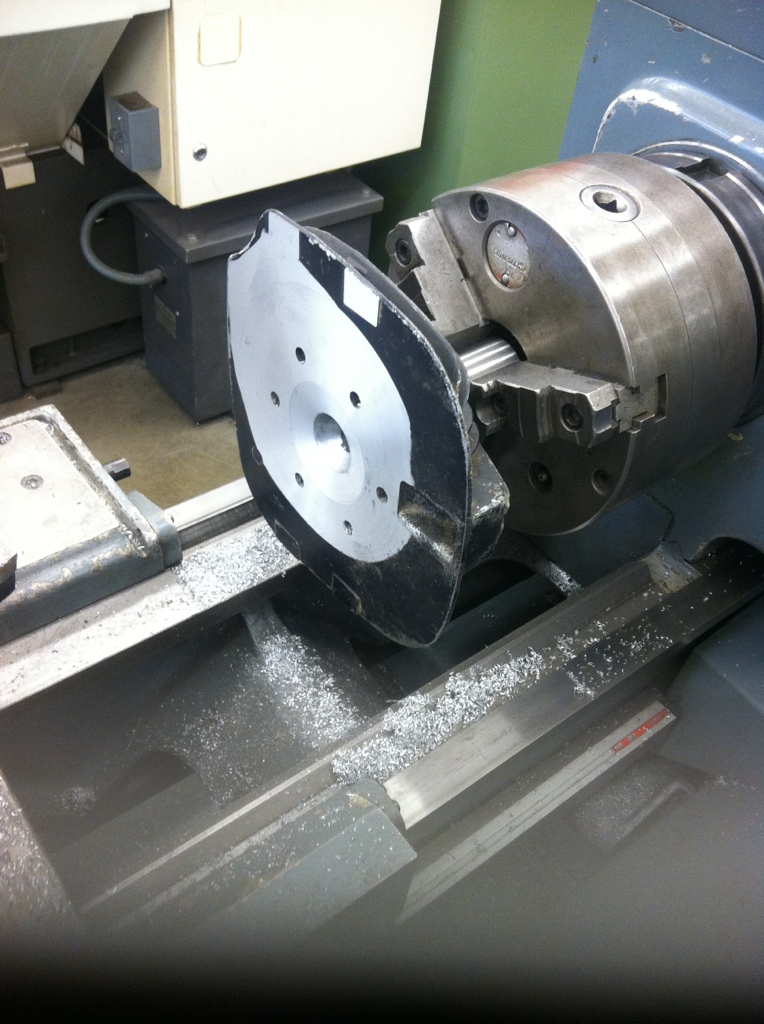
After cutting the 60 degree combustion chamber out to a diameter of 37mm using the compound rest with carbide boring bar.
0CDFA81E-4499-4DBD-AD3D-07A8384A0B94-28226-00000ACAC64DE2B1.jpg

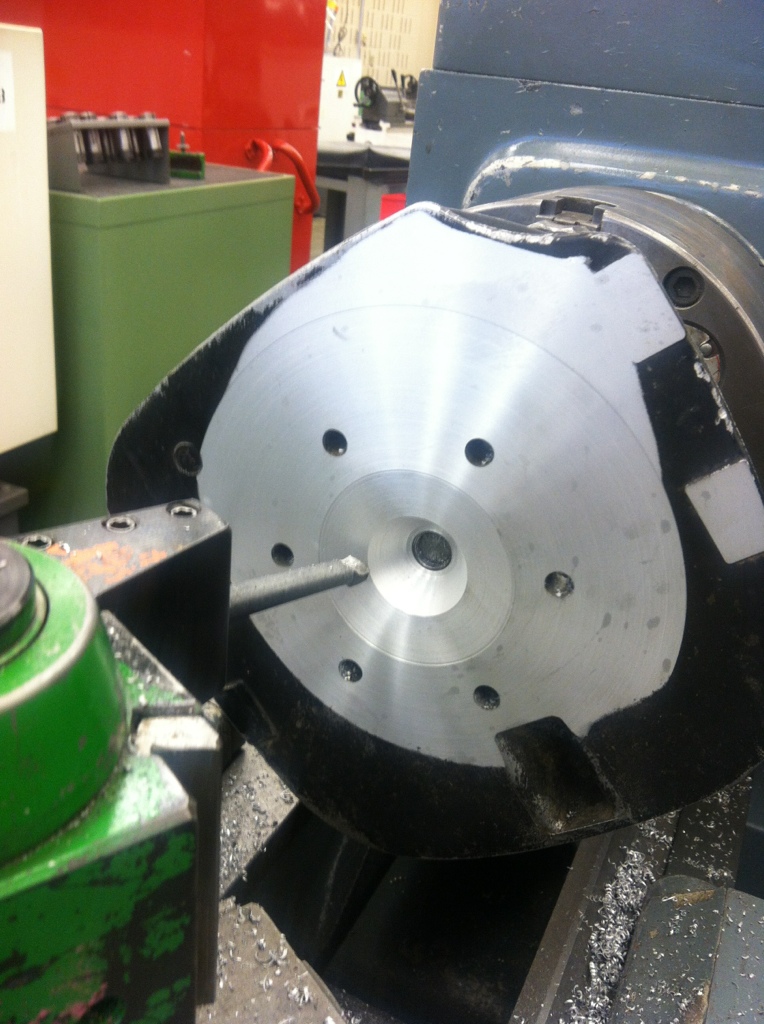
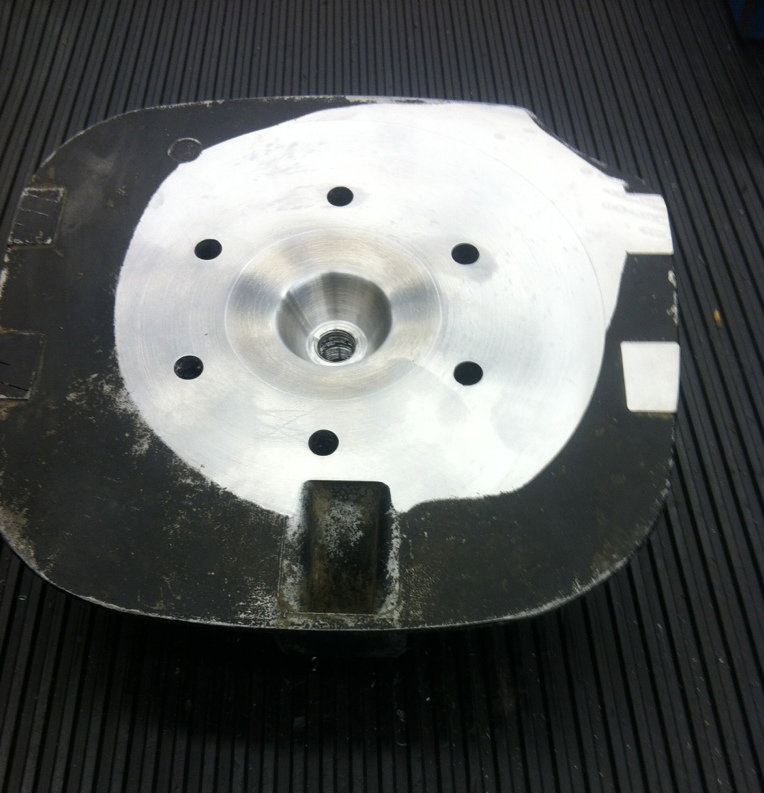
Finished product with a light polish.
BFF27216-9C6F-423F-863E-D3CBE50D0902-28226-00000ACACBCA1730.jpg
 
That looks pretty good for a first shot. You did a pure cone chamber though, not torroidal (doughnut shaped) or hemispherical (half round). It will work, just doesn't allow the flame front to "spread out" as it's growing (still better than the stock head design with the whacked out squish area).

Now, get a syringe graduated in cc's, something flat to lay the head on, and some grease. See what your final volume is. I figure it'll be pretty small as you don't have the "relief" of the hemi combustion chamber.

You will also some soft rosin core solder to test your squish. That "step" distance doesn't take into account the inaccuracies of the various machining processes that make up that engine. You may end up adjusting that "step height" to get the final target gap thickness we discussed.

Looks good for a first shot in the dark.
 
Whose lathe?????????????????
Sinclairs

I can't wait to see how it works on my blaster should be fun wheather it's better or not. And that arbor turned out nice .
Yeah Im really happy with the quality of the arbor. At least I know I made it solid and right so that when I get good at cutting these heads Ill have a good tool for making the job better.

finished product looks very nice!!!!!!
Thanks man!

That looks pretty good for a first shot. You did a pure cone chamber though, not torroidal (doughnut shaped) or hemispherical (half round). It will work, just doesn't allow the flame front to "spread out" as it's growing (still better than the stock head design with the whacked out squish area).

Now, get a syringe graduated in cc's, something flat to lay the head on, and some grease. See what your final volume is. I figure it'll be pretty small as you don't have the "relief" of the hemi combustion chamber.

You will also some soft rosin core solder to test your squish. That "step" distance doesn't take into account the inaccuracies of the various machining processes that make up that engine. You may end up adjusting that "step height" to get the final target gap thickness we discussed.

Looks good for a first shot in the dark.
Ok doughnut shaped? Im confused... HEMI is the half bowl type right?

What relief are you referring to on the HEMI head?
Also 92f150300six is going to cc it for me when I get it to him. Part of the deal haha.

And this step distance your referring to is where I dived in 8 thousands right? And what is the final target? Is that the .040" which I measure by using the solder?

Sorry for all the questions, just want to make sure Im clear with everything.
 
Also looks like you have left the squish area quite large.
I've read in several places that 50% of the total bore area is a good starting point.
This calculated to machining the toroidal section out to a diameter of approximately 44mm.

Your arbor looks 10x better than mine!! I didn't have access to a 14x1.25mm die so I hollowed a spark plug and pressed it onto a piece of bar! Rough but it worked!

Thats what I thought on the squish are looking larger than others. Am I doing the math wrong.. For a toroidal its 55% of the bore. I have a 67.5 so 67.5mm times .55 is 37.125mm? Your saying yours was 44mm at 50% then your saying you had a 88mm bore?

Also I didnt use a die. I cut the threads using the lathe. Just set the leadscrew gear train to 1.25mm per inch thread pitch.
 
The squish band is calculated by AREA, so (pi x radius x radius). You've got the diameter multiplied by 0.55 to get ~37mm
I can't remember the figures off the top of my head but it works out to be about 44mm DIAMETER for the main combustion chamber if 50% of 67mm bore is desired!

And I'm running stock bore @ 67mm too!
 
I'm impressed! That really looks good for your first try! The problem now, is that you are officially addicted!!! Wait till you cut about three dozen of them! All...different...kinds! They're like potato chips...you can't just have one. My advice would be to go ahead and turn that cone shaped combustion chamber into a "Hemi" chamber and
S-M-I-L-E! Test it as it is and see what she does,then recut it into a hemispherical chamber (half a ball) and re-test. You want to try and get away from the stock head design (cone shaped chamber) as much as possible. The squish band you cut is whats going to really help. Toroidal's are a bit tougher to machine. Now its time to port your own cylinder and REALLY FEEL THE POWER! Take your time and you won't be sorry. That head looks good. You should be proud of yourself. The arbor looks very high quality too.

One question... You said... (quote) "Thats how I was told to do it".
Who was telling you to do it this way?

I told him to do it that way. It was kinda a guess as we go thing. But I'm guessing I told him wrong??i hope he had fun cutting it cause I know I want to try out more than just one. He'll I had fun just seeing the pics as he did his thing.
 
Thats what I thought on the squish are looking larger than others. Am I doing the math wrong.. For a toroidal its 55% of the bore. I have a 67.5 so 67.5mm times .55 is 37.125mm? Your saying yours was 44mm at 50% then your saying you had a 88mm bore?

Also I didnt use a die. I cut the threads using the lathe. Just set the leadscrew gear train to 1.25mm per inch thread pitch.

You can make many different combustion chamber shapes into many different squish area's. There is no "set" size, just a good sound number (50% of the bore area being a good "round" number) for general purposes.

Alan_4runner is right, you did your math correctly but you were looking for the wrong term. It's generally calculated as percentage of the bore area, not diameter. You could do it as a function of the diameter because the area is a function of the diameter but the figure would be like 30% instead of 50%.
 
I told him to do it that way. It was kinda a guess as we go thing. But I'm guessing I told him wrong??

Not at all. You can go about cutting a head many different ways. Do what your comfortable with. You will systematically discover easier ways of getting the job done as you do more heads.
You will have many... "Why didn't I do it like that the first time" moments. I suggest keeping a note book with/for all your ideas.
If you really start getting into it,you might want to eventually build a
"radi cutting tool",or radius cutting tool for the lathe. Its not required to have one. I'm guilty of STILL not having built one yet. Maybe I should be building one of these instead of a "boysen port jig"?
Anyway,I have no problem duplicating heads by hand as long as I have the specs I want to cut it too.
As a side note... getting the squish distance (solder test through spark plug hole) in the 1mm to 1.25mm range is optimal. Your deck height (piston edge to top of cylinder) on a stock stroke bike will be in the .020 to .025 (thousandths) range,and the stock copper head gasket measures right at
.030 to .031 (thousandths) getting you right in the .050 to .055 thousandths range (about 1.5mm).
Also remember that you can re-use that soft copper head gasket about 2.5 million + times as long as you aneal it before each "re-use" This is cool,because its one less thing to buy. You can also make your own base gaskets using a gasket material made by felpro called "Karropak". This stuff is easy to cut and work with,and is very durable,and ...thats right...its one less thing to purchase. It comes in a few different thicknesses. I've had zero issues using it.

Here's a link to my " Do it yourself ..cutting a squish band head" video in case you haven't seen it. It may help you a bit.
http://www.blasterforum.com/engine-...high-compression-squish-band-hemi-head-50156/

Now about that porting...
 
Last edited:
Here's another tip from the boys at KOR. From the factory, Blaster heads aren't even close to being perpendicular from the spark plug hole to the sealing surface. This is why the sealing surface isn't parallel to the casting when people cut the heads. Here's an easy fix. Clamp the head to a milling machine so the sealing surface is tight to the table. Take a very small cut off of the spark plug sealing surface and WHALLA. The combustion chamber will be centered to the spark plug hole and the sealing surface of the head will run true. Works every time!!! Nice job on the head Boss!
 
Joe is your day job a teacher? If not it should be. The way you explain and your excitement about everything is great. And the fact you don't talk down about the way people do things. You and civic could have one hell of a shop class. Just a thought.
 
You can also make your own base gaskets using a gasket material made by felpro called "Karropak". This stuff is easy to cut and work with,and is very durable.

I only have one thing to add about karropak. I have used it before and it works well but unlike regular base gaskets, it shrinks and swells when it gets soaked through with gasoline.

If you do use it and cut your own base gasket out of it, you need to keep an eye on the cylinder base nuts for more than the customary 3 heat cycles and retorque. I've seen it squish after weeks of running it....

I also soaked mine with yamabond 5 (the thin runny stuff) just before application to seal the material to the aluminum. It makes for a mess coming back off but it basically "glues" the gasket in place too....

As long as you are diligent about throwing a wrench on the cylinder base nuts every once in a while it works well.
 
Well I set down and cc the head and it is 17cc . Tomorrow it will go on and get tested. I think the chamber is to small and will need to be opened up bill thinks it will work. He had a mcdizzy( I think that's how you spell it) that he swears had a smaller chamber and ran great on his blasty. So only time will tell. But by this time tomorrow i hope to have a smile glued to my face lol
 
Well I set down and cc the head and it is 17cc . Tomorrow it will go on and get tested. I think the chamber is to small and will need to be opened up bill thinks it will work. He had a mcdizzy( I think that's how you spell it) that he swears had a smaller chamber and ran great on his blasty. So only time will tell. But by this time tomorrow i hope to have a smile glued to my face lol

http://www.blasterforum.com/engine-13/head-design-parameters-how-they-affect-power-output-51331/

Read my friend. Head displacement is relative to exhaust port timing/height. I would suspect that 17cc's is too small but it depends on how much exhaust port timing you've got and what fuel you want to run.