case repair
- Thread starter sicivicdude
- Start date
You are using an out of date browser. It may not display this or other websites correctly.
You should upgrade or use an alternative browser.
You should upgrade or use an alternative browser.
- Status
- Not open for further replies.
Well, now for the bad news and silver lining. I tried this afternoon to braze up the large hole. I backed it with a piece of steel and poured the rod to it.
I did it three times before I gave up about 30 minutes ago. I had several problems trying to get it to take this large a hole in this bad spot. First I couldn't get it to tin because the brush was torn all to pieces (I'm going to have to get another one or two
before I attempt any more)
I then had it crack out twice. I think the case aluminum and the repair metal cool at such different rates, it cannot take the stress of getting that hot and then cool off.
What I'm going to do is this: I'm going to get a small piece of nice aluminum from the recycle bin at work. I'm going to cut the hole out a little bigger, squared out, and beveled evenly all the way around. I'm then going to bend the sheet of fresh aluminum around the weight of the crank to get the curve right and then bevel the sides of it after I cut it to size.
I think without trying to keep the entire pool hot it won't take nearly as much heat to get the patch to take. It should also give the patch a stress relief because the patch itself can stretch as it cools.
For now it's a draw, not a win.

We welded up 2 cracked cam bearing caps on kawasaki concours last spring and they held up perfect.
Well I successfully repaired the cracked, mushed, and small holed areas. It's the large hole that's giving me fits.
It's on hold until at least Monday. I'll be able to get some aluminum plate then
It's on hold until at least Monday. I'll be able to get some aluminum plate then
Last edited:
Well I got very discouraged and threw the left case half in the recycle bin. The brazing rod wouldn't take very well to the case and when it finally did, it cracked back out when it cooled down. I even used a nice piece of donor aluminum to try to patch. The heat was still too much.
I did take some pictures of the "mushed" section of the left case half and repair before I put in the recycle bin.
Enjoy:
I did take some pictures of the "mushed" section of the left case half and repair before I put in the recycle bin.
Enjoy:
I'll give ya a tip on welding, brazing, filling, cast alluminum, You really should heat it up over 400* first- will prevent the cracking. I learned this when I took welding class. We welded some headers that had cracked and you need to make a bevel as ya said. We put it in the oven for 2 hours at 400* and after we had the welding equipment set and ready, we took it out and welded right away, worked very good. prevented the cracking you get, for the reasons you stated. Cast is so much denser and the cooling rate is more than 3 times longer. I wish i'd a kept one om my broken cases, Now I have the ability to weld aluminum, and tried it with my equipment just this weekend. It's definetly tricker than steel but a little practice , made me good.
Oh, I set the torch on the case and let it ride until the case was smoking the clamp it was in. I'm fairly sure the case was over 400 degress at least by the time I started.
I think the problem with the cracking was the cooling rate of the brazing material and the aluminum itself.
I was thinking about ordering some real aluminum brazing rod. The kind that requires a flux paste to be applied before you begin to braze which apparently REALLY helps adhesion. These cases aren't worth taking them to get them welded, these are spares which are really beat up and most of bearings in them are bad anyway but I really do like practice and learning new things.
Alright..... so I have a real bona fide update here.
I purchased a small package of "new generation" aluminum brazing rods from New Technology products....
Aluminum Welding - Aluminum Repair - Aluminum Brazing - AluminumRepair.com
1 lb of rods is $65 plus $15 shipping and includes approximately 35 rods 18" long 3/32" round. Kind of pricey but they say it works easier and makes a better repair than the other stuff I was using.
Well... I would have to agree. Part of it is I figured how to control the amount of heat needed to get the brazing rod to work properly but even without that the rod itself works easier...
I will tell you the secret to getting this stuff to work... HEAT CONTROL. I am using an oxygen-acetylene torch so my guidelines will be slightly different then if you are using a MAPP torch.
I found the perfect amount of heat for the rods though... I start the torch as normal by turning on the acetylene and lighting. Then I adjusted the acetylene flow up until the fuel is no longer carburizing in the air (the squigglies are gone) and it making a "whoosh" sound. Then I turned the oxygen on gently and adjusted it up to just a little less than a completely neutral flame. It ends up with an inner cone about an inch long and a total flame about 6" long with a slight whoosh using a number 0 welding torch tip. I would hold the tip of the feather on the outer most part of the case (the part it's hardest to get hot) for 30-40 seconds and then feather the heat towards the mating surface of the case. Once the crack was hot enough, I would work the heat side to side and forward and backward to "wash" the whole area in enough heat to keep the whole area hot.
With the other material I was turning the flame down after that to keep from burning the brazing rod but I figured out I was making a mistake doing that. With the flame turned down I had to heat the cases too directly and would actually burn the pool worse than if I left the flame hot and held the flame on the metal beside the pool...
I left the flame hot this time and worked the aluminum until it was hot enough to melt the rod and then slid the flame beside the crack and let the rod slide into the hole.
The brazing rod worked a pool liquid as water once there wasn't a flame oxidizing the surface and I was able to push the pool into the base material with the brush like it was supposed to work like that. Then I pooled up the rod material to fill in the small area I had burred out and let the material cool.
The finished product will be sanded and pictured tomorrow.
Alright, another update but this one isn't exactly case repair....
I managed to get my hands on a broken cylinder. The previous owner had broken one of the mounting "ears" off of the base of the cylinder and had decided to source a new cylinder instead of finick with it. I can't blame him, it's pretty bad and I wouldn't mess with it except the sleeve is standard bore, not tapered, or rounded. I've got nothing to lose so I'll give it a shot!
I tried the alloy brazing rod from Aluminum Welding - Aluminum Repair - Aluminum Brazing - AluminumRepair.com but I couldn't get the heat even across the two sections of aluminum to get it to take to both. The ear was too hot and the rest of the cylinder was too cold... so that's a no go.
I decided to order some REAL aluminum brazing rods from TM Technologies: Tools, Sheet Metal Shaping Machines, & Gas Welding Supplies for Better Metalworking called "aerobraze". I ordered the solid rod and tub flux version yesterday, $22 for 40 1/16" rods and 4 oz. of flux.
I'm going to be changing out my #0 oxy-fuel welding tip to a #2 to get enough heat in the mix mainly focusing on the cylinder side and see if I can get this cylinder back together.
I'll be taking pictures tonight of the carnage and giving a FULL report with pics of the attempted (but hopefully successful) repairs.
Alright so in my zeal, I purchased a crank (which I did not need) to build a motor (which I didn't have all the parts for) to be installed in a set of cases (which were cracked in their previous life) to put together a spare engine (which will ultimately be MUCH more powerful than the current ported +3 stroked engine)
The crank actually arrived just before my busco trip last weekend which meant absolutely no work got done besides taking the crank out of the box and oogling at it...
I finally got around to playing with the cases and figuring out how much actually has to be removed to allow for the instructed amount of clearance for e +4 hot rods stroker crank... It's scary how little material is left where the two case halves meet....
Anyway, I got out a double cut burr and my straight pencil grinder and started working on trenching the right side case for the crank. It took a long time because of all the stops to check depth and see if I had ground away enough for clearance.
I think the finished product turned out very well and now that I have the measurement, the other side should go faster because I can hog it nearly to the correct depth and then spend time cleaning the last bit up for a proper finish.
By the way, this is a repaired case... see if you can spot where it used to be cracked (blkbzr, keep your mouth zipped)
PICS!!!
Well, I have another tool in my arsenal now. Most saw already but I have been successful using it now.... I bought a miller tig welder.
I stopped by the local welding shop yesterday and picked up a pound of ER4043 1/16" filler rods and a gas lens for my tig torch. I'm using a blunted 3/32" thoriated (radiation be damned!) tungsten with the 'medium" gas lens and matching #8 alumina gas cup.
I traded the above cases ^^^^ with the crank installed to blkblzr (yes, that was your original set of cases BTW) for a pipe and a busted set of cases. A piston had exploded in them at some point and a nice dime sized hole ahad been formed. I was able (with great effort) to get that hole welded closed with a combination of propane torch preheat, acetone, stainless steel "toothbrush", and careful addition of filler rod. The result (after a bunch of burring) is an all aluminum repair area back to factory specs.
The brazing rod is still on the shelf in the garage but I have a feeling it won't be used as often as the Tig welder for repairs such as this. Pictures tonight!
A aluminum tig welder would be best for case repair. I never had a chance to use those alumiweld rods even though they look interesting. What did you pay for your tig?
The tig welder is best for MOST repairs. Some repairs the tig torch cannot reach in and the brazing rods are the only choice.
I still like the way the brazing rod melts and "flows" compared to the filler material and the Tig but some areas (particularly large broken spots) the brazing material would cool at a different rate than the aluminum and it would crack back out. Not such a problem with the Tig, the materials are compatible...
I bought a Miller Econotig 150 on Craigslist for $500. The guy had it listed for $650 but I talked to him on the phone for a while and he said he'd be happy to get $500 out of it. I thought it over and decided I'd be a fool not to jump on a AC/DC tig welder for $500 and apparently CL agreed with me, after I made an appointment to go look at it, about 5 more people called wanting to come take a look.
So I have an update for this. I have been progressively better at this Tig thing.... practice makes perfect I've always heard.
Now I want everyone to remember that this isn't by a professionally trained welder here. This is all learned in the school of hard knocks.... so don't judge too harsh!
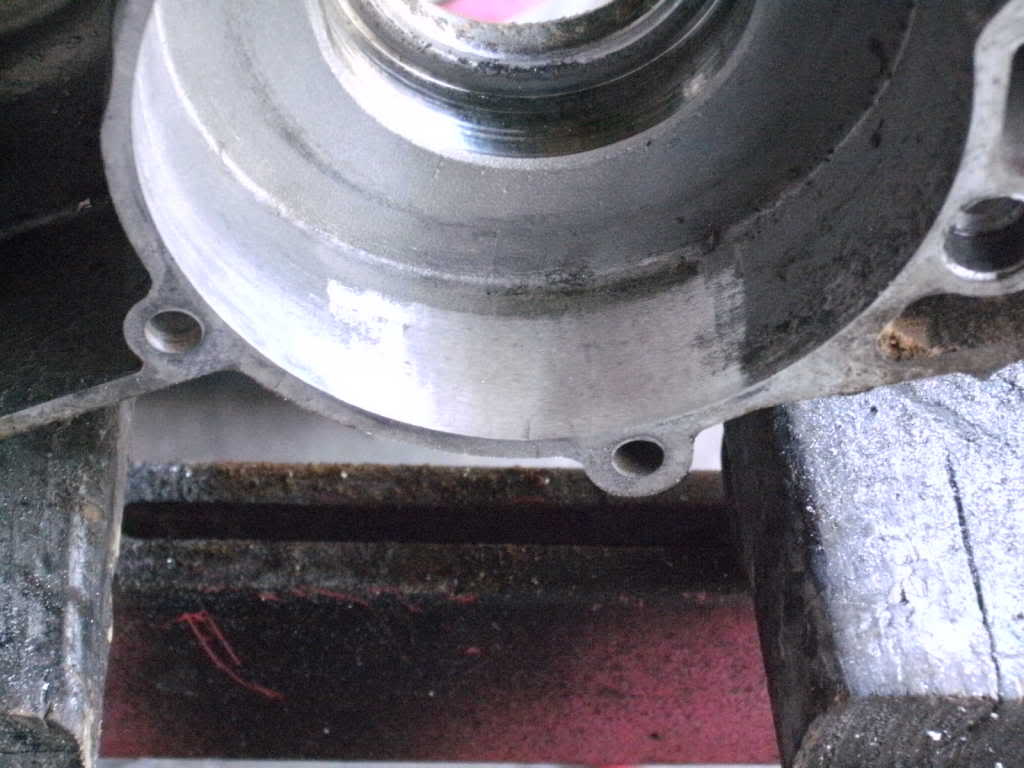
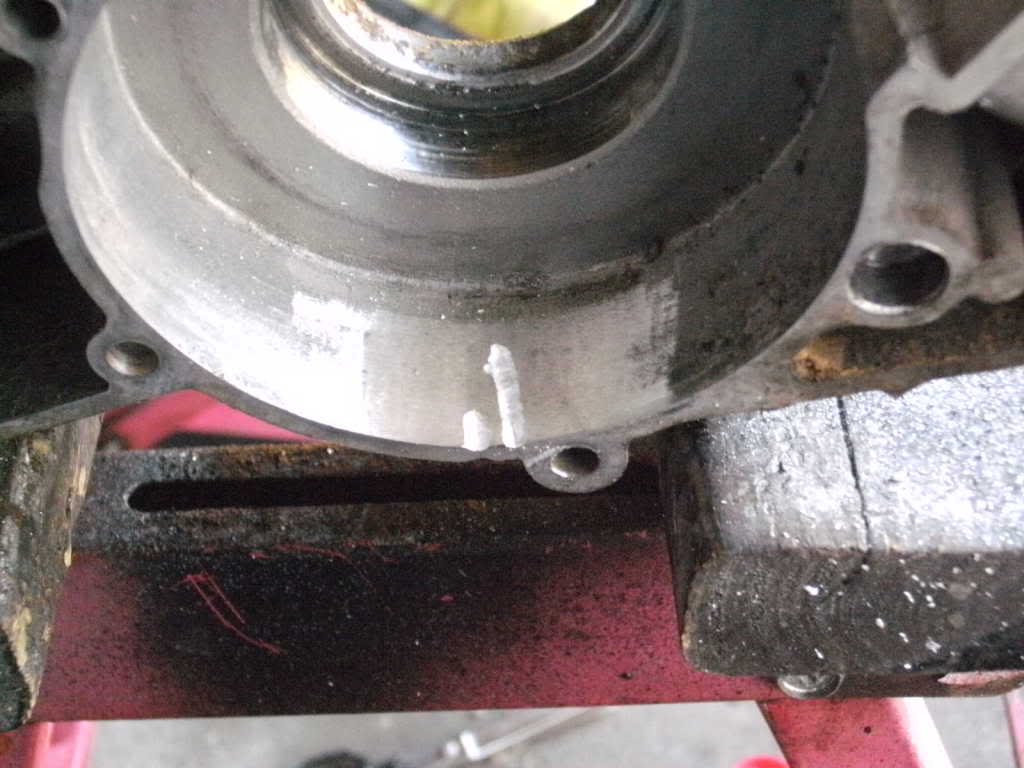
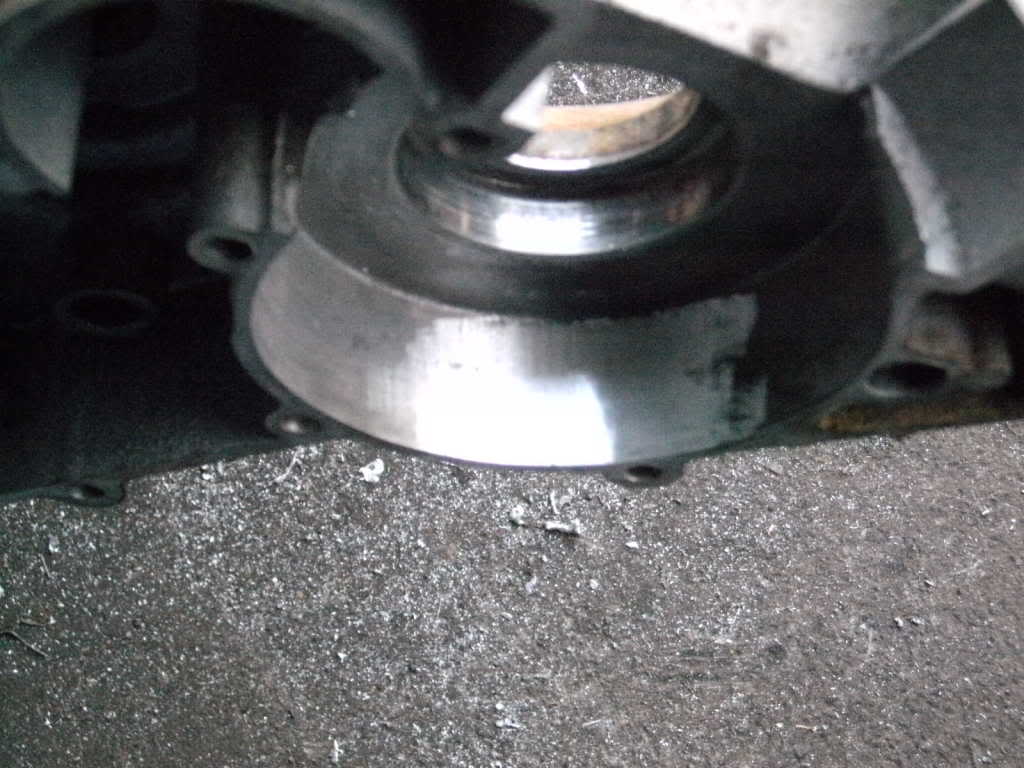
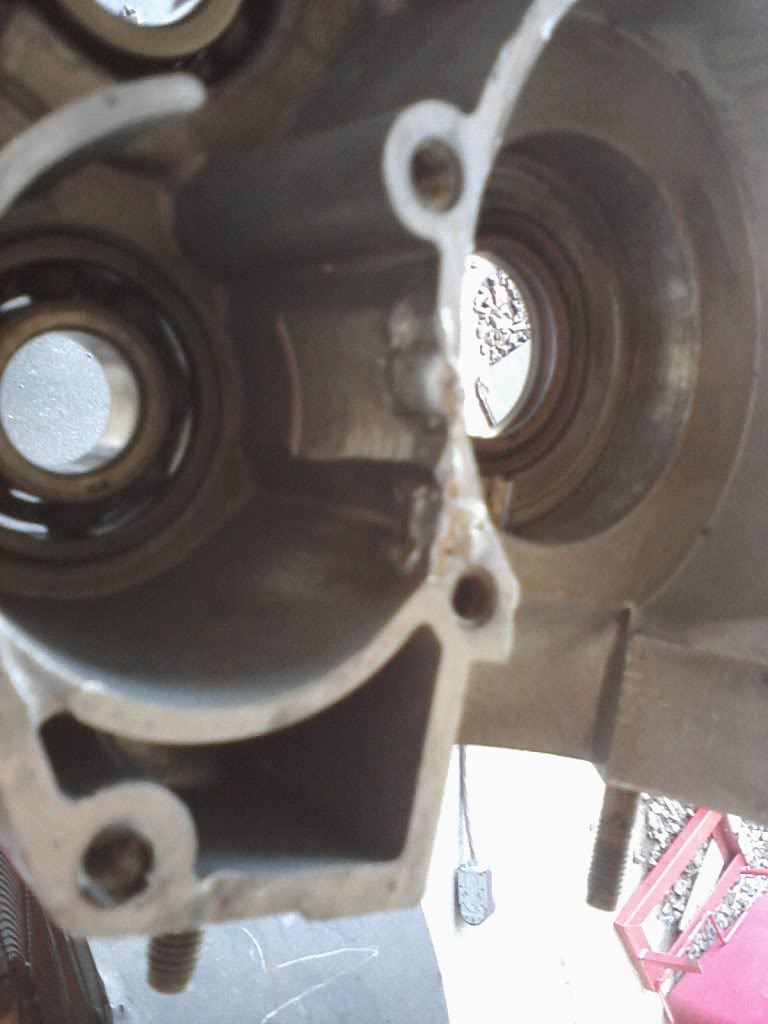
This whole area was "smushed" out so I laid a lot of rod down just working the pool back and forth trying to build up the level so I can grind it back down to the level it's supposed to be. The actual bead around the lip is to build enough material up to grind back down and have it squared properly.

The outside of the mushed area, the spot that's still cracked has been repaired internally but doesn't stand out in person quite like it does in the photo. I think I'll probably weld it over anyway just so it doesn't look bad:

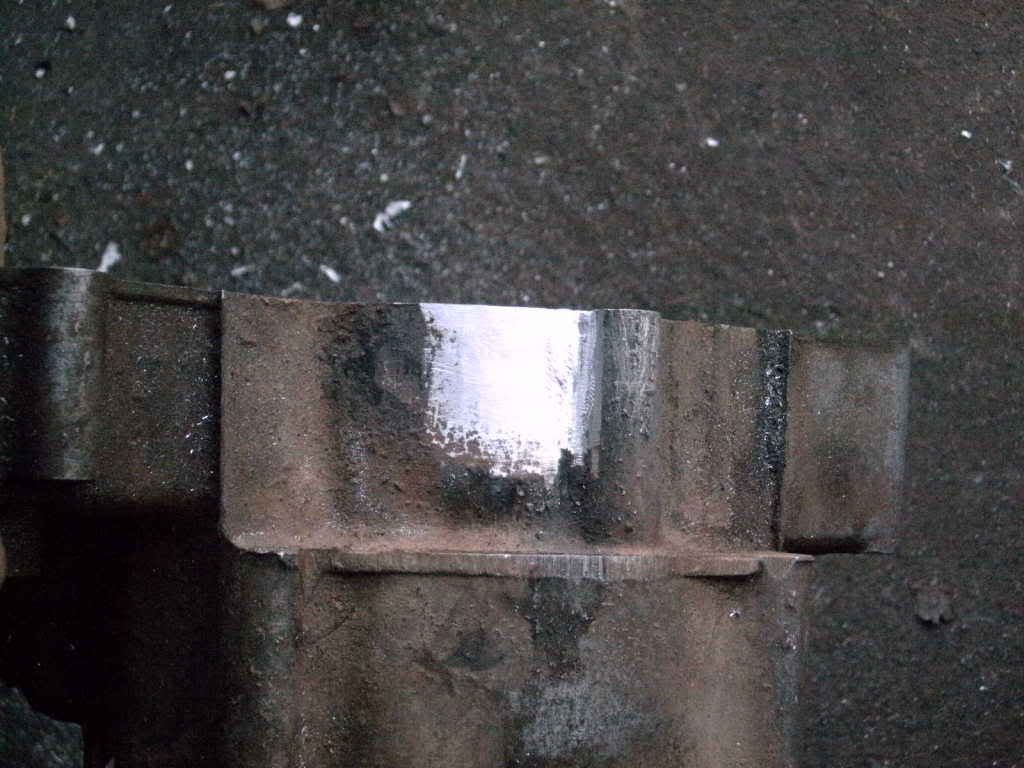
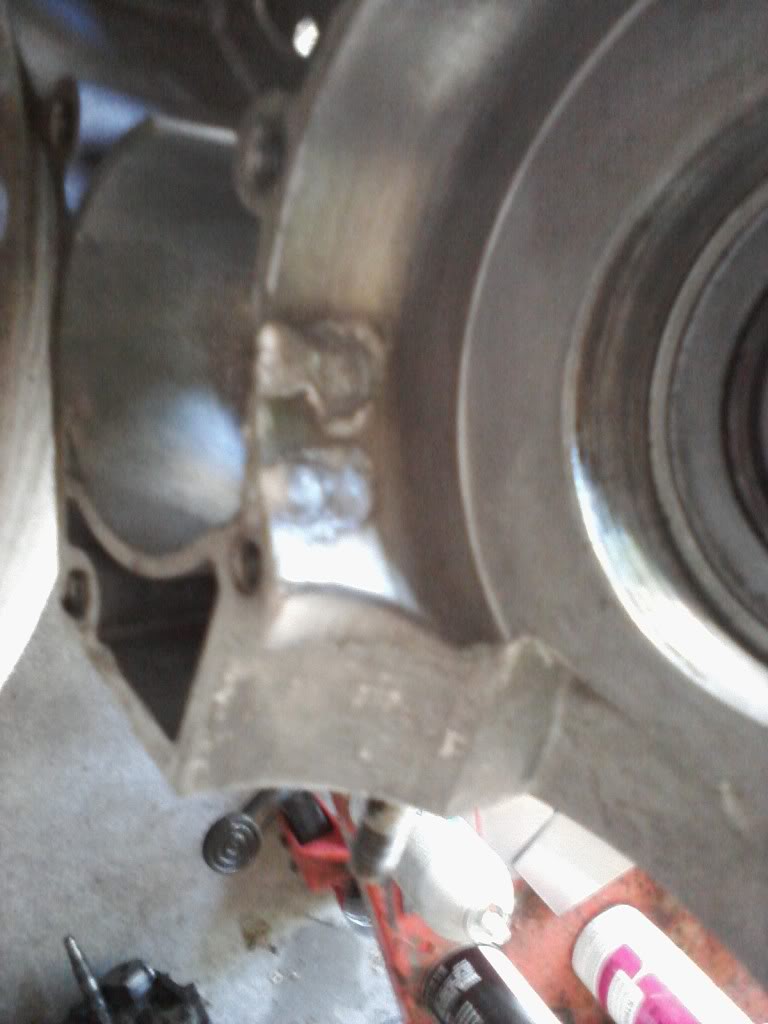
This was a dime sized hole:

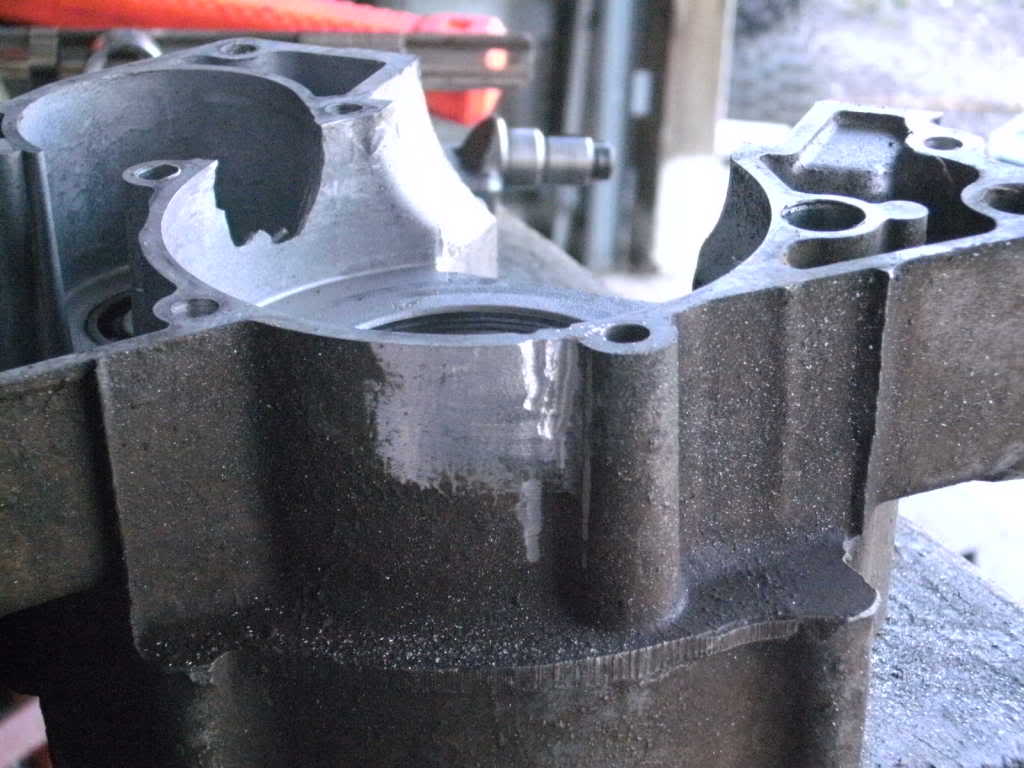
Just look how clean these cases are. They spent their lives in a garage in Arizona before the PO decided to blow part of the piston down through the cases!

Now I want everyone to remember that this isn't by a professionally trained welder here. This is all learned in the school of hard knocks.... so don't judge too harsh!
This whole area was "smushed" out so I laid a lot of rod down just working the pool back and forth trying to build up the level so I can grind it back down to the level it's supposed to be. The actual bead around the lip is to build enough material up to grind back down and have it squared properly.
The outside of the mushed area, the spot that's still cracked has been repaired internally but doesn't stand out in person quite like it does in the photo. I think I'll probably weld it over anyway just so it doesn't look bad:
This was a dime sized hole:
Just look how clean these cases are. They spent their lives in a garage in Arizona before the PO decided to blow part of the piston down through the cases!
I think you done a fine job cuz i know how difficult oil impregnated cases can be to weld. Keep up the good work, the welder seems to be doing real well.
This is of cases worked the best I've done so far.
I figured out a couple of "secrets" that would seem basic to a "real" welder. Of course, I cleaned everything down with a stainless brush and acetone but then afterwards I spent a few minutes preheating the area with a propane torch to drive the acetone out and get the aluminum warmed up. Also, I Fired off the plasma and pulled the torch back about 1/4" away from the metal and held it there for a few seconds to give the aluminum the opportunity to warm completely up around the weld pool and the pool time to stabilize. Once I got the pool nice and liquid, I gently added filler with the torch pulled farther back than before. Before I didn't give the metal time to warm up and I was trying to keep the torch too close to "make up" for that and I was touching the tungsten with the filler rod a bunch of times. It made it VERY difficult to keep a pool hot and pushing around the surface.
I did all of this today in a little over an hour instead of the 2+ hours I worked on one set of cases before
From broken to SMOKIN!
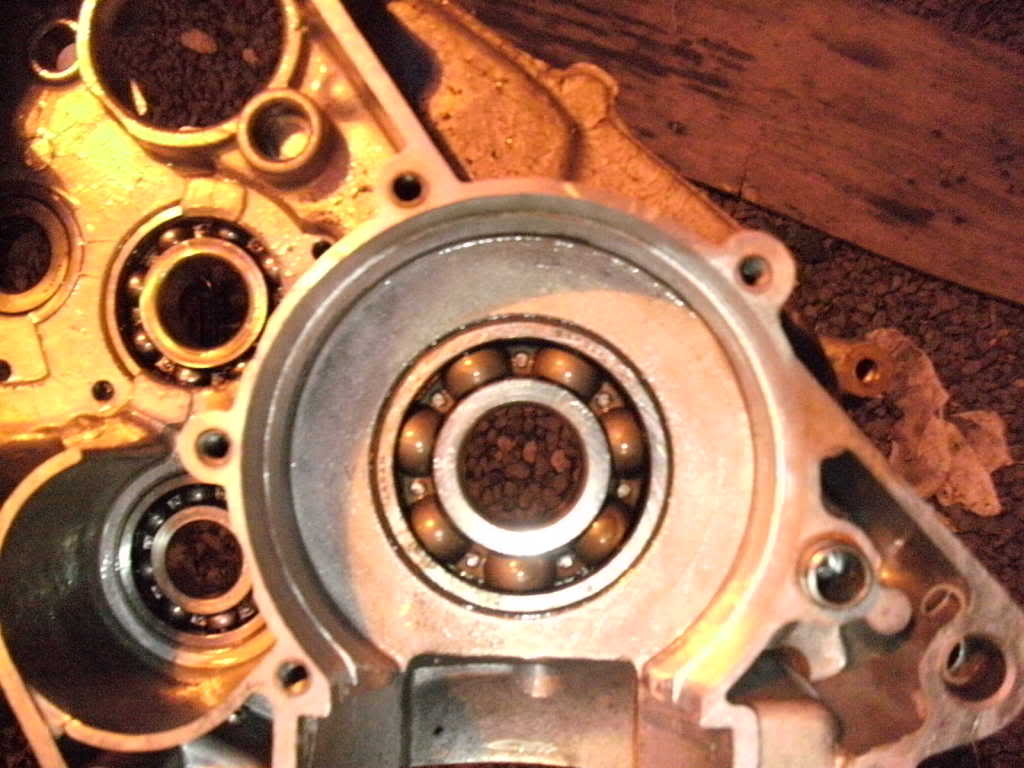
I ground them all down, matched them, and then lapped them. A thing of beauty to have these back together.
I ground them all down, matched them, and then lapped them. A thing of beauty to have these back together.
- Status
- Not open for further replies.
Similar threads
- Replies
- 5
- Views
- 225
- Replies
- 0
- Views
- 143