I know Ken O'connor has the DIY porting videos in the engine section but what we have here is a little tooling help.
Most people feel like the job of porting is completely over their head and except the bravest of folks, it probably is. For those who feel like it's up their alley, I'll lay out my experiences and perhaps it can help someone make some decisions.
For people who are going to be making a living on this, only the best tools will do. There aren't a lot of choices for those folks, CC specialties is one of the only manufacturers of specialty porting tools but their products are very expensive (high quality but pricey) and out of the price range of someone who is not going to be doing this for a living...
I have found tools which will work comparatively well without the relatively extreme prices.
First, I have made a few mistakes (not just mistakes but learning mistakes) and will cover those too. I went out and bought a dremel tool, a dremel right angle adapter, and a flex shaft. While the dremel tool is a useful tool for a lot of jobs and will work moderately well for the "basic" porting Ken O shows in his video's it and its attachments have a few drawbacks.
First, the tool itself is heavy. It's an electric motor and that fatigues the wrist if you don't have a flex shaft. After an hour or so your forearm feels like it could fall off...
Second, during its operation the machine and its attachments get very hot, especially the flexible shaft. The bearings in the end don't really get too hot but the flex cable itself gets pretty warm and with such a small hand piece, there's not a lot of mass to absorb that heat.
Third, the right angle attachment is very bulky. For advertising that it can "get into tight spaces" I sure found a bunch of spaces it could not get into... including blaster cylinders well.... Also, the right angle attachment generates a LOT of heat by itself. The gears are not cross-cut so they have a fair amount of resistance and produce a LOT of noise.
Fourth, while a foredom drive motor produces GOBS of torque at low RPM's, the dremel needs to be moving to have any power at all. With the flex shaft installed, that means anytime you apply enough force to cut a hard to reach area or get the bit jammed, the motor is spinning fast enough to turn the flex shaft into a coil spring. It will wrap all up and twist seven ways from Sunday...
I have found the solution to most of those problems... pencil grinders! They are air operated micro die grinders. They have several advantages and a few disadvantages. I think the good outweigh the bad's by a LOT. First off, they use 1/8" collets so the run-of-the-mill dremel bits will work in them. They relatively little air considering their size and power output. The air controls are made into the base of the handle, skilled, you can operate the entire thing with one hand...
I started off buying the straight red one which was very inexpensive off Ebay because they are popular and everywhere. I bid $12 on it with like $8 shipping and won it. It came with two wrenches and a "M" style air fitting. It's a "neiko" brand tool and relatively well built. The bearings roll smooth and runout on the turbine shaft is zero. Free speed is listed as 40,000 RPM @ 90 psi and 4GPM air consumption. So far those figures seem to be underestimated but closer to the actual figures than most (unlike most air tools which GROSSLY underestimate the air consumption). I have a 40 year old (hand-me-down from my dad after he bought it at a yard sale) belt drive speedaire "oiled" air compressor. It's in fair shape but in its hey-day was a medium sized unit and it's hey-day was somewhere in the 80's...but neither of the air tools will drain it past 85 PSI at full tilt.
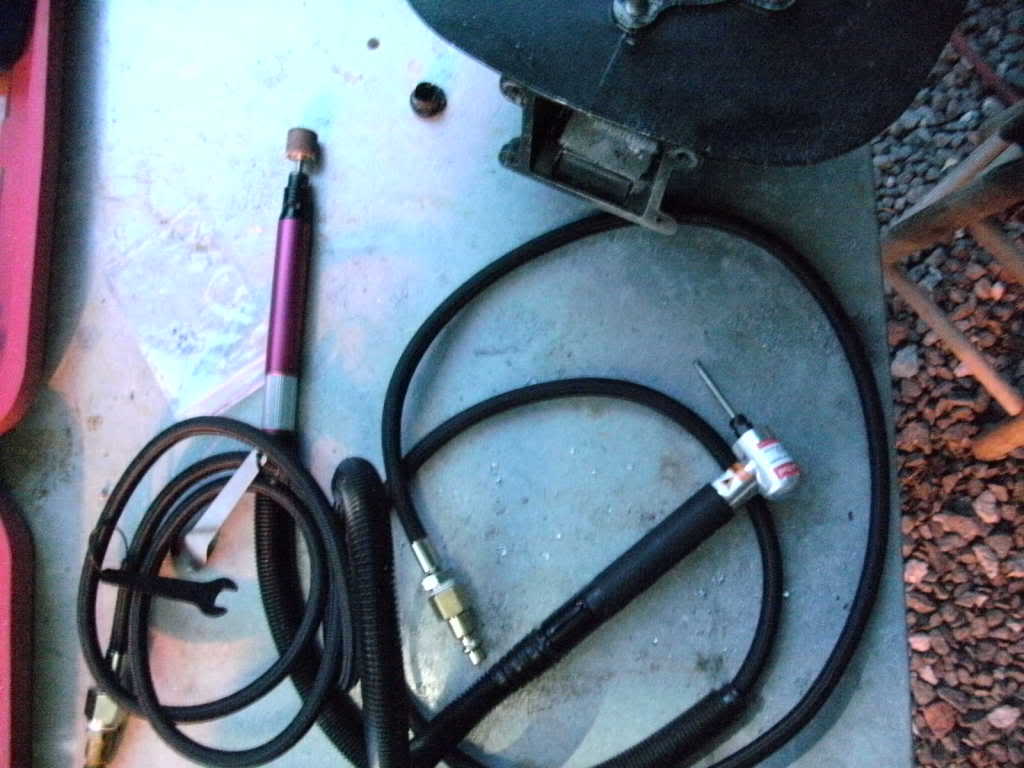
The tool brings air in through the braided hose into the back of it. The air valve is the silver section which twists 180 degrees from off to on. The spent air is then ducted out of the back of the tool and down the flexible hose over top of the braided hose halfway down. They say that's so the air doesn't blow chips around while you're working on stuff. I would say it also helps greatly in quietening down the tool.... The entire body of the tool is about 6" long and 3/4" round. The hose is about 4 feet long.
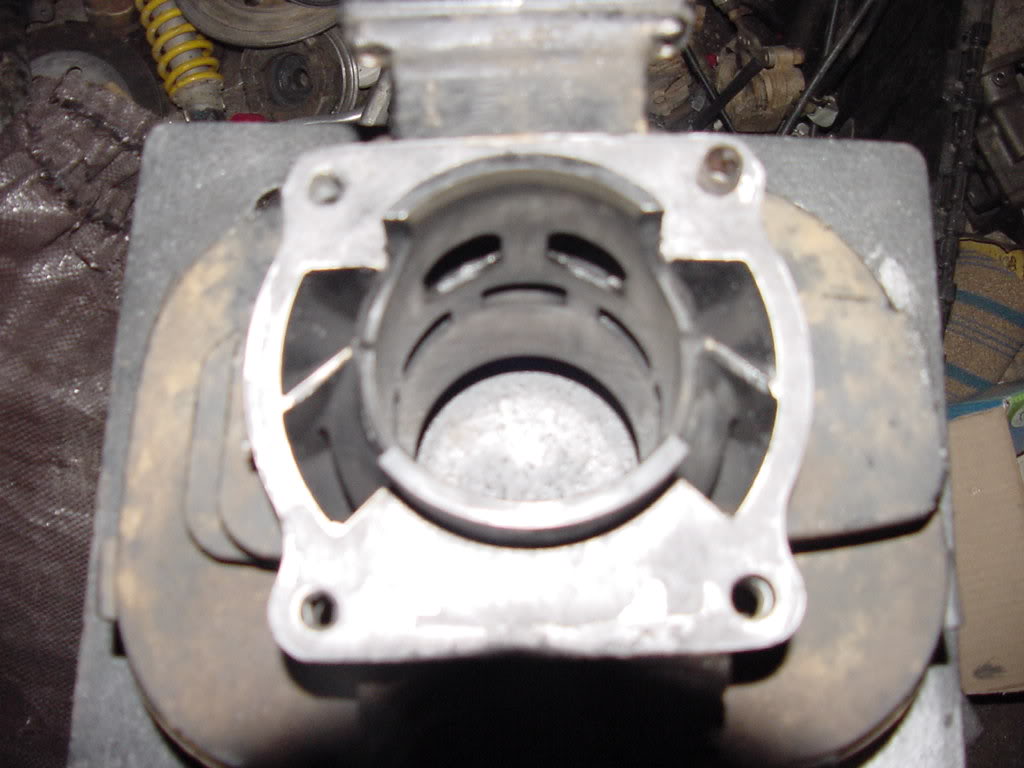
I knew that as long as I had no way to turn the diamond bits sideways inside the transfer ports, I didn't have a chance at actually PORTING any blaster cylinder. I'd be stuck with cleaning the intake, exhaust and lower transfers up and calling it a day. I began a quest for ANYTHING which would allow my 1/8" bits to work sideways inside the bore. Of course, that led me to CC specialties and their $900 price tag for their "normal" porting kit or the dremel right angle attachment.
Not many other choices out there until I stumbled across a right angle pencil grinder which had a grinder wheel attachment for it (cannot use 1/8" bits but really darn close to it) so once I knew what to search for, I was hot on the trail BUTTTTTT the prices were still a little hight for one time use. Snap-on makes one which is about $400 and ampro makes one which is over $200. I knew if I was going to pull this one off, the price of the right angle pencil grinder needed to be in line with what it would run me to purchase a single porting job.... I kept up my search, trolling Ebay, looking through tool catalogs, anywhere I though I might find one of these tools moderately priced. I ended up running across a company which specializes is selling nearly anything called "Global Industrial". On their site, they had a meager advertisement for a right angle die grinder which used 3mm bits (1/8" equivalent for the uninformed) but the listing was very sparse... the dimensions were sketchy and I wasn't sure it was what I wanted or not. Their price for the tool is $133 which is pricy but within my budget I set out to stay under. I ordered it last week and let me tell you guys, it's the bees knees.
It's rated at 1/4" hp 70,000 rpm free speed turbine powered and non-geared. What arrived today is EXACTLY what I've been looking for...
A picture of it with a 1/8" ball burr full length (1.25" long shank) inside the turbine...
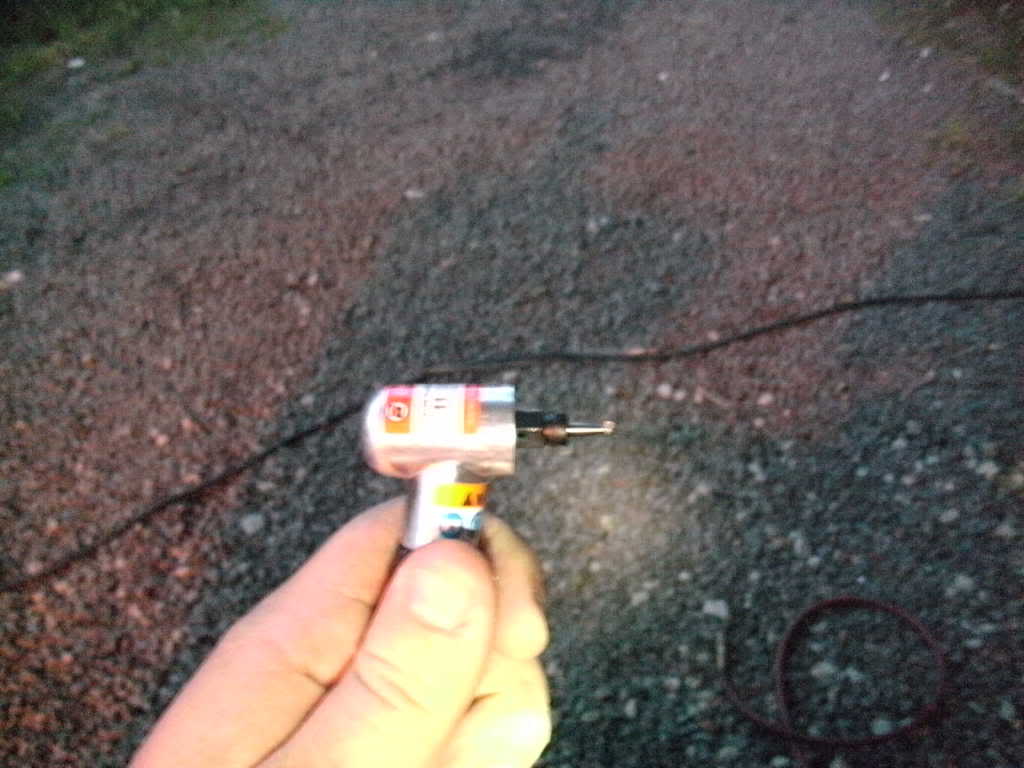
The turbine is hollow inside and thread on the VERY front of it. The collet is designed to stick out a little as possible (you sacrifice the ability to exchange in different size collets like the dremel tool but lose the "collet and nut" design which adds another 1/4" or so to the dremel right angle attachment) so an entire bit can go down through the head for minimum depth reach when you're in a tight spot and not having to cut carbine burr shafts off.
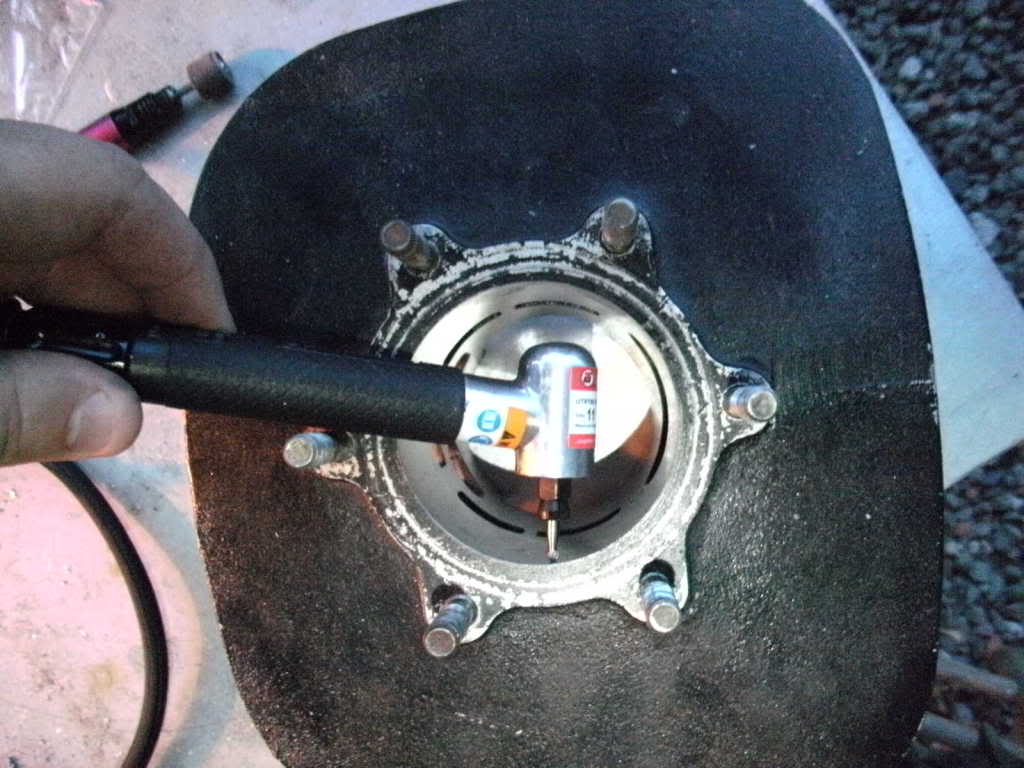
A picture of the tool with 1/8" ball burr inside one of my blaster cylinders. Note that the burr is sitting against the cylinder wall (not down inside the transfer port) and how much clearance is behind the turbine head (at least 1/2").
Most people feel like the job of porting is completely over their head and except the bravest of folks, it probably is. For those who feel like it's up their alley, I'll lay out my experiences and perhaps it can help someone make some decisions.
For people who are going to be making a living on this, only the best tools will do. There aren't a lot of choices for those folks, CC specialties is one of the only manufacturers of specialty porting tools but their products are very expensive (high quality but pricey) and out of the price range of someone who is not going to be doing this for a living...
I have found tools which will work comparatively well without the relatively extreme prices.
First, I have made a few mistakes (not just mistakes but learning mistakes) and will cover those too. I went out and bought a dremel tool, a dremel right angle adapter, and a flex shaft. While the dremel tool is a useful tool for a lot of jobs and will work moderately well for the "basic" porting Ken O shows in his video's it and its attachments have a few drawbacks.
First, the tool itself is heavy. It's an electric motor and that fatigues the wrist if you don't have a flex shaft. After an hour or so your forearm feels like it could fall off...
Second, during its operation the machine and its attachments get very hot, especially the flexible shaft. The bearings in the end don't really get too hot but the flex cable itself gets pretty warm and with such a small hand piece, there's not a lot of mass to absorb that heat.
Third, the right angle attachment is very bulky. For advertising that it can "get into tight spaces" I sure found a bunch of spaces it could not get into... including blaster cylinders well.... Also, the right angle attachment generates a LOT of heat by itself. The gears are not cross-cut so they have a fair amount of resistance and produce a LOT of noise.
Fourth, while a foredom drive motor produces GOBS of torque at low RPM's, the dremel needs to be moving to have any power at all. With the flex shaft installed, that means anytime you apply enough force to cut a hard to reach area or get the bit jammed, the motor is spinning fast enough to turn the flex shaft into a coil spring. It will wrap all up and twist seven ways from Sunday...
I have found the solution to most of those problems... pencil grinders! They are air operated micro die grinders. They have several advantages and a few disadvantages. I think the good outweigh the bad's by a LOT. First off, they use 1/8" collets so the run-of-the-mill dremel bits will work in them. They relatively little air considering their size and power output. The air controls are made into the base of the handle, skilled, you can operate the entire thing with one hand...
I started off buying the straight red one which was very inexpensive off Ebay because they are popular and everywhere. I bid $12 on it with like $8 shipping and won it. It came with two wrenches and a "M" style air fitting. It's a "neiko" brand tool and relatively well built. The bearings roll smooth and runout on the turbine shaft is zero. Free speed is listed as 40,000 RPM @ 90 psi and 4GPM air consumption. So far those figures seem to be underestimated but closer to the actual figures than most (unlike most air tools which GROSSLY underestimate the air consumption). I have a 40 year old (hand-me-down from my dad after he bought it at a yard sale) belt drive speedaire "oiled" air compressor. It's in fair shape but in its hey-day was a medium sized unit and it's hey-day was somewhere in the 80's...but neither of the air tools will drain it past 85 PSI at full tilt.
The tool brings air in through the braided hose into the back of it. The air valve is the silver section which twists 180 degrees from off to on. The spent air is then ducted out of the back of the tool and down the flexible hose over top of the braided hose halfway down. They say that's so the air doesn't blow chips around while you're working on stuff. I would say it also helps greatly in quietening down the tool.... The entire body of the tool is about 6" long and 3/4" round. The hose is about 4 feet long.
I knew that as long as I had no way to turn the diamond bits sideways inside the transfer ports, I didn't have a chance at actually PORTING any blaster cylinder. I'd be stuck with cleaning the intake, exhaust and lower transfers up and calling it a day. I began a quest for ANYTHING which would allow my 1/8" bits to work sideways inside the bore. Of course, that led me to CC specialties and their $900 price tag for their "normal" porting kit or the dremel right angle attachment.
Not many other choices out there until I stumbled across a right angle pencil grinder which had a grinder wheel attachment for it (cannot use 1/8" bits but really darn close to it) so once I knew what to search for, I was hot on the trail BUTTTTTT the prices were still a little hight for one time use. Snap-on makes one which is about $400 and ampro makes one which is over $200. I knew if I was going to pull this one off, the price of the right angle pencil grinder needed to be in line with what it would run me to purchase a single porting job.... I kept up my search, trolling Ebay, looking through tool catalogs, anywhere I though I might find one of these tools moderately priced. I ended up running across a company which specializes is selling nearly anything called "Global Industrial". On their site, they had a meager advertisement for a right angle die grinder which used 3mm bits (1/8" equivalent for the uninformed) but the listing was very sparse... the dimensions were sketchy and I wasn't sure it was what I wanted or not. Their price for the tool is $133 which is pricy but within my budget I set out to stay under. I ordered it last week and let me tell you guys, it's the bees knees.
It's rated at 1/4" hp 70,000 rpm free speed turbine powered and non-geared. What arrived today is EXACTLY what I've been looking for...
A picture of it with a 1/8" ball burr full length (1.25" long shank) inside the turbine...
The turbine is hollow inside and thread on the VERY front of it. The collet is designed to stick out a little as possible (you sacrifice the ability to exchange in different size collets like the dremel tool but lose the "collet and nut" design which adds another 1/4" or so to the dremel right angle attachment) so an entire bit can go down through the head for minimum depth reach when you're in a tight spot and not having to cut carbine burr shafts off.
A picture of the tool with 1/8" ball burr inside one of my blaster cylinders. Note that the burr is sitting against the cylinder wall (not down inside the transfer port) and how much clearance is behind the turbine head (at least 1/2").