My yamaha blaster build and experiences

Andie

Member
May 25, 2015
57
14
44
36
Hi,
Thought id make a post here to document all that i am doing and have done to my blaster as to show you all my ups and downs of owning and building my race spec (eventually) quad!
First i have started to build my blaster from a gery clean low hours blaster that had 4 hours use in saudi arabia and then got shipped to the uk where it had been sat in a storage container in a back garden in herne bay and never moved since!

First thing was first i pulled the bike out and gave it a very detailed clean of all parts externally under and over! i then gave the blaster a head inspection and resealed using athena gaskets, all was ok and tight.
After this i serviced the bike with new air filter, spark plug, brake pads, gear box oil, greased bearings and bushings.
Then i started to strip the bike of all unnecvesary parts like lights, igntion etc...
I then fitted a mx style kill swtich and done away with the switch gear.
I still need to fit a tether but am still currently looking for one i like.
Fitted a front bumper to get rid of hefty orginal.
Fitted a rear elka stage 3 shock (waiting for fronts to come up for sale).
Fitted some shock covers to protect seals.

Things on list to do in near future:
Nerf bars with intergarted heel plates
Exhaust
Vforce 4 reed cage
Port and polish job
Tors elimination
Wide axle
Wide a arms
Heavy duty tie rods
Pro taper fat bars on clamp extenders
Eliminate rear parking brake and replace with single front brake lever and perch
Folding shifter
Then a f*ck load of lightening and strengthening

I hope to get this all ready for the start of next years season as i intend to race this next year in a compatible series here in the uk, which one im unsure of and will be researching alot.
But for now i will be riding the quad track at least once a week and will let you all no how i fare with every new mod i install.
 
Looks awesome just a pain having to pay the import tax on everything as on some items the price doubles.
 
Some pictures taken earlier after prepping for tommorow at the track.
 

Attachments

  • image.jpg
    image.jpg
    1 MB · Views: 911
  • image.jpg
    image.jpg
    1.1 MB · Views: 553
Pictures of rear elka installation and also of how i decided to mount the compression bottle in the end!

Bought two large jubilee clamps and 2 car exhaust rubber wraps
 

Attachments

  • image.jpg
    image.jpg
    1 MB · Views: 506
  • image.jpg
    image.jpg
    1 MB · Views: 518
  • image.jpg
    image.jpg
    946.9 KB · Views: 595
Visited the track today, ground was overly hard as havent had much rainfall and this particular track isnt watered.
When i first went round my new rear shock seemed very hard and the rebound was trying to buckaroo me off over the woops.
Soon sortd this by adjusting the compression a few clicks softer and the rebound setting 3 clicks softer.
Now the suspension was feeling great and i felt the traction was there alot better.
The standard width of this machine however is a problem, very unstable at high speed turns and definetly needs at least 4 inches of width front and rear.
Tyres also a problem on the rear needs a much smaller tyre 18-10-8 i reckon.
I have taken some pictures of the track and my quad, have a few videos but do not no how to upload yet so will be aearching for a way to show you all.
Footage and pics all with go pro hero 4 black edition
 

Attachments

  • image.jpg
    image.jpg
    3.1 MB · Views: 565
  • image.jpg
    image.jpg
    3.6 MB · Views: 490
  • image.jpg
    image.jpg
    2.8 MB · Views: 466
  • image.jpg
    image.jpg
    2.1 MB · Views: 458
  • image.jpg
    image.jpg
    2.4 MB · Views: 420
Hi havent posted in a while been busy on another project of mine my cbr rr. I have however been doing small bits and bobs as the time has passed.
Widened front (unknown wider arms +2, lonestar rods and all balls ball joints)
Pro armor kill switch tether (to be legal to race)
Shorty rear brake cable
Deleted parking break and assembly (twinshock perch and lever fitted in its place)
Cut rear plastic (will be buying racing plastics once ready)
Xfr nerf bars with rear heel guards (amazing would reccomend to anyone)

Am looking to finish the widening process with axcaliber rear axel, then banshee hubs with dwt bead lock rims and razr tyres. Once all is complete and am happy with the way the bike rides i will start on power. I thoought there was no point in bigging up the power if it rodes like sh*t around a proper race track so decided with going the suspension route first.

What you think so far?
 

Attachments

  • image.jpeg
    image.jpeg
    1.9 MB · Views: 453
  • image.jpeg
    image.jpeg
    2.2 MB · Views: 482
  • image.jpeg
    image.jpeg
    895.9 KB · Views: 417
  • image.jpeg
    image.jpeg
    1,016 KB · Views: 418
  • image.jpeg
    image.jpeg
    844.9 KB · Views: 429
  • image.jpeg
    image.jpeg
    959.5 KB · Views: 498
  • Like
Reactions: pudvah
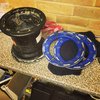
So i managed to pick up a rear set of dwt bead lock g2 ultimate from a guy from ebay. They were in pretty good nick but not my ocd good so i had them acid dipped to to rmove all the old paint and powder coat. On reciving the alloys back i checked them all over and managed to see the slight damage and scratches better. There are a few gauges in the metal so i will fill them with some alubond and rub back to shape of wheel, there was also a indent outwards of the wheel so a, going to heat that and reshape it with a panel beating hammer. Im no pro so will take pics of my progrss so you can see how i get on with the refurb. I am choosing to do it my self as paying to have the. Refurbed will have made it not worth puchasing as could of bought brand new for the same price of purchase and refurb. Also bought two new artrax mx trax wheels 18x10 8 to fit once refurb is complete. Also realise i will have to purchase new rear hubs in order to fit the new wheels. What you think?
 

Attachments

  • image.jpeg
    image.jpeg
    1.7 MB · Views: 460
  • image.jpeg
    image.jpeg
    2.1 MB · Views: 409
  • Like
Reactions: dirtysquared
So making moves on refurbing the dwt alloys! I have rubbed back, filled and rubbed again all damage off of the beadlocks. I used the filler in the pics and has worked really well. Easy to use and sand, also holds up well to the etch primer i am using to get good adhesion with the paint. I fully primed the rings and now await there colour coat, i also purchased a 2k laquer to hit them with at the end to preserve the paint job and be a little more tough wearing.
 

Attachments

  • image.jpeg
    image.jpeg
    1.2 MB · Views: 330
  • image.jpeg
    image.jpeg
    1.1 MB · Views: 390
  • image.jpeg
    image.jpeg
    1.2 MB · Views: 348
  • image.jpeg
    image.jpeg
    1.1 MB · Views: 381
not sure how I missed this build so far ?
looking good Andie !
 
Right as i am getting closer to having my quad ready for racing i decided to look for the race series i wanted to enter. I found a race series in the south west of the uk (gravitylc). I will be riding the adult novice series as i am no veteran in racing but do have previous experience from rwcing my yz years ago. Thing is you are unable to modify engine in anyway, so how can i make my quad run its best as a standard machine. Would i be allowed to bore slighty, any cheeky mods to gain some power? You are allowed after market exhausts but will i have to change anything else to accompany it that maybe will not be allowed?
Thughs please?