Mysterious seized motor *HELP PLEASE!*

Replacing a connecting rod bottom bearing is a specialised job and should only be attempted by the very experienced person with the correct tools.

It may be advisable to buy another crank and rod assembly.
 
I certainly won't have the cash to pay this guy to do the whole rebuild anytime soon...and a little over $200 for the crank and rod assembly is a bit much. Either I'll have to deal with it until I have the cash for it, or I'll at least tear it down to that point and have the guy take it from there....
 
I have not left my Blaster for dead. I will soon have the funds to commit to parts and what seems apparent now, special tools.

I have begun disassembling the bottom end as there is indeed metal debris in the crankcase and I have a seized connecting rod bearing.

I am now at the point where I need the Universal Clutch holder to hold the clutch basket still while I break that nut loose...(I'm looking into a friends suggestion to use a strap wrench and a fan belt....)....So I have stopped at this point.

I did download the Blaster manual from the oh so helpful link someone had in their signature or whatever...and can see that under inspection/repair, it states that scoring/wear/damage on the clutch housing itself calls for either de-burring or replacement.... To me it looks as though I need a new clutch housing.

Some edges are smooth, some are very much not smooth. I believe this photo points out what i'm referring to. You fellas agree this clutch housing should get replaced?
 

Attachments

  • blaster 009.jpg
    blaster 009.jpg
    50.7 KB · Views: 178
That's your clutch basket , take a fine flat file and take the high spots off , do not take allot of material off , you can measure the one side and get a general idea of how far you can go , search you tube for blaster clutch rebuild
 
See this chip in the case on the stator side? That call for a new case? I wouldn't think so, but I'm askin you guys...

Also - I saw the other recommendations on how to get the crank seal out, with a hammer and a screw driver, taking care to not damage the case.

So I have the case split, and the crank assembly is still in the one half with the crank seal. Is that in fact the best method of removal, hammer and screwdriver? Is there a special tool that will do it without damaging the case?
 

Attachments

  • blaster motor 027.jpg
    blaster motor 027.jpg
    38.9 KB · Views: 133
  • crank seal 002.jpg
    crank seal 002.jpg
    48.8 KB · Views: 140
  • crank seal 001.jpg
    crank seal 001.jpg
    49.5 KB · Views: 133
That chip is okay , you just need to seal it with some Silicone or yamabond when you put the stator cover on after the leak down test after rebuild
 
That chip is okay , you just need to seal it with some Silicone or yamabond when you put the stator cover on after the leak down test after rebuild

Cool thanks. I figure thats not good with that crack there given I drive through creeks and what not... If that sealer is heavy duty that oughta do it...

What about the removing the crankshaft and seal the rest of the way from the case - you have a suggestion?
 
You might be able to Tap the crank out with a rubber mallet or a small 2 pound sledge with a chunk of wood so no damage happens to crank , but you will more than likely need new bearings if you Tap them out
 
Do not mess with the idea of re-using the old bearings, for peace of mind buy new ones, you may never get the old ones cleaned properly.
 
You might be able to Tap the crank out with a rubber mallet or a small 2 pound sledge with a chunk of wood so no damage happens to crank , but you will more than likely need new bearings if you Tap them out

Okay that should work because as it is I am purchasing a crank and rod assembly that will come with new bearings.

The connecting rod bearing is totally seized and misaligned. I don't know how to press it out and replace it so I'm just replacing the crankshaft and connecting rod assembly.

I'll give your suggestion a shot, much obliged.
 
That bearing does look very sad.

I am in no way having a poke at you, and I do not know the history of the motor, but this is a typical example of not splitting the cases and cleaning and/or replacing the bearings after a piston skirt failure.

I am drawn now to the look of the piston skirt where it meets up with the cylinder. The photo shows not necessarily a machined edge.

What do you fellas make of this? I need to know if this is a-okay to go back on the motor...looks a little fishy to me....

the other pic is off the connecting rod bearing totally oblonged and misaligned....took another pic now that i got the crank out of the case....

Appreciate your input by the way!

The third pic is of one half of the case with a groove that got cut into it about a quarter inch from the edge....there are marks on the bottom of the connecting rod so I assume its from there... Is that going to cause any problems when I put this sucka back together??
 

Attachments

  • blaster bearing 003.jpg
    blaster bearing 003.jpg
    39.7 KB · Views: 157
  • blasterbearing 002.jpg
    blasterbearing 002.jpg
    40.8 KB · Views: 140
  • blaster bearing 005.jpg
    blaster bearing 005.jpg
    44 KB · Views: 156
ask the guy you bought it from if the ports were ever chamfered (when your piston goes upward imagine the rings caching the top of the ports, chamfering eliminates this)

blew up one of my motors because the "technician" didnt do this my two cents anyhow not sure if vitos 240 needs that done
 
Alright at this point, I'm accumulating the cash for the piston/rod assembly (bottom end kit), and a top end kit.

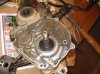
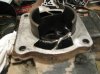
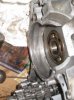
The cylinder condition I have pictured in the thread above (area where cylinder sleeve meets cylinder has me concerned.

I know about cars, used to be a tech, so have an understanding of how power modifications can apply to this context. I'm a nube with the two strokes though.

So porting and polishing on a car, they go through and clean up the rougher surfaces in the intake so they are all smooth, and as a result you get more volume of air flow goin through, more breathable, more efficient, more power.

The porting you guys refer to with the two stroke, I wonder if it is a similar concept.

Can I buy a cylinder that is already ported and a bigger cut to accommodate an oversized piston?

Or do I buy the cylinder, get the oversized piston, then get the cylinder ported and machined to that piston?

I'm willing to take the time and money now to beef up the motor a bit, and the ported cylinder, oversized piston, and a different pipe with proper jetting and reed setup is how can do that from what I understand.

Anyone help me out on those couple questions? Or direct me to a resource that can help me out....

Thanks - my quest to get that blaster running again and screamin even better is proceeding slowly - but I want the end of the quest to have a sick ass quad to ride....
 
those are just the way the transfers look from the factory on the bottom of the cylinder

yes the porting basically uses the same consepts but it's all about port timing with a 2 stroke.

You can send your whole cylinder to a builder and they can do the porting for you and a bore job in most cases. first you need to have the cylinder measured to see how large of a piston to order so that when it is bored all the scuffs will be removed. Any machine shop should do that for you for free. and no it can't be done properly with a pair of calipers. sometimes you can just send your topend to a builder and he will measure it order the piston and do the port work and head mod to it all while you have it.

If you read over my sig the engine, carb, and pipe mods are some of the more popular. all the builders on the forum are good guys and trustworthy