Project MonkeyBlaster

I finally got my computer plugged in so I can resume the updates

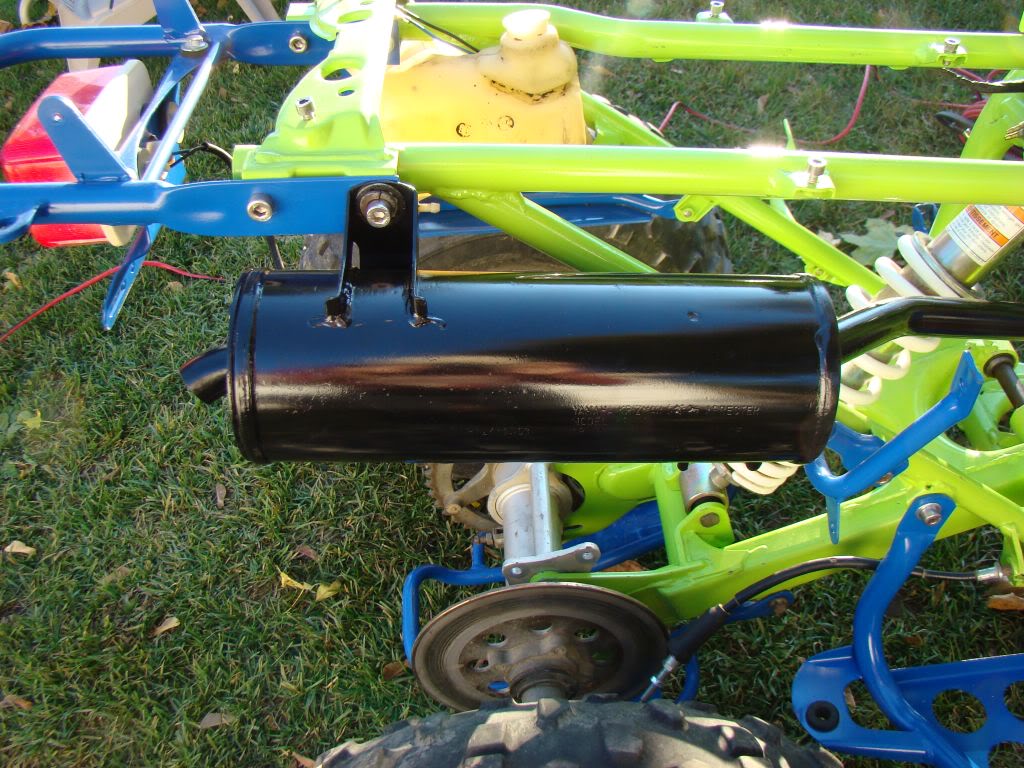
This is what the exhaust looks like painted and bolted up.

DSC07141.jpg


I'm uploading some pics to photobucket right now but it's taking a while...so I'll post up more updates in a bit

nice build so far love the colors. more picsI:I
 
Coming together...

DSC07081.jpg


some other misc parts in the blue

DSC07096-1.jpg


DSC07097-1.jpg


DSC07099-1.jpg


All assembled together and bolted up

DSC07144.jpg


I'm thinking of using the oil injection since I believe it's all working....but if I decide not to it's easy enough to cap off the lines and premix

DSC07139.jpg


Besides, I like having less ATV parts on the floor/garage/shed/laundry room etc etc,. so things bolted up are good.

Front plastics are installed

DSC07140.jpg


DSC07145.jpg
 
Does anyone have a good picture of how the rear brake foot pedal assembly looks like? I'm missing a part or two but I'm not sure what I'm supposed to be looking for.

I have a few springs that I've tried to use, but I'm guessing they're way too small since I can't even come close to stretching them out into the hole from the frame to the pedal.
 
Last edited:
Coming together...

DSC07081.jpg


some other misc parts in the blue

DSC07096-1.jpg


DSC07097-1.jpg


DSC07099-1.jpg


All assembled together and bolted up

DSC07144.jpg


I'm thinking of using the oil injection since I believe it's all working....but if I decide not to it's easy enough to cap off the lines and premix

DSC07139.jpg


Besides, I like having less ATV parts on the floor/garage/shed/laundry room etc etc,. so things bolted up are good.

Front plastics are installed

DSC07140.jpg


DSC07145.jpg

nice love the colors so muchI:I
 
Coming together...
I'm thinking of using the oil injection since I believe it's all working....but if I decide not to it's easy enough to cap off the lines and premix

Check out...
http://www.blasterforum.com/do-yourself-20/injector-block-off-clean-3-a-31229/

Does anyone have a good picture of how the rear brake foot pedal assembly looks like? I'm missing a part or two but I'm not sure what I'm supposed to be looking for.
You mentioned a pdf shop manual early in this thread. Have you tried the Clymer's manual? Best $30 I ever spent on my Blasty I:I


Btw, looking good bro!
 
Yeah I would advise you to premix instead of using your oil injection because they have been known to just fail randomly and cook whole engines.
 
I managed to get the engine in and noticed the oil lines have been cut off, that combined with your advice means premix it is. Besides I have other 2 stroke engines that I premix for anyway.
 
Wow I love those colors! They really stick out and it makes it look very original. And as for the oil injection, just get rid of it and don't worry about it ever again. And never get rid of those front tires, they are some of the best tires you can buy. And the only thing I would like more about this build is if you painted the A-Arms. Tell Mr.Monkey that he made an awesome color choice and it looks sweet. =]
 
Wow I love those colors! They really stick out and it makes it look very original. And as for the oil injection, just get rid of it and don't worry about it ever again. And never get rid of those front tires, they are some of the best tires you can buy. And the only thing I would like more about this build is if you painted the A-Arms. Tell Mr.Monkey that he made an awesome color choice and it looks sweet. =]

Thanks,

I wanted to paint the A-arms but I made a decision at the time to just go ahead and start bolting things up to see how far I could get with what I had parts wise. Turns out I got much further than I anticipated and well, it's almost December now so outdoor painting season is no more.

Next spring I'll probably take them off and paint them since now I have a pretty good idea of how much work it is....but you never know, I've been known to do "crazy" things before when it starts to bother me too much.

I'll let Monkey know everyone likes his color choices
 
Here's a shot of the engine bolted in except in the rear swing arm...I've got some chain roller issues to sort out it seems.

DSC07210.jpg


Trying to get the engine with that goddam TORS thing on is a tight fit...so I ended up scratching the frame a bit. Lucky for me I have a mouthful of that paint left that should work for all my touch ups....or I can just remind myself that a 10 year old will be ripping through rough terrain with this thing and it will probably look like that after his first ride :)

DSC07211.jpg


Here's the swingarm that's lacking chain rollers. Not sure what I'm missing here, but it's definitely something. If anyone has some pictures of how the swingarm is supposed to look with all the roller stuff please post one up.

DSC07204.jpg


This is what I have for a roller, but it fits on REAL loose. Not sure which end goes in towards the motor. One has a taper, the other a lip...

DSC07209.jpg


DSC07207.jpg
 
I mentioned before that I took the engine to get welded but I forgot to take pictures before I dropped it in the bike.

The guy that did the welding manufactured boat props as well as fixed boat motors with cracks etc,. and had a fair sized shop that was SUPER clean and generally seemed quite knowledgeable about fixing stuff other than boat props. He ended up pulling out a couple Sea Doo top ends that were all cracked inside the cooling passages...seems someone forgot to winterize.

He did the welding on a big ass brand new Miller Syncrowave and started off by removing the gear shifter lever and then the oil seal without damaging it.

Next he removed the loose piece of the casing and torched all the soaked-in oil off. One he was satisfied it was clean enough, he grooved out a section in the pieces and Tigged it all back together again...or at least this is what I was told :D

Looks pretty solid to me

DSC07221.jpg


DSC07219.jpg


DSC07217.jpg


DSC07216.jpg


DSC07215.jpg
 
I'm trying to figure out this chain roller situation I got going on...or lack there of rather.

So I managed to remove this guide or whatever it's called from another busted swinger that I had.

DSC07237.jpg


If I'm on the right track here, the shop manual shows something along the lines of this guide thingy going on the swingarm

DSC07241.jpg


DSC07249.jpg


Next this chain roller goes on and the tapered end sits on that guide thingy

DSC07242.jpg


Next this

DSC07243.jpg


Then the cap

DSC07244.jpg


If that's all there is to it, then I have a problem. That plastic roller is really loose but doesn't look worn.

Also as I was bolting up the foot peg and heel guards I got to thinkin'.

DSC07247.jpg


Are the screws supposed to go all the way through the foot pegs? I see holes lining up on both sides.
 
No on the foot pegs. You have it assembled correctly as-is. The second hole is there only to help you gain access to a screw head if needed. You have the screw heads facing out, so there's no need to worry with it.

You have the stock chain roller/end cap assembled correctly. That being said, this part is a total piece of crap. The chain roller fits loosely over the sleeve, even brand-new.

Buy and install this and I guarantee you won't have anymore headaches with the crappy stock setup.

Blaster Front Chain Protector Stock Swingarm [YCP-203] - $19.95 : TM Designworks, Online Store

I run the full TM Designworks chain slider/guide kit on all my chain-driven ATV's and love it. Best money you'll ever spend on a normal-wear part, and I have yet to wear a TMD product out. And as you can see from my sig pic, my Blaster is no showpiece. Its a running, hard-ridden bike.
 
Braaaptor,

So should I just install the swingarm without that plastic crap and metal guide for now?

Can I install that chain protector you recommend while the swingarm is on or do I have to take it apart again? Just curious.

The Oury grips that match pretty close to the blue Monkey picked finally came in. How I have to figure out the "best" way for them to stay on there. I've heard lots of different ways to glue the grips on, but so far I think Gorilla glue is leading the pack. Most of the stuff I've read says to stay away from "grip glue" and the Oury packaging says to use 3M weatherstrip adhesive.

DSC07203.jpg
 
Weather stripping adhesive is some nasty sticky stuff, but in my experience it works great and will prevent the grips from sliding around. I've never used Gorilla Glue to hold grips in place, but I suppose its worth a try.

As for the chain slider/roller in question, I'd leave the loose stock one installed on the swingarm until you can get a better setup. If you run the Blaster without any sort of roller whatsoever, the swingarm and chain will get torn-up in a hurry from metal-on-metal contact.

You have to remove the swingarm (or at least unbolt it and slide it back, with the shock still in place) in order to install the TM Design chain slider. Not a hard job, but the bike does have to come back apart before things will go together.

Thanks for the info Braaaptor,

A new chain is on the short list of parts I need, so I'm not concerned about things getting chewed up. No chain, no cog, no problem :)

I'm hoping I can order the remaining things I need this week and maybe get everything together before the snow drops.

On the list of things I need:

chain
front cog
chain slider
bottom chain roller
rear brake pad
rear brake thingy that goes by the brake pedal.

and I believe that should get us across the finish line.

That is assuming everything else works
 
Speaking of rear brake pad, A few weeks ago I noticed the rear brake was seized, so in lieu of spending for a hydro kit right away I figured I'd give the mechanical brake a crack and see if we can't get her goin'

DSC07083.jpg


You can see how the rear brake was assembled poorly. I don't know if this was how it was while in operation, but it wasn't sitting properly and that gasket clearly wasn't keeping dirt out.

DSC07100.jpg


This explains a few things

DSC07102.jpg


DSC07103.jpg


That dirt is ALL in the bearings and looks like it's been there for a while

DSC07109.jpg


After a half a can of brake cleaner things look promising

DSC07110.jpg


Used a few small tools to get into all the nooks and crannies that the dirt had accumulated. The stuff was well caked into the needle bearings and took quite a bit of effort to clean it out thoroughly. It doesn't look like the bearings were damaged though.

DSC07111.jpg


Cleaned up and moving freely

DSC07113.jpg


DSC07118.jpg


DSC07119.jpg
 
Everything greased up and ready to be reassembled

DSC07121.jpg


DSC07123.jpg


DSC07124.jpg


Once I get my brake pad I'll use a bit of gasket maker compound upon reassembly and make sure that dirt stays out.
 
Looking good there! Just FYI, if you look on ebay, some of the new rear brake pad kits come with a new gasket as well.

I'm happy to help! I can't wait to see this one done...