Mod Fever!!
- Thread starter ant_mb
- Start date
You are using an out of date browser. It may not display this or other websites correctly.
You should upgrade or use an alternative browser.
You should upgrade or use an alternative browser.
")

newer wheels, bug shield, bumper with fog lights, mirror accents, Z71 stickers, anything else?
nice truck, VORTEC!!!
nice truck, VORTEC!!!
newer wheels, bug shield, bumper with fog lights, mirror accents, Z71 stickers, anything else?
nice truck, VORTEC!!!
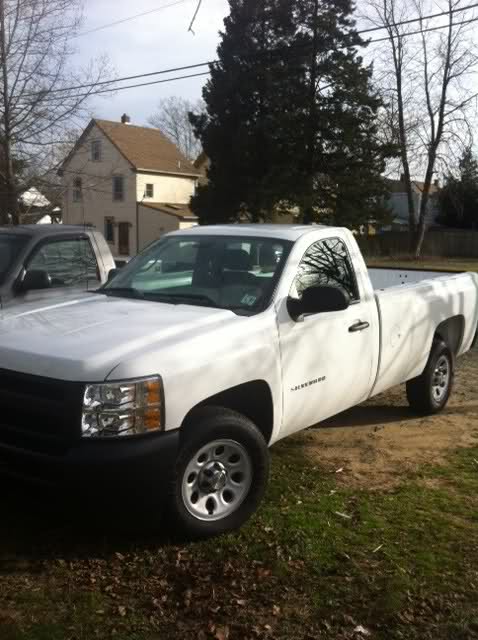
That's about all you'll see. Here is what I've done over the past couple months.
Z71 rims
Tow hooks
Fog lights
Bug shiels
Mirror caps
Bed rail caps
locking tailgate
Dynomax cat back exhaust
DIC
I start on the inside next week.
looks a lot better! amazing what a little paint and some new wheels will do!
Those are all genuine GM parts, no painting on my part.
That's about all you'll see. Here is what I've done over the past couple months.
Z71 rims
Tow hooks
Fog lights
Bug shiels
Mirror caps
Bed rail caps
locking tailgate
Dynomax cat back exhaust
DIC
I start on the inside next week.
cool!!! i love silverado's. ill never own anything else. have had great luck with them. i really like the vortec engines. I:I
Those are all genuine GM parts, no painting on my part.
gotcha, wasn't sure if you had some of the stock stuff painted up.
either way, truck looks great!
I know it's not a chevy forum so I'll keep all my mods in this thread.
Here is what I did today
Let me start out by saying none of the wires are HOT at any point of time! Powering it up will be the very last step in my instillation.
Well guys I got around to installing the power wire for the amps today. I went 4 gauge wire and a 100 amp fuse. I started off fishing the wire through the firewall, what a real PIA that was. I made a small slit in the boot and ran a plastic coated wire hanger through the boot. I then taped the wire to the hanger and proceeded to pull it though. After about 6 times of pulling it through and losing the wire I decided it was time for a little help. This time I would pull while I had a friend push the wire and I managed to get it through.
Here is where I fished it through. Be careful and don’t cut any wires or get too sh*tty with it. Last thing you want to do is screw some wiring up.
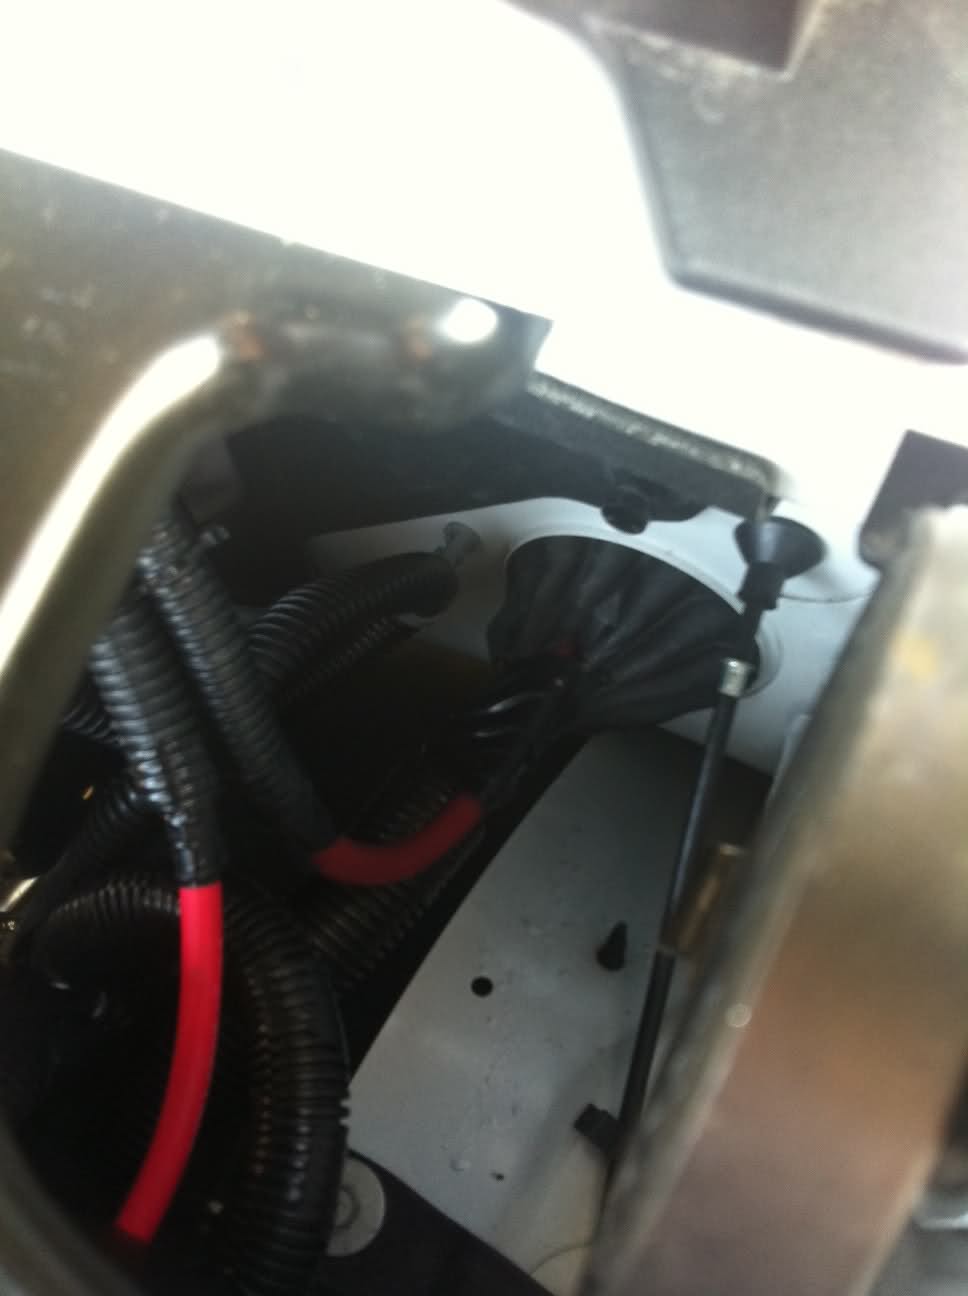
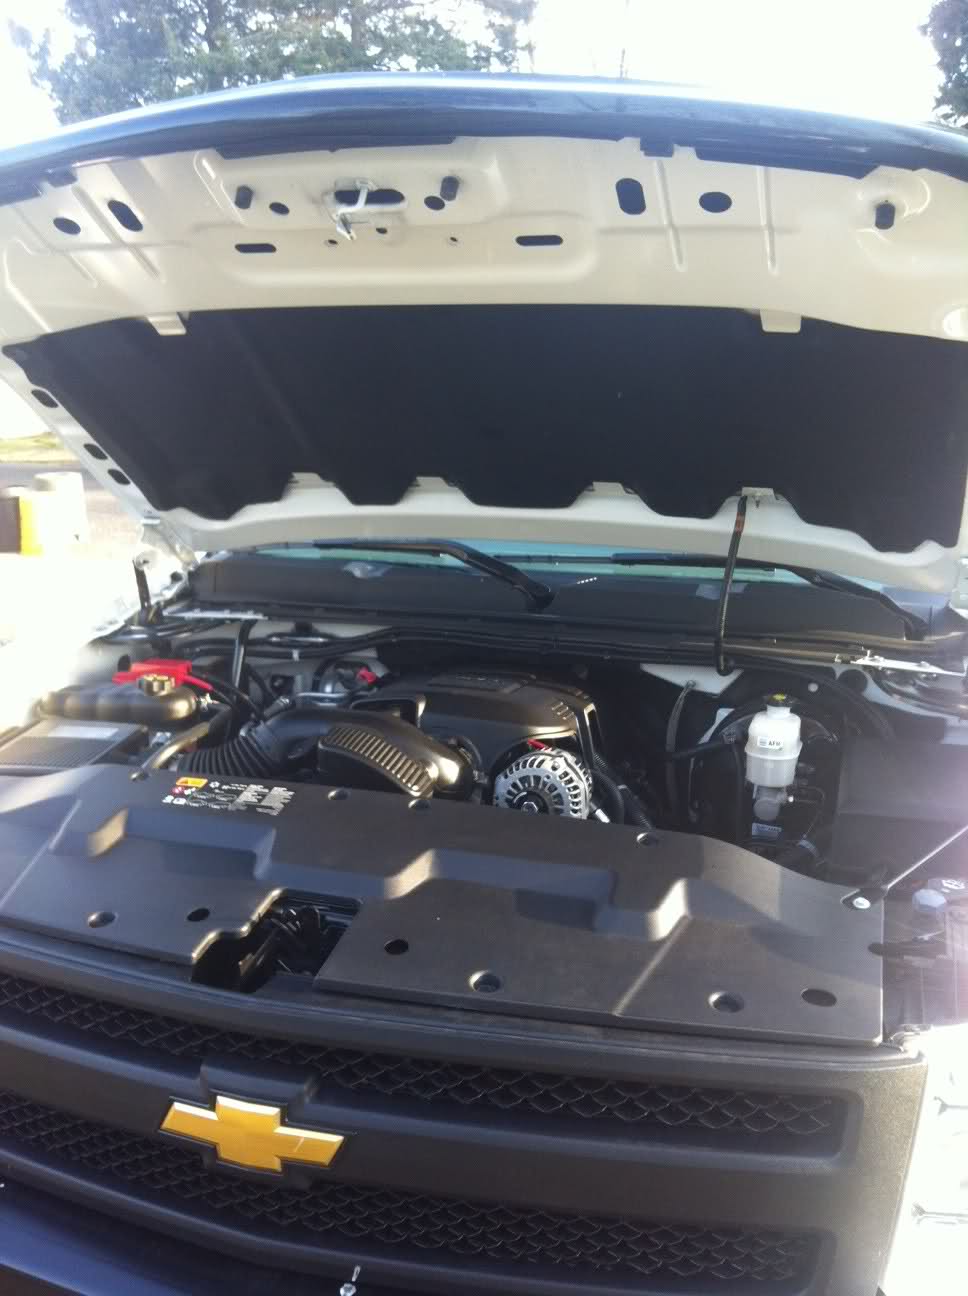
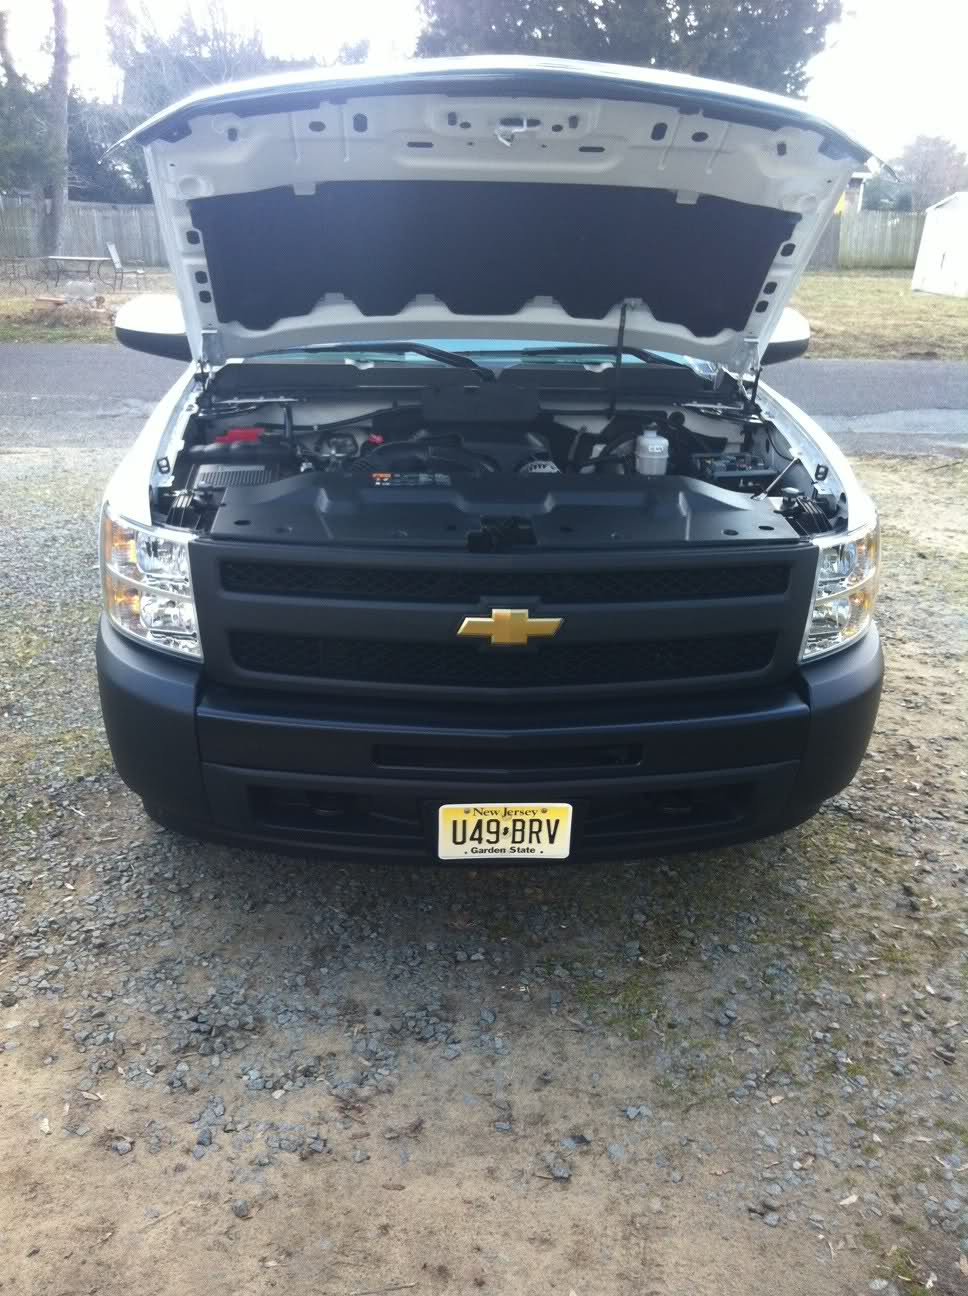
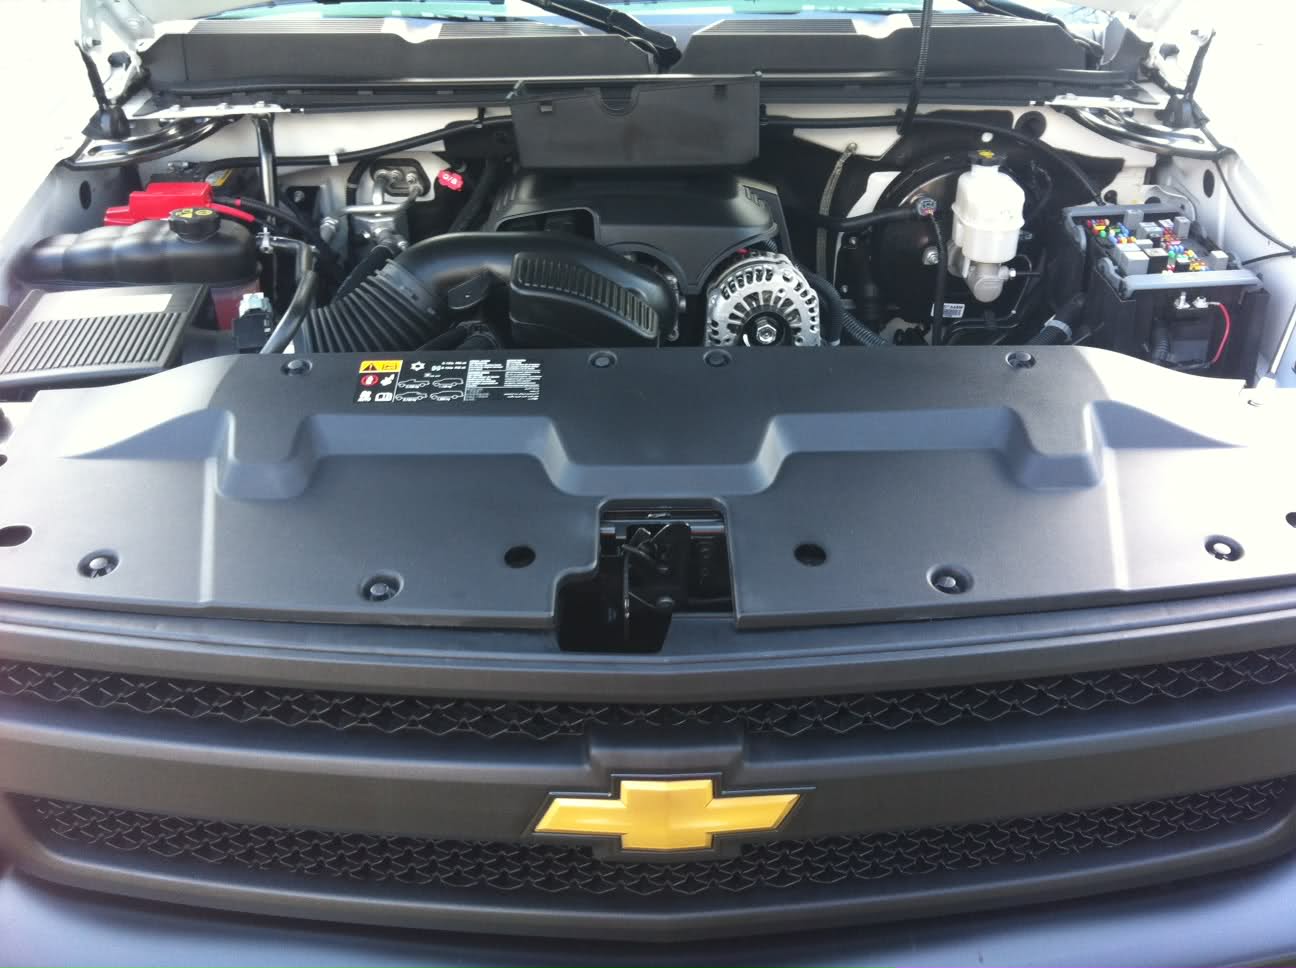
I then went to town under the hood. First I picked a good spot to mount the fuse. Once that is figured out you can get a rough idea of how much wire to you’ll need to pull through. Pull extra now and you can get rid of it later. I work from the battery to the back. Working this way allows you to take all the slack back through the firewall without cutting the wire.
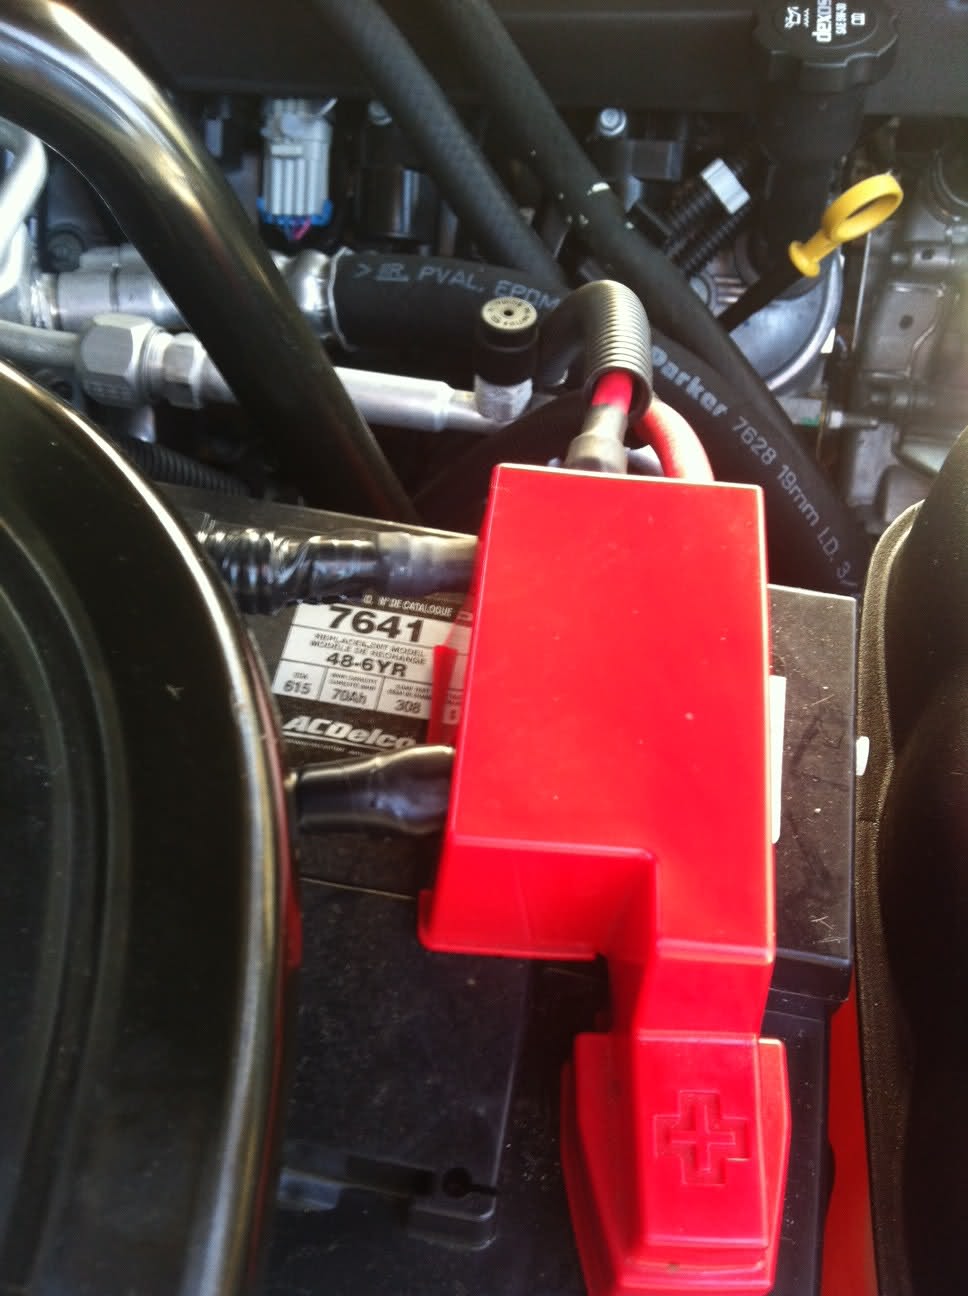
Here is a pic of the wire mounted to the battery. The battery has a mega fuse on it for protection, I chose to connect before the fuse as my line will be fused and I’m sure I would blow it and be left stranded somewhere. I simply notched the plastic cover that protects the positive terminal.
Next I hooked the fuse up, and pulled the excess wire back into the cab. Now that I have my exact length determined I can work on making it look pretty. I chose to run the wires parallel to the main power wire running to the fuse box. I zip tied it and taped the ends all up.
Here is the fuse
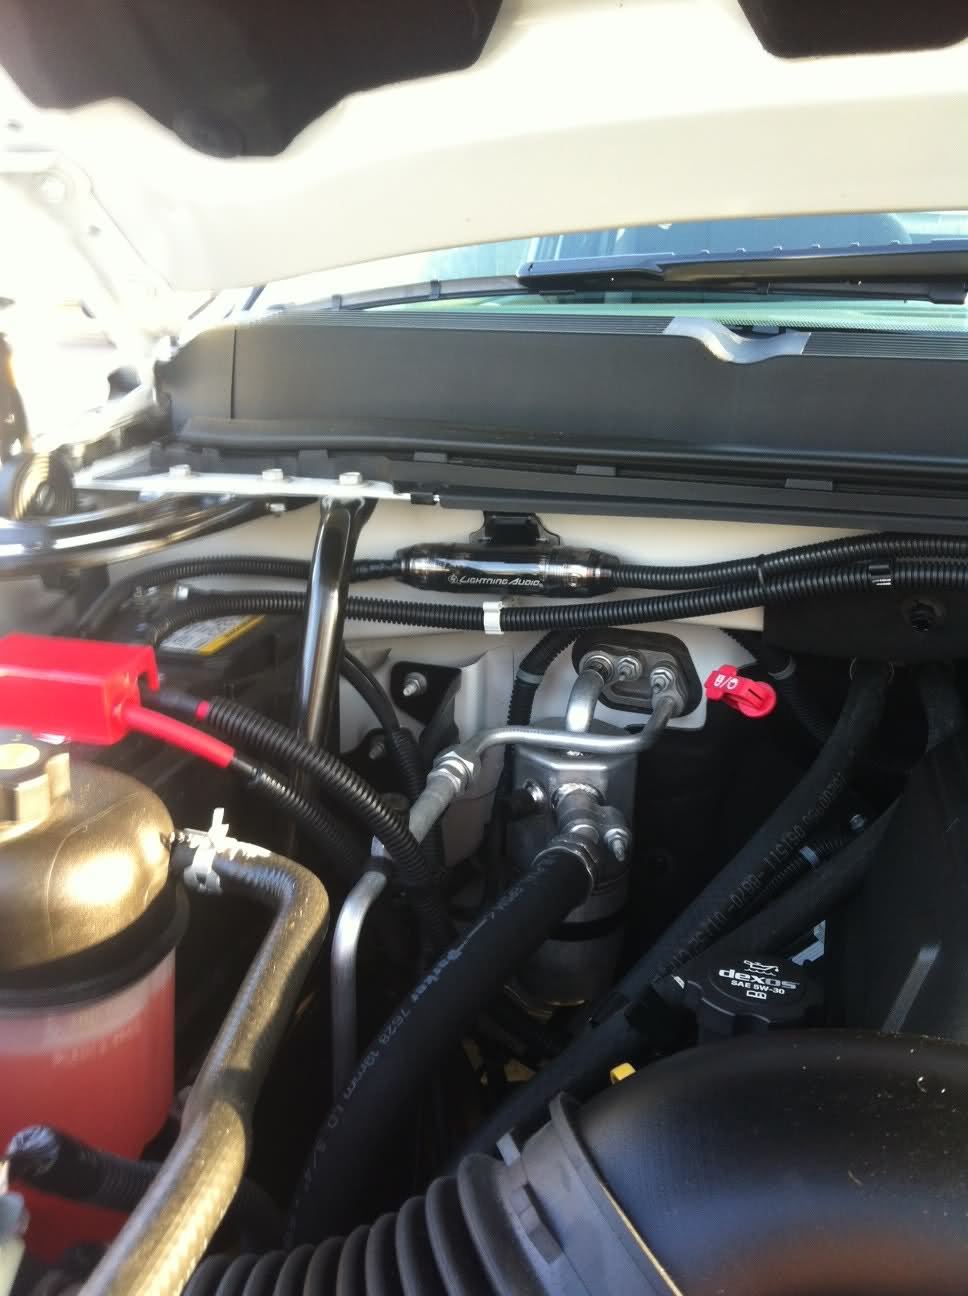
An overall look at the wire
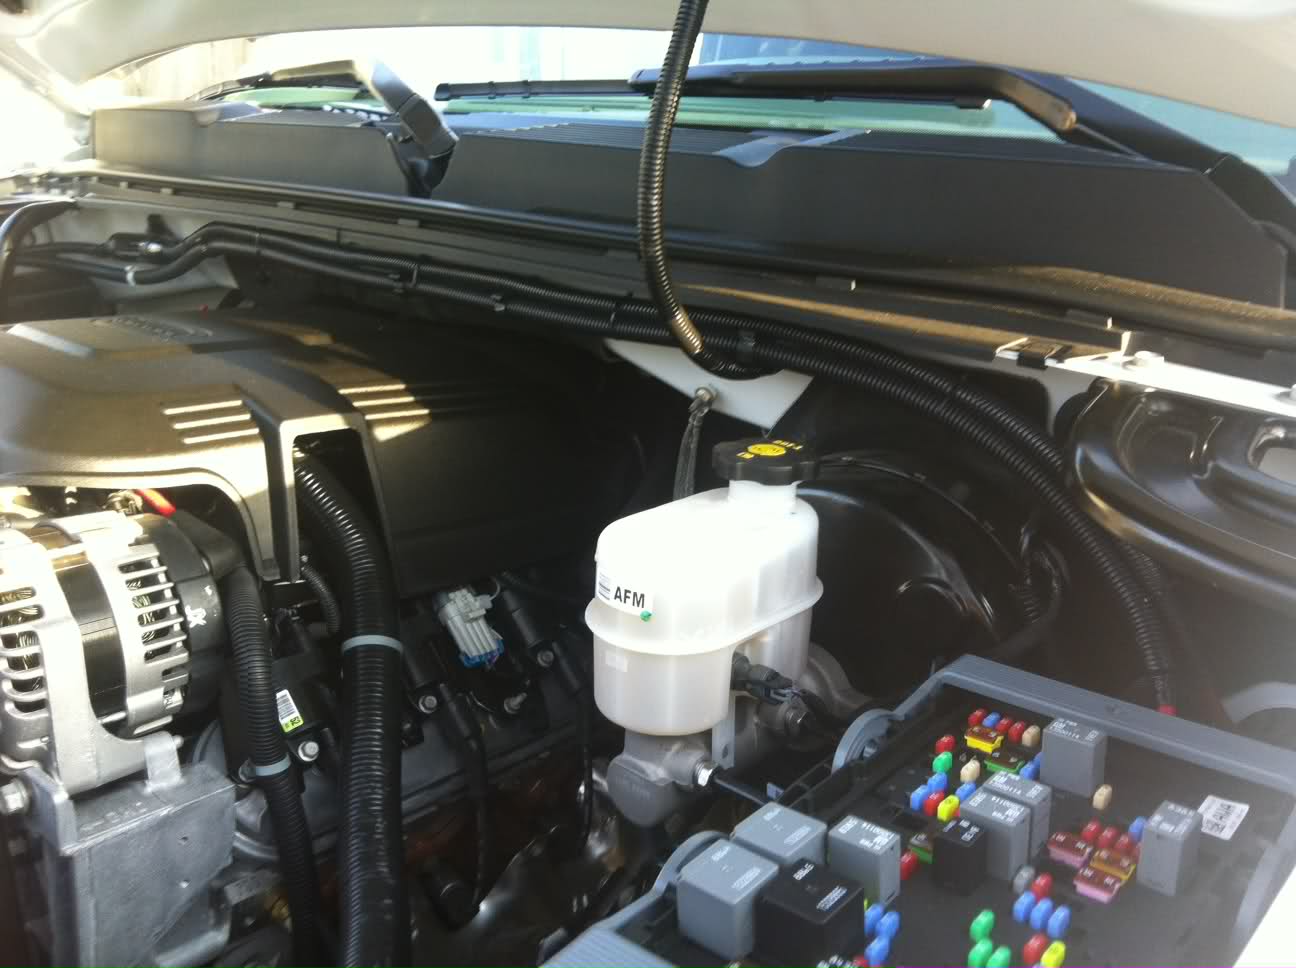
Take a step back and admire your work. The dealer would have a hard time finding anything out of place here. J
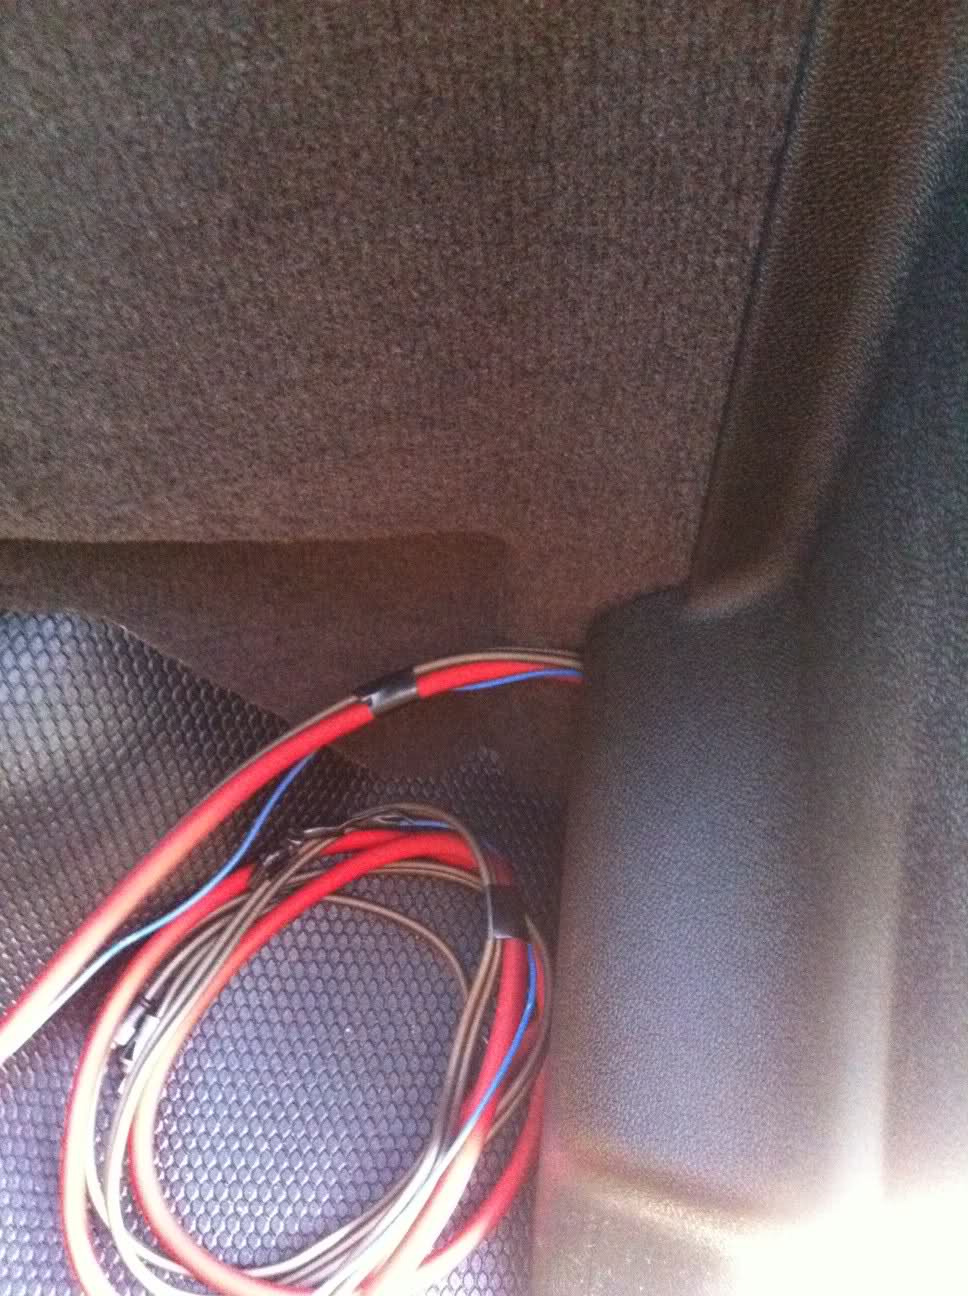
Now it’s time to run the wires to the rear. I’m using quality wires, but if I get any interference I’ll separate the wires and run the RCA’s down the passenger side. Yes I know my truck is dirty!
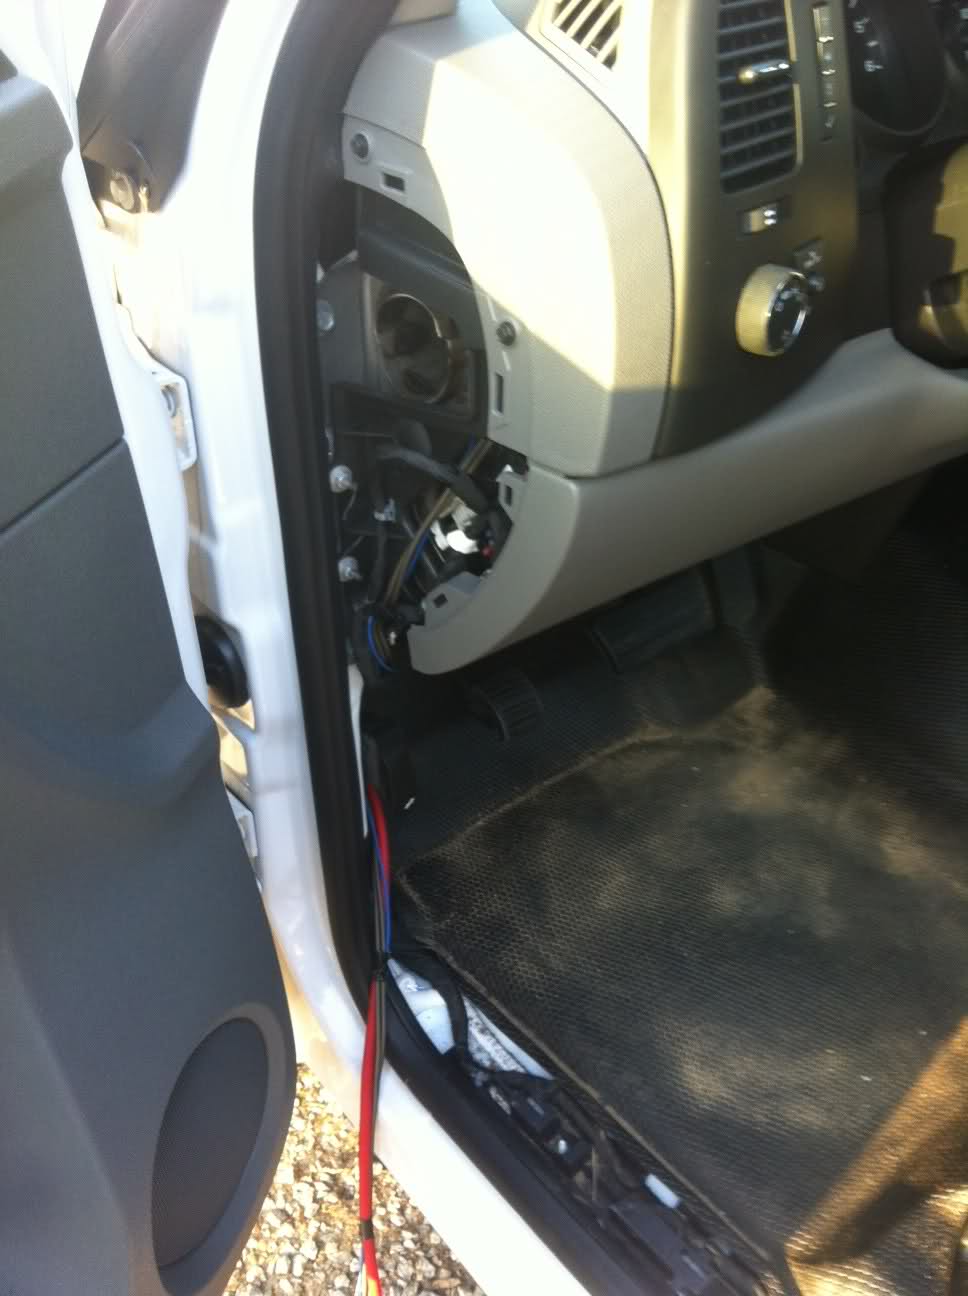
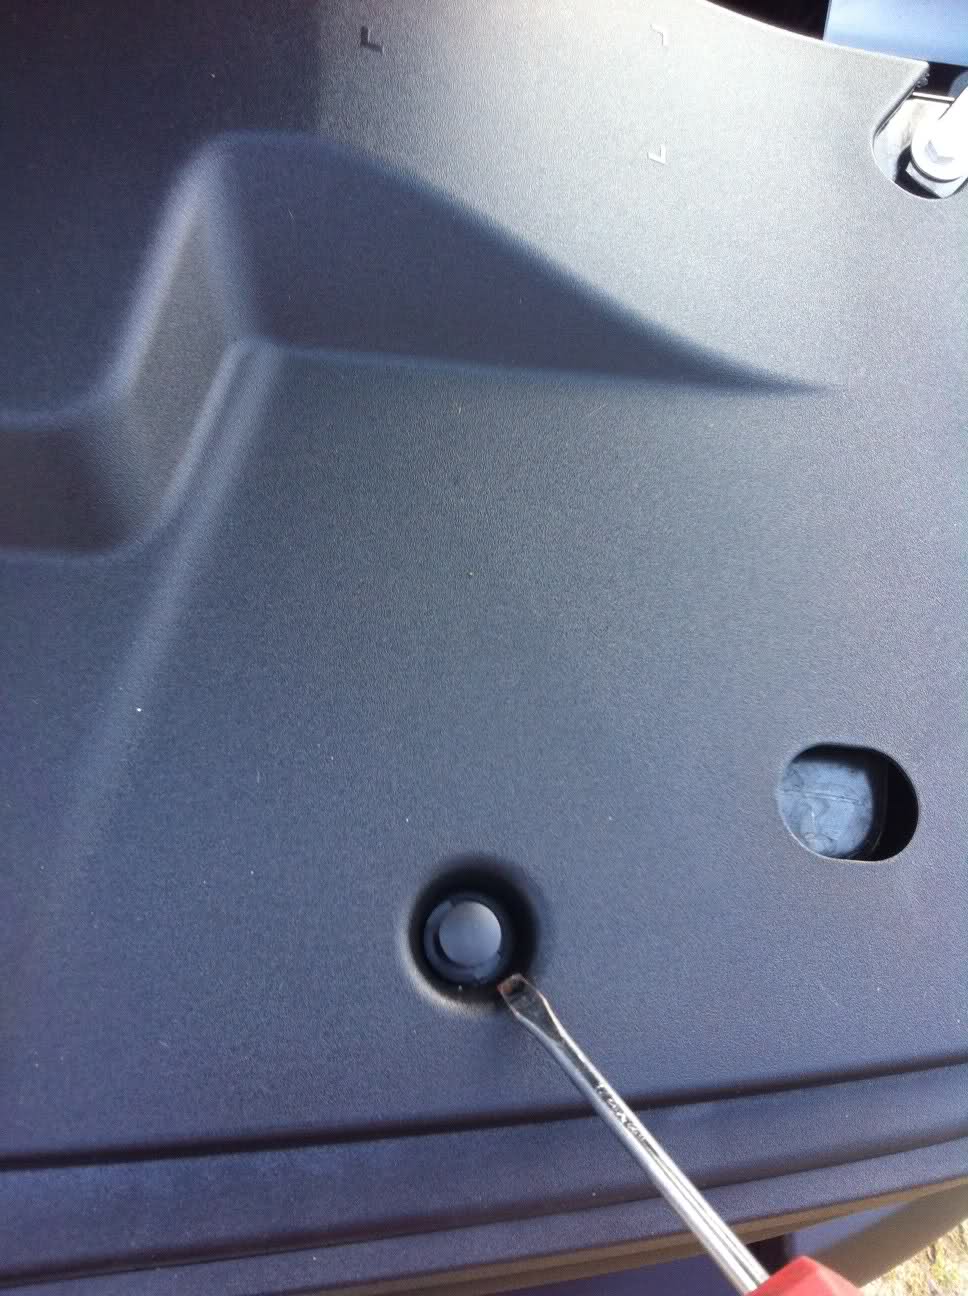
Next the wires get installed into the pre existing channel in the rail.
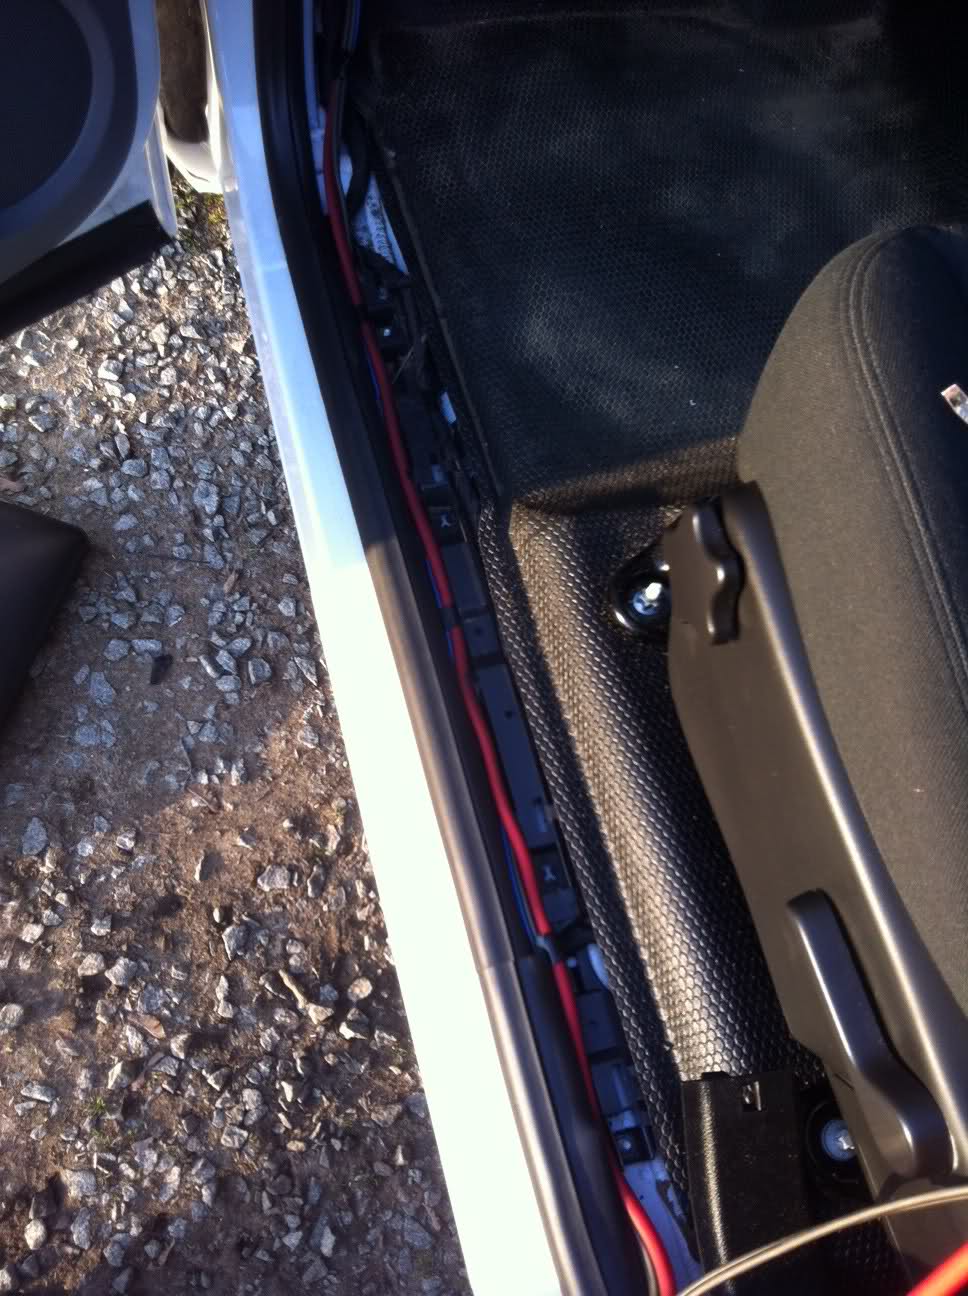
There is plenty of room for the wires to exit out the back of the rear plastic. Don’t try and pry up on the plastic, pull it off and do it the right way, you don’t want to ruin your wires or plastics.
Pretty easy to do and if you take your time you can make it look pretty sharp. I get my box tomorrow, and then the real fun begins!!!!
Here is what I did today
Let me start out by saying none of the wires are HOT at any point of time! Powering it up will be the very last step in my instillation.
Well guys I got around to installing the power wire for the amps today. I went 4 gauge wire and a 100 amp fuse. I started off fishing the wire through the firewall, what a real PIA that was. I made a small slit in the boot and ran a plastic coated wire hanger through the boot. I then taped the wire to the hanger and proceeded to pull it though. After about 6 times of pulling it through and losing the wire I decided it was time for a little help. This time I would pull while I had a friend push the wire and I managed to get it through.
Here is where I fished it through. Be careful and don’t cut any wires or get too sh*tty with it. Last thing you want to do is screw some wiring up.
I then went to town under the hood. First I picked a good spot to mount the fuse. Once that is figured out you can get a rough idea of how much wire to you’ll need to pull through. Pull extra now and you can get rid of it later. I work from the battery to the back. Working this way allows you to take all the slack back through the firewall without cutting the wire.
Here is a pic of the wire mounted to the battery. The battery has a mega fuse on it for protection, I chose to connect before the fuse as my line will be fused and I’m sure I would blow it and be left stranded somewhere. I simply notched the plastic cover that protects the positive terminal.
Next I hooked the fuse up, and pulled the excess wire back into the cab. Now that I have my exact length determined I can work on making it look pretty. I chose to run the wires parallel to the main power wire running to the fuse box. I zip tied it and taped the ends all up.
Here is the fuse
An overall look at the wire
Take a step back and admire your work. The dealer would have a hard time finding anything out of place here. J
Now it’s time to run the wires to the rear. I’m using quality wires, but if I get any interference I’ll separate the wires and run the RCA’s down the passenger side. Yes I know my truck is dirty!
Next the wires get installed into the pre existing channel in the rail.
There is plenty of room for the wires to exit out the back of the rear plastic. Don’t try and pry up on the plastic, pull it off and do it the right way, you don’t want to ruin your wires or plastics.
Pretty easy to do and if you take your time you can make it look pretty sharp. I get my box tomorrow, and then the real fun begins!!!!
Here is the fog light install. These were all written and posted in a GM forum.
Hey Guys,
I searched the web and couldn’t find much on the install of fog lights on the NBS Silverado. I installed mine today and took a couple pics of the process. I ordered the kit from gmpartsdirect.com. It was around $350 shipped, and took 2 ½ weeks to arrive. Here is my install: 2011 Silverado
The before product.
First step is to remove the top shroud. If you take a small flat head screw driver and pop the inner ring up on the rivet you can remove them. Take your time and you won’t scratch anything.
All the rivets popped up and ready to remove. Start on one end and slowly pull the rivets out. Make sure you have a container to put them in.
Once the top shroud is removed you expose the 4 10mm bolts that hold the grill on. This is the right bolt.
Here is a pic of the middle two. There is also one on the left.
Once the 4 bolts are removed there are 6 clips that hold the grill on. 4 in the middle and 1 on either end. Start at either end and take a pair of plires and squeeze the clips while pulling the grill out. Work your way across the grill until all clips are free. Take care with this as I can see these clips breaking.
Once the grill is free there are 5 rivets that are holding a protective flap. I used a scraper to cut the rivet heads off. I tried to pull them, but it is much easier to just cut the heads off and get new ones. There are three in the center and one on both ends. I picked up a box of 15 for $5 at Advance auto to replace these.
The grill gone!
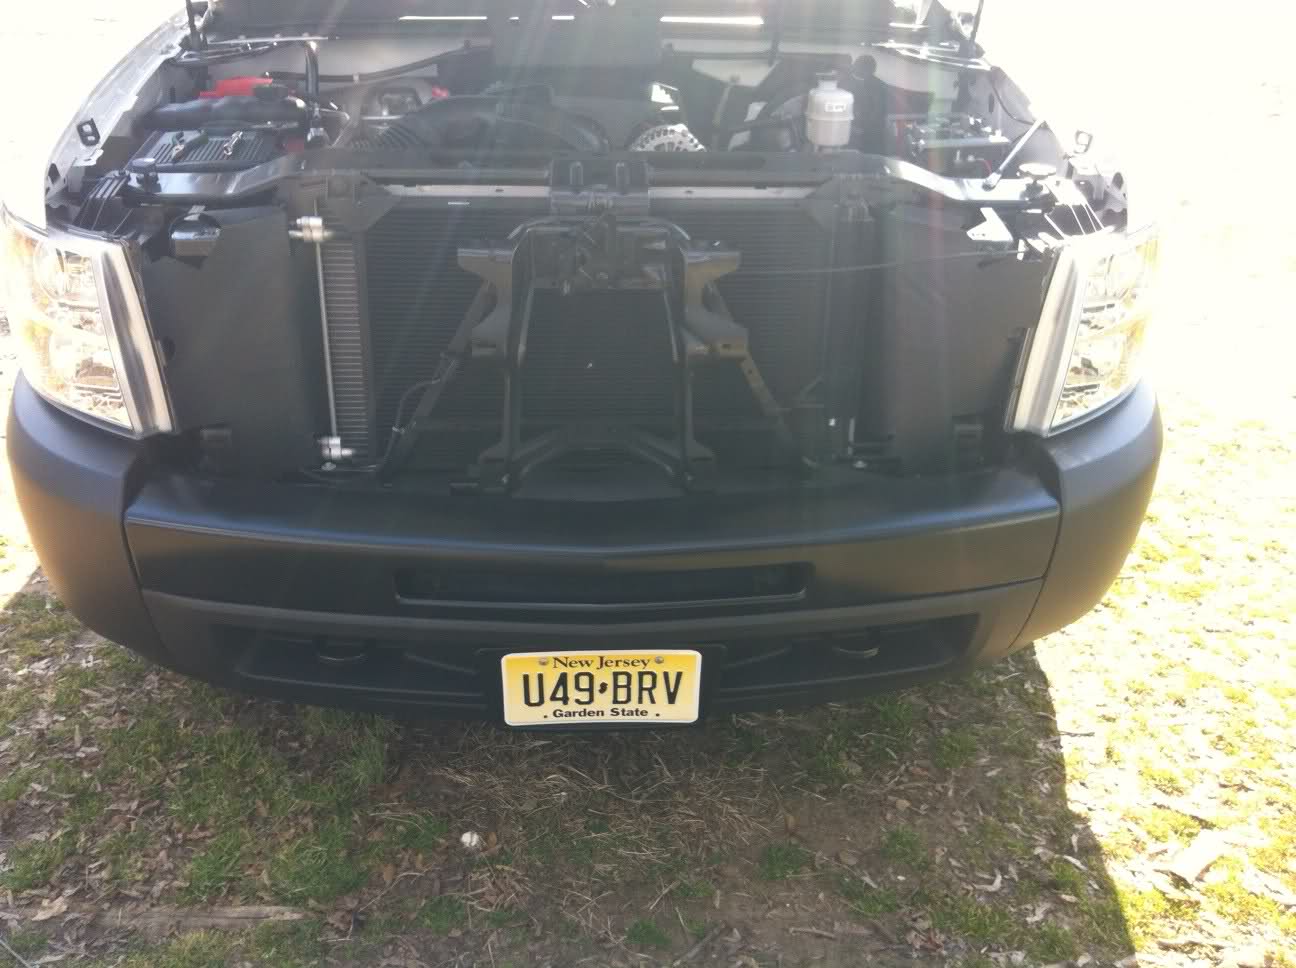
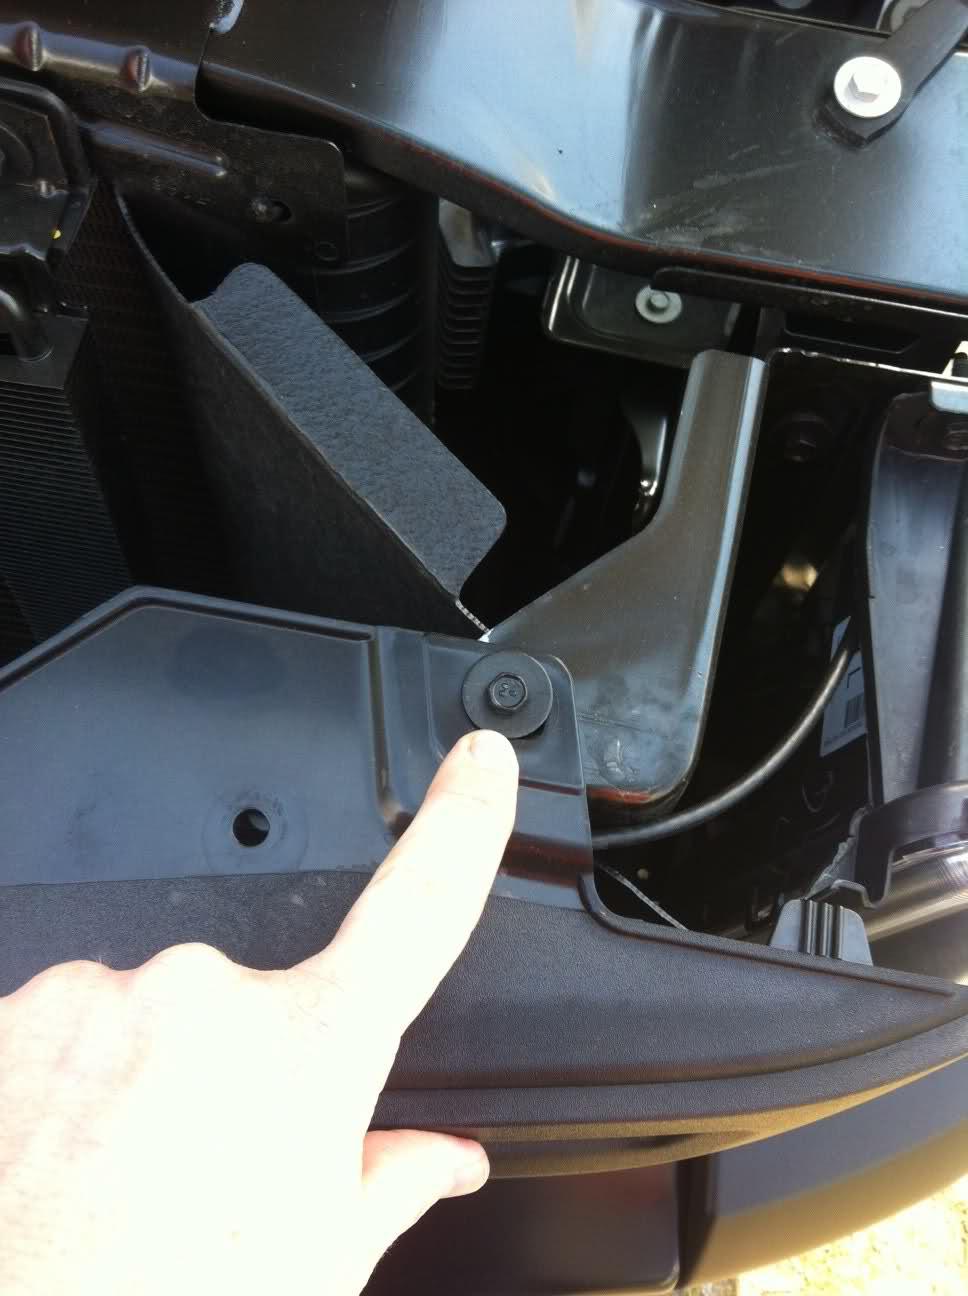
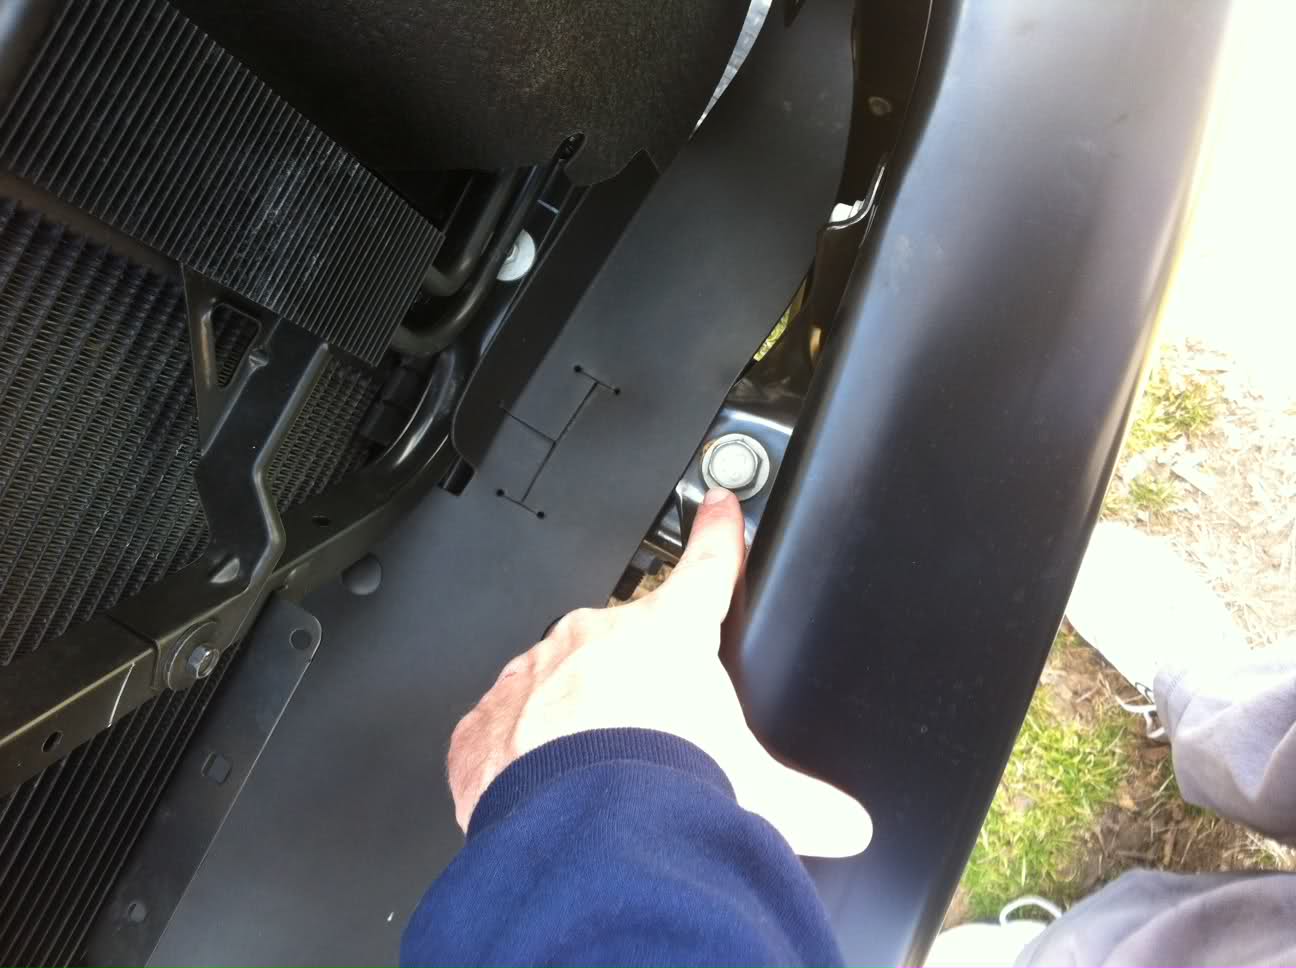
Once the grill is off it’s time to remove the bumper. There are 4 bolts that hold it on. 2 are visable from the top and 2 from the bottom. I was doing the job by myself so I chose to remove the bottom bolts first. I didn’t want the bumper falling on me when I removed them.

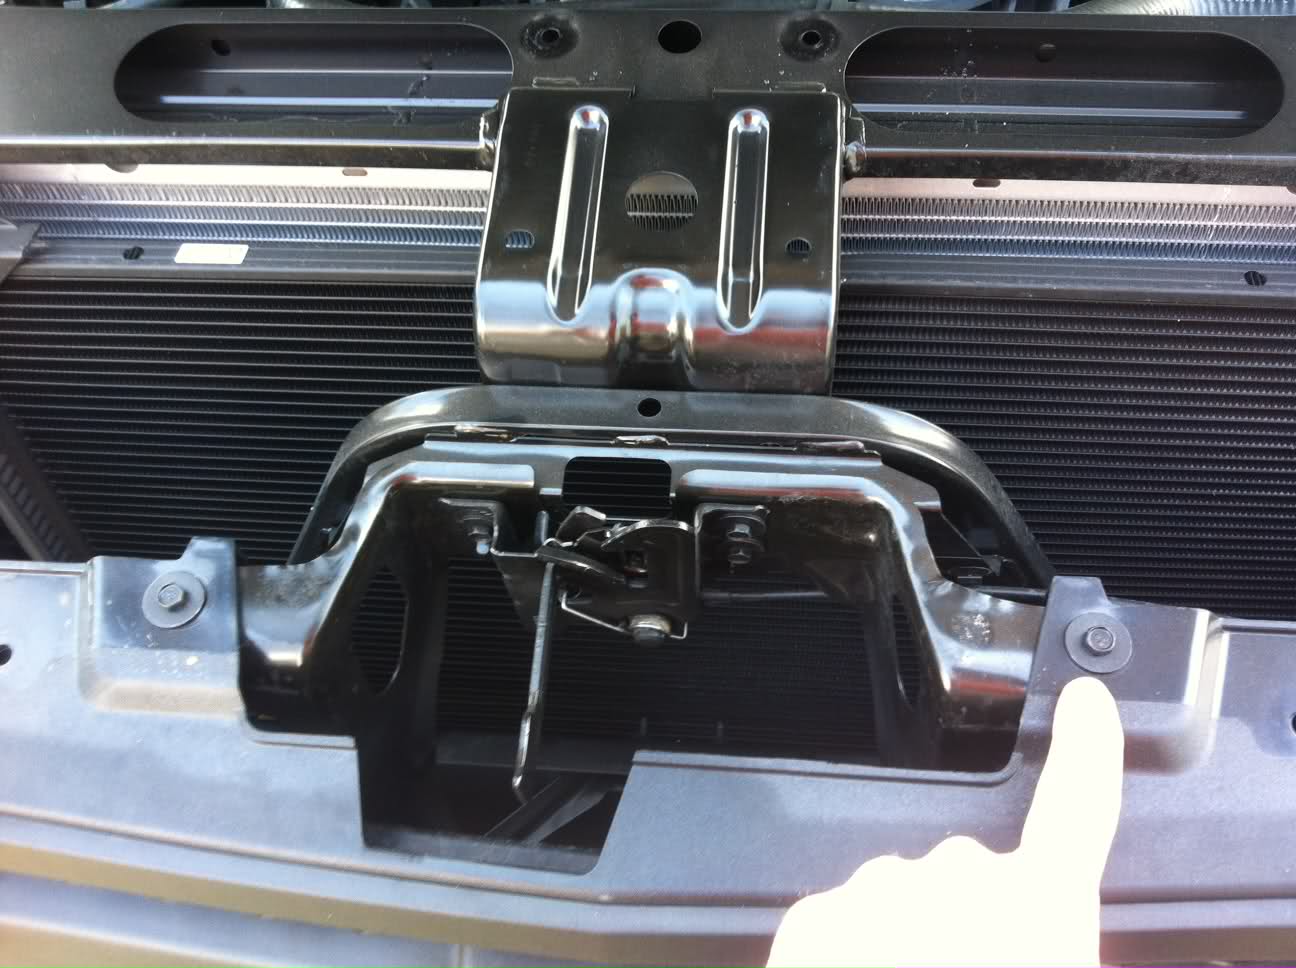
Once those were removed I pulled the two up top bolts. Take care here, when you remove the last bolt the bumper is free. Pull it straight out, It’s light enough for one to handle, but it is still a big awkward piece that you don’t want to scratch.
Hey Guys,
I searched the web and couldn’t find much on the install of fog lights on the NBS Silverado. I installed mine today and took a couple pics of the process. I ordered the kit from gmpartsdirect.com. It was around $350 shipped, and took 2 ½ weeks to arrive. Here is my install: 2011 Silverado
The before product.
First step is to remove the top shroud. If you take a small flat head screw driver and pop the inner ring up on the rivet you can remove them. Take your time and you won’t scratch anything.
All the rivets popped up and ready to remove. Start on one end and slowly pull the rivets out. Make sure you have a container to put them in.
Once the top shroud is removed you expose the 4 10mm bolts that hold the grill on. This is the right bolt.
Here is a pic of the middle two. There is also one on the left.
Once the 4 bolts are removed there are 6 clips that hold the grill on. 4 in the middle and 1 on either end. Start at either end and take a pair of plires and squeeze the clips while pulling the grill out. Work your way across the grill until all clips are free. Take care with this as I can see these clips breaking.
Once the grill is free there are 5 rivets that are holding a protective flap. I used a scraper to cut the rivet heads off. I tried to pull them, but it is much easier to just cut the heads off and get new ones. There are three in the center and one on both ends. I picked up a box of 15 for $5 at Advance auto to replace these.
The grill gone!
Once the grill is off it’s time to remove the bumper. There are 4 bolts that hold it on. 2 are visable from the top and 2 from the bottom. I was doing the job by myself so I chose to remove the bottom bolts first. I didn’t want the bumper falling on me when I removed them.
Once those were removed I pulled the two up top bolts. Take care here, when you remove the last bolt the bumper is free. Pull it straight out, It’s light enough for one to handle, but it is still a big awkward piece that you don’t want to scratch.
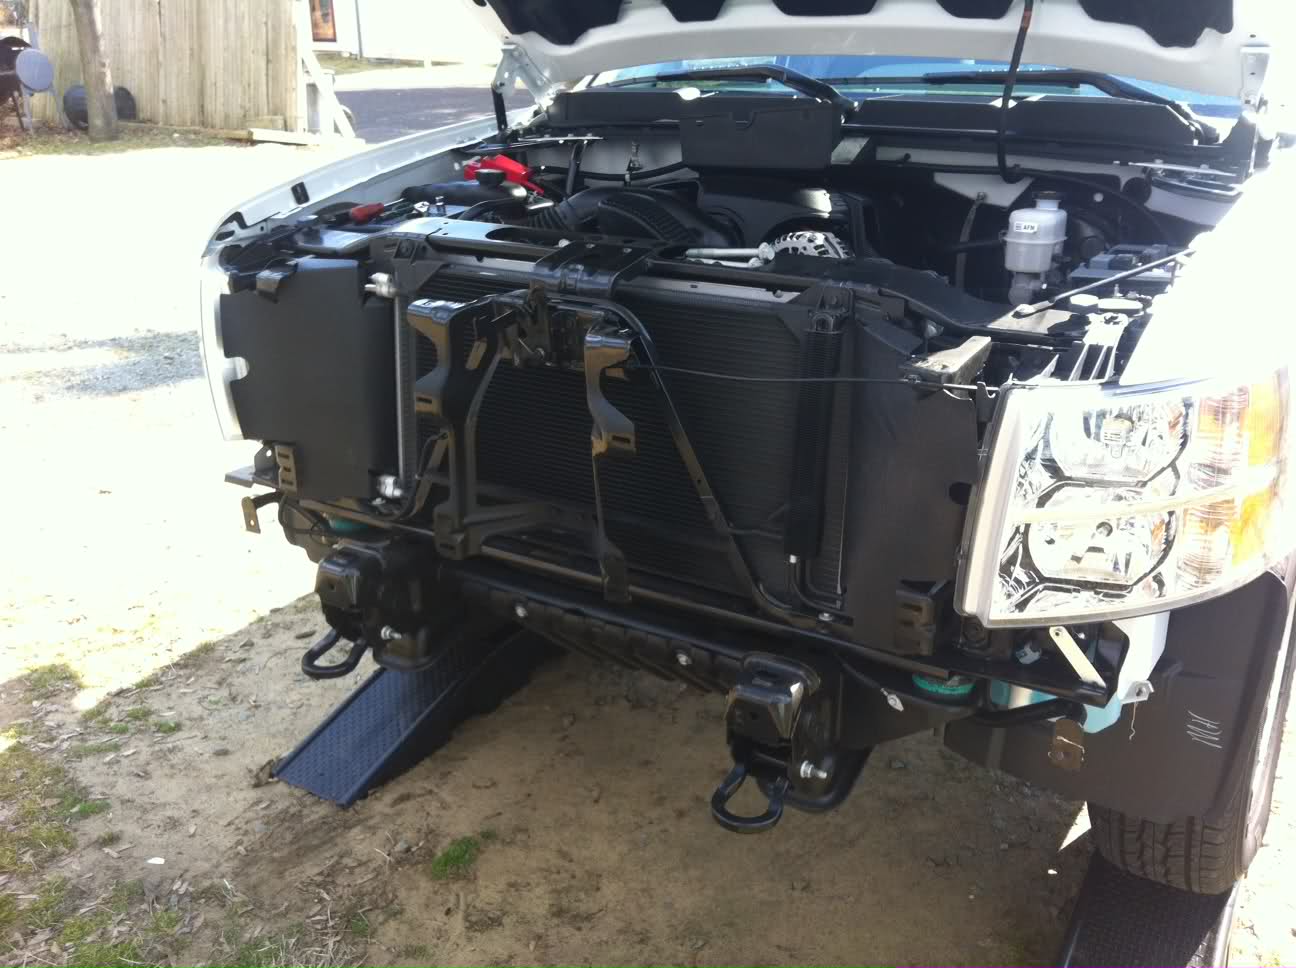
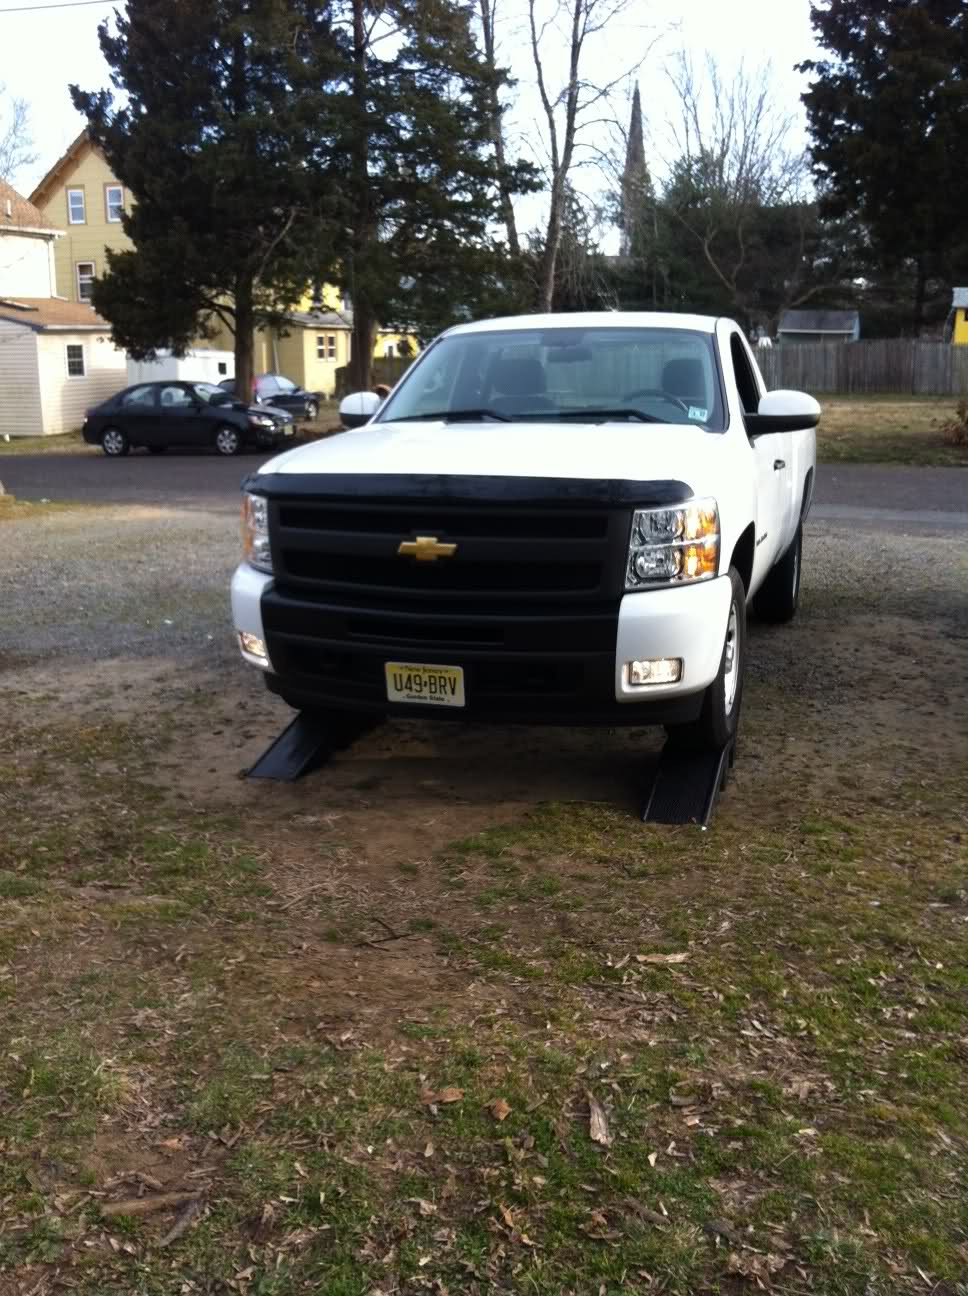
The front removed. I cringe when I see my new truck like this! J
I didn’t take a lot of pics of the conversion as the directions covered it pretty well. You do have to remove these two white rivets from the old piece so take care while pushing them out. I wish they would have included a new set, but they didn’t. You’ll want to compare the old cap with the new and remove the metal bolt clips and reuse them on the new cap. This process went pretty easy. I left the protective film on the new paint incase I scratched it.

There are also 3 rivets that need to be cut on the new caps. I used scraper as well and took care not to scratch anything.
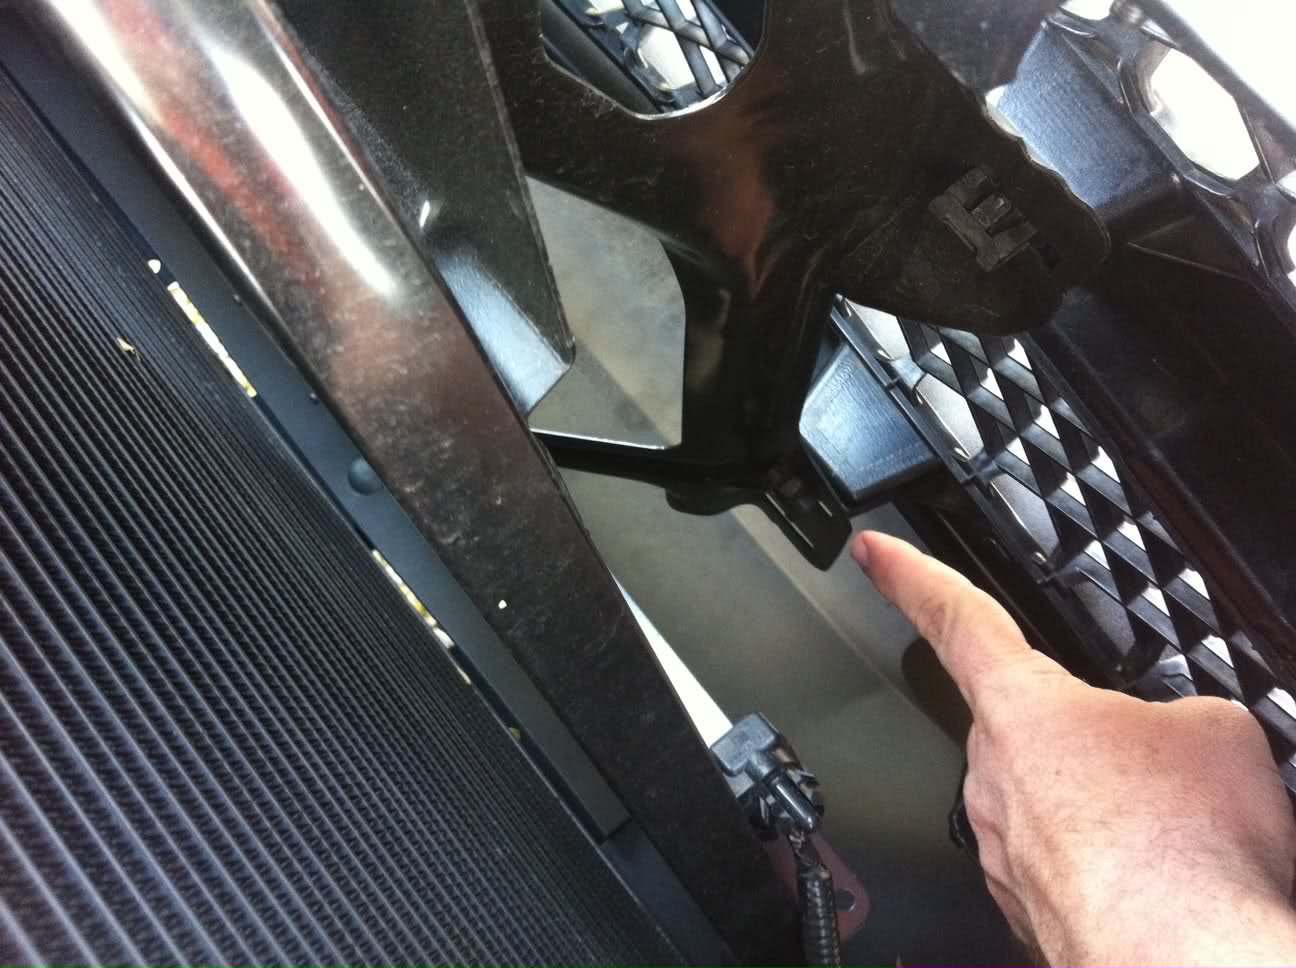
Once the new color coded caps were installed I put the fog lights in. Take note to install these metal clips BEFORE you install the lights in the caps. Don’t ask me how I know! PS It’s a real PIA to take the lights out once installed!
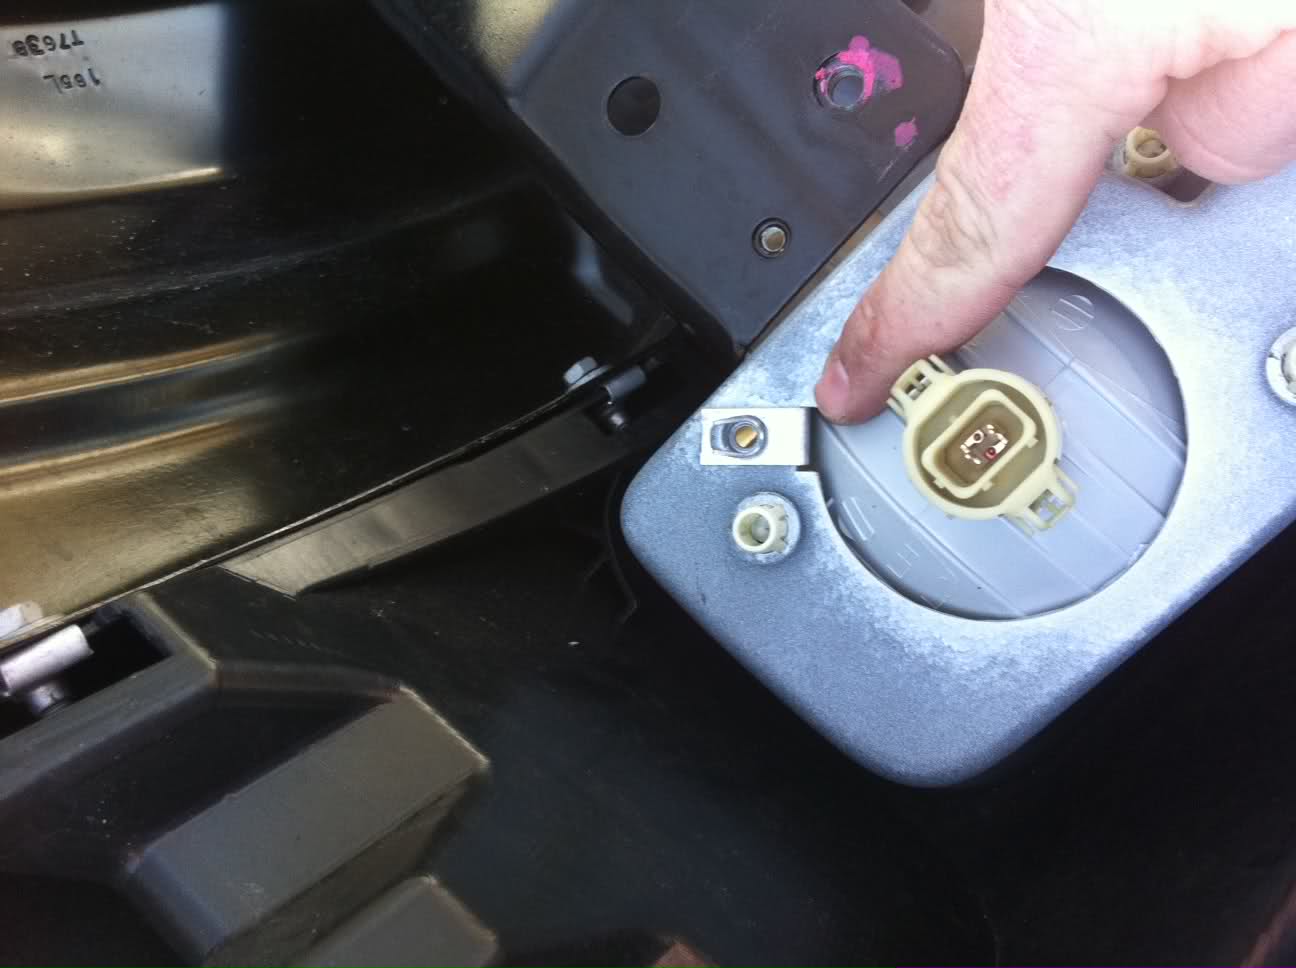
Here is how the new bracket is placed.
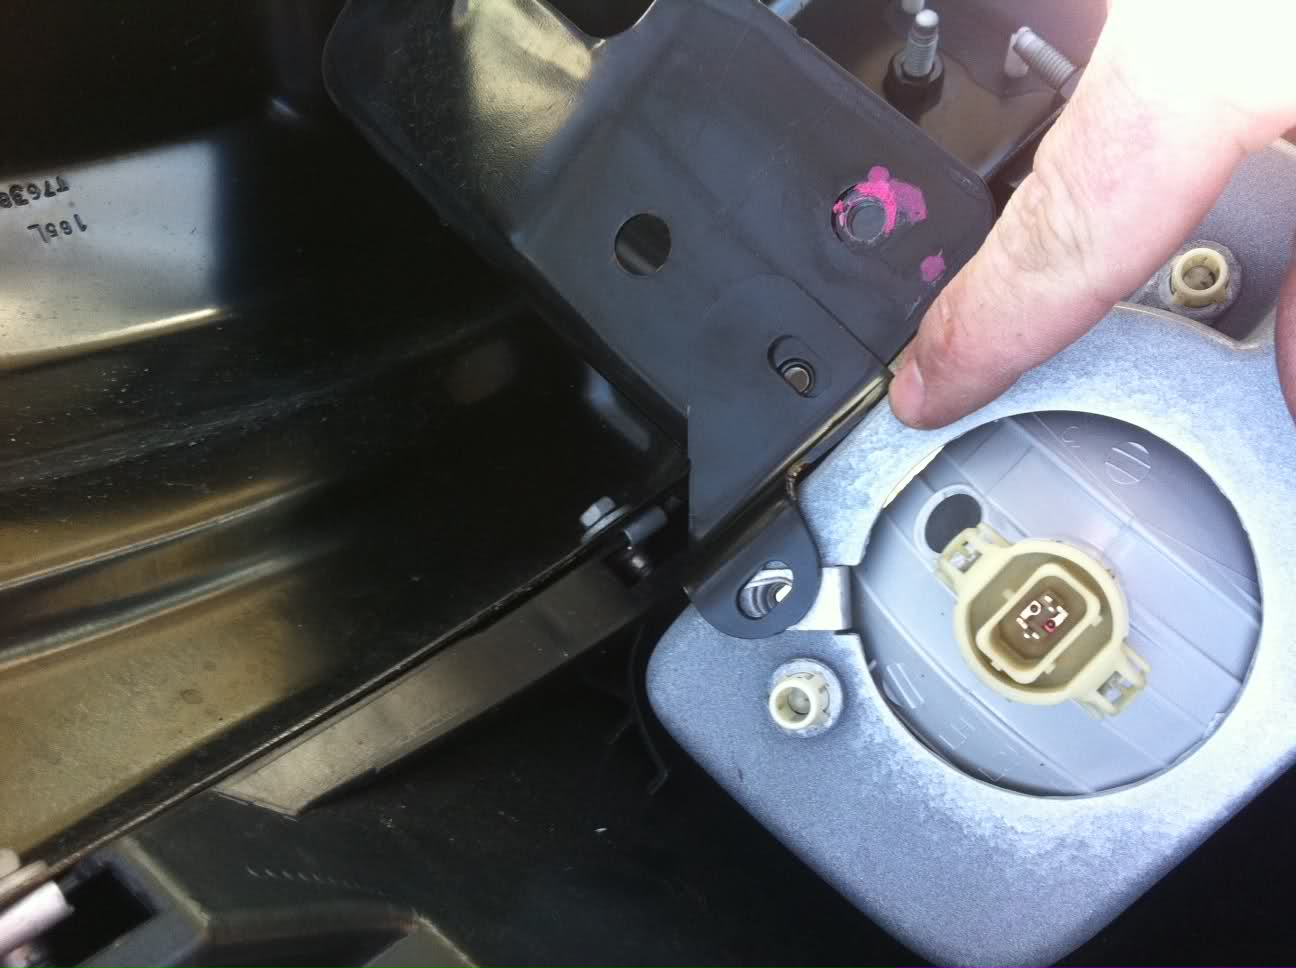
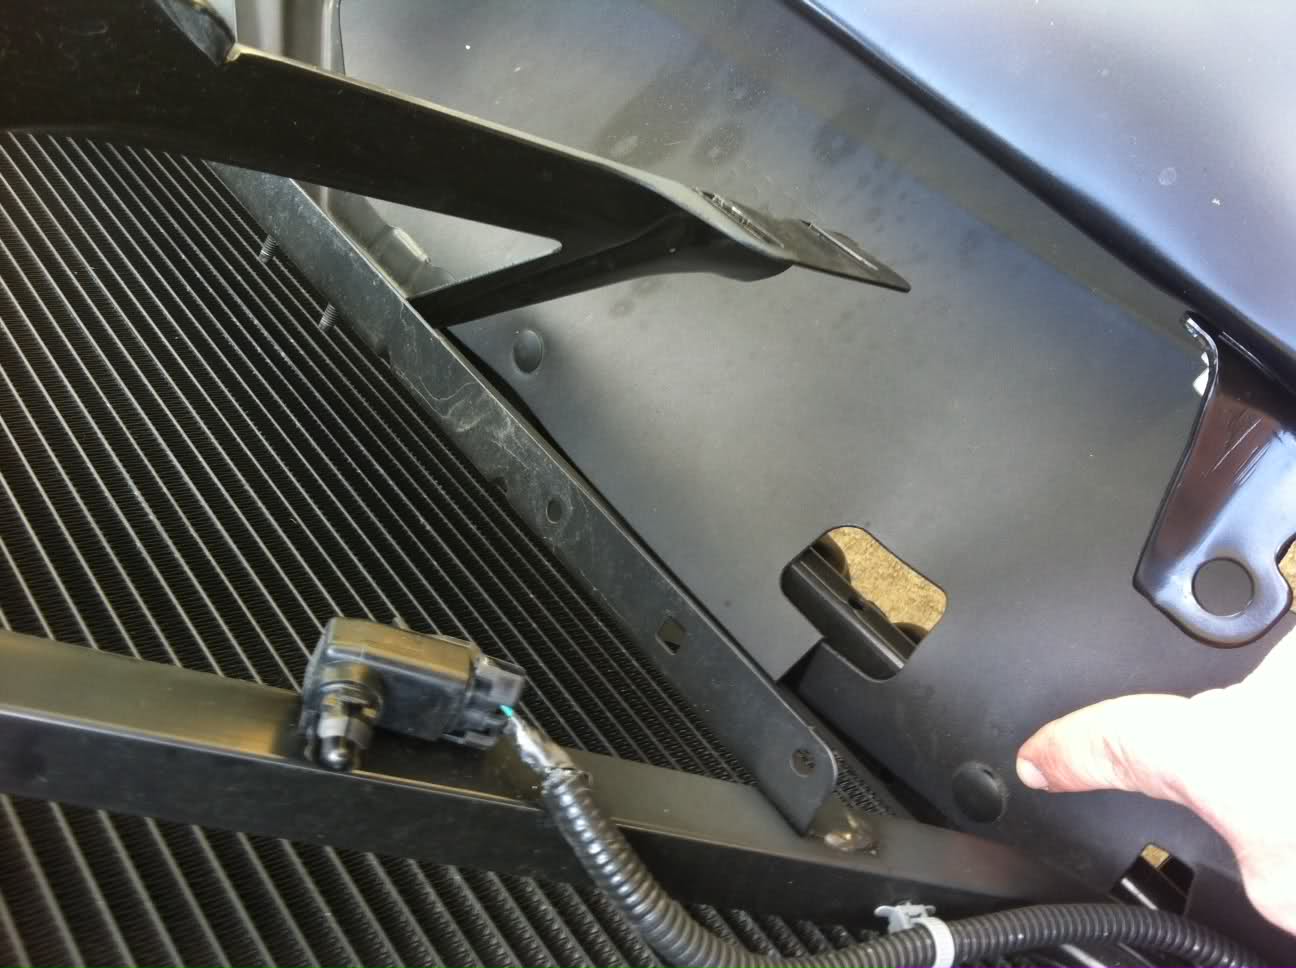
Once the lights are in simply trace your steps back and install the bumper and grill
TIME TO WIRE!
Normally I would call this a 4 beer job, but since I was dealing with the fuse panel and important wiring I chose to stay sober.
Fuse panel that is located under the hood on the driver side. I have removed the cover in this pic.
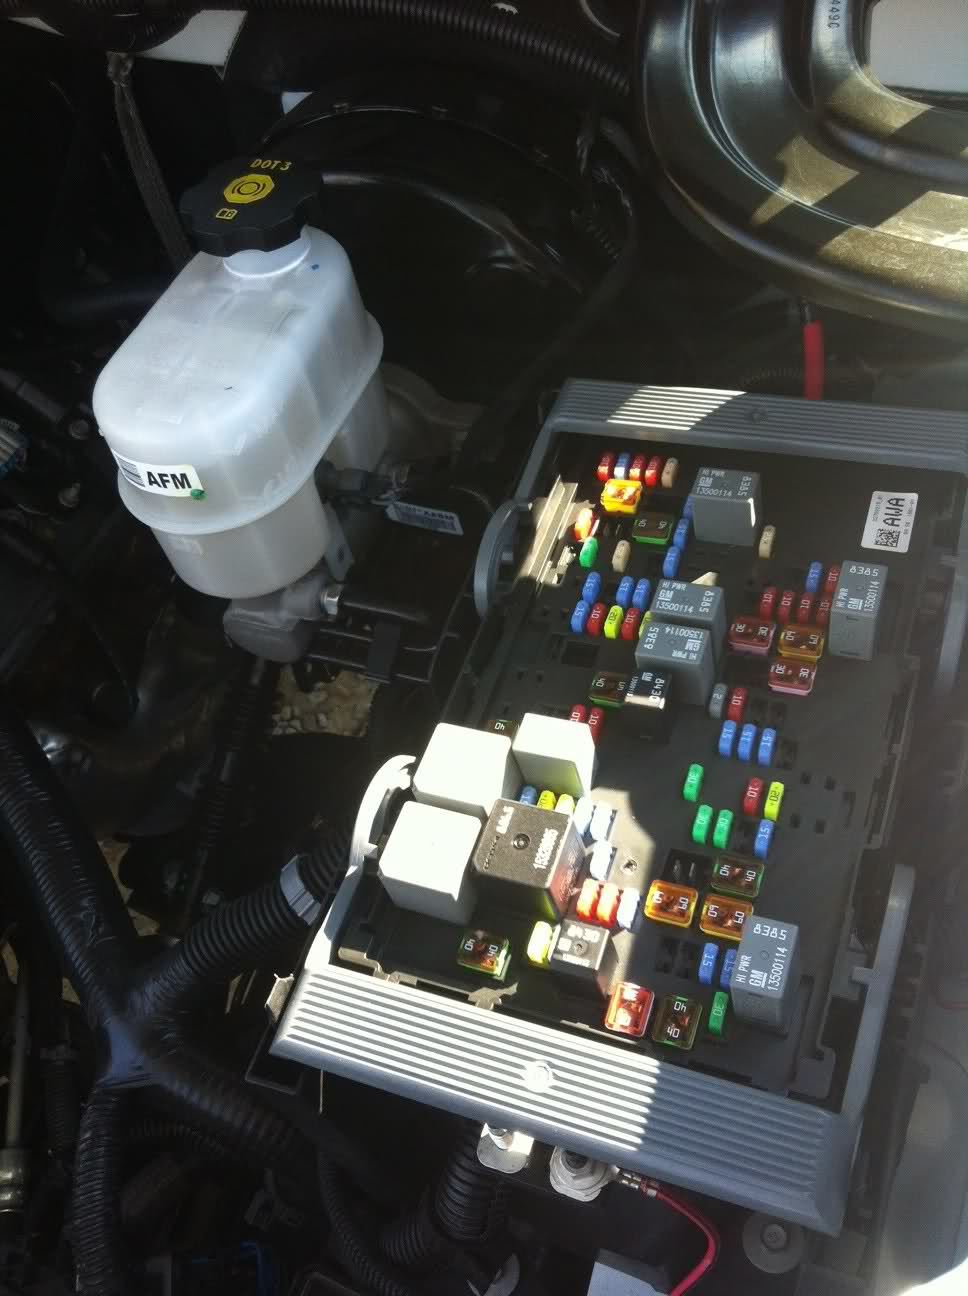
The fuse panel has two handles on it. One on either end. You simply pull up on these handles to remove top portion of the box. Once removed you expose the blocks that you will need to wire the lights. At this point I took a good ½ hour to double check the wiring with the directions. You need to pop the grey block that is closest to the front and passenger side. It has 4 clips that hold it on, two on either side. Use a small screwdriver and release the block.
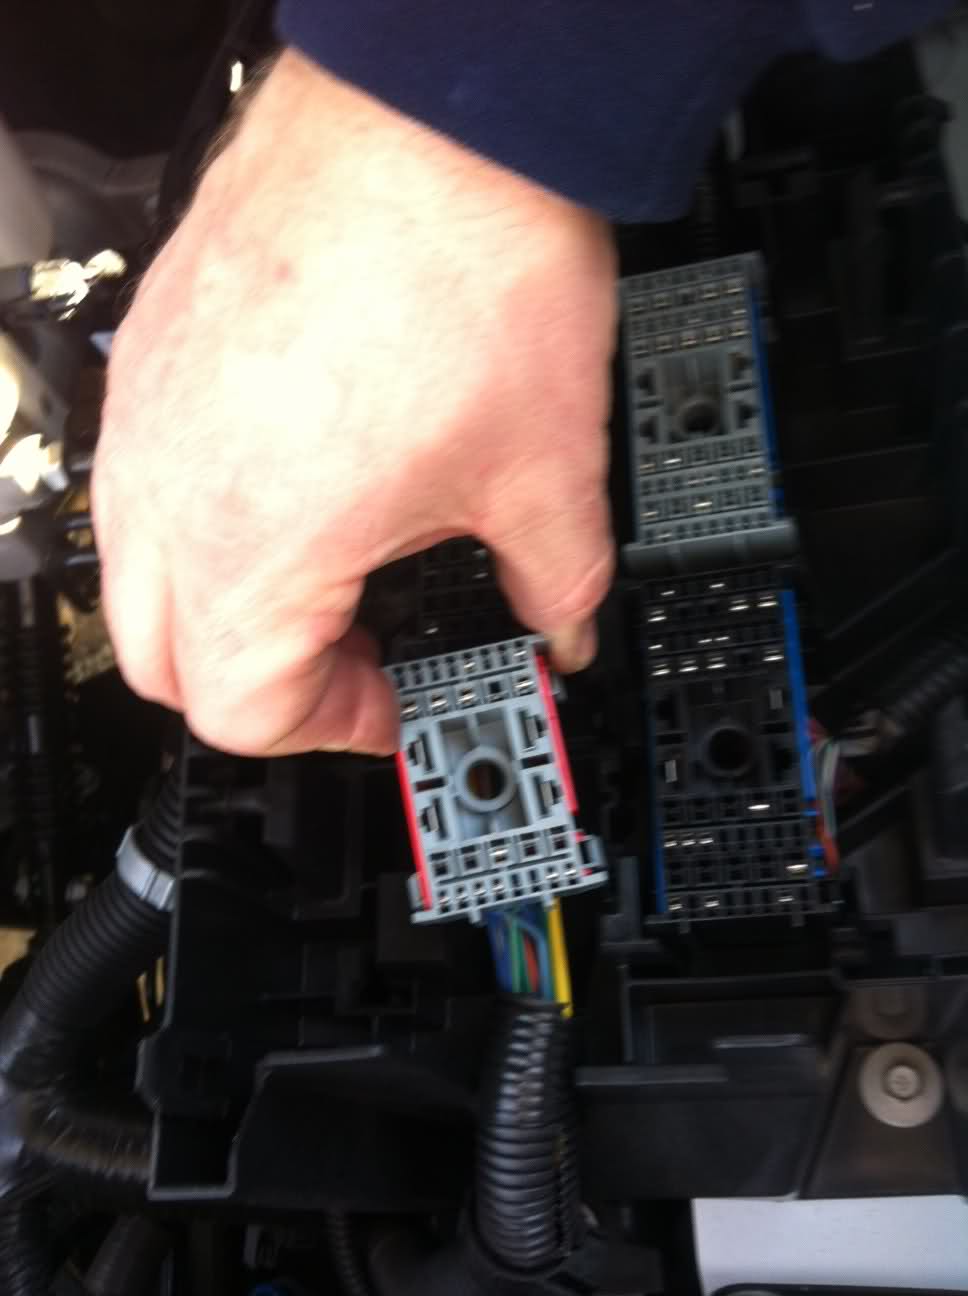
Here is where the new pin will be installed.
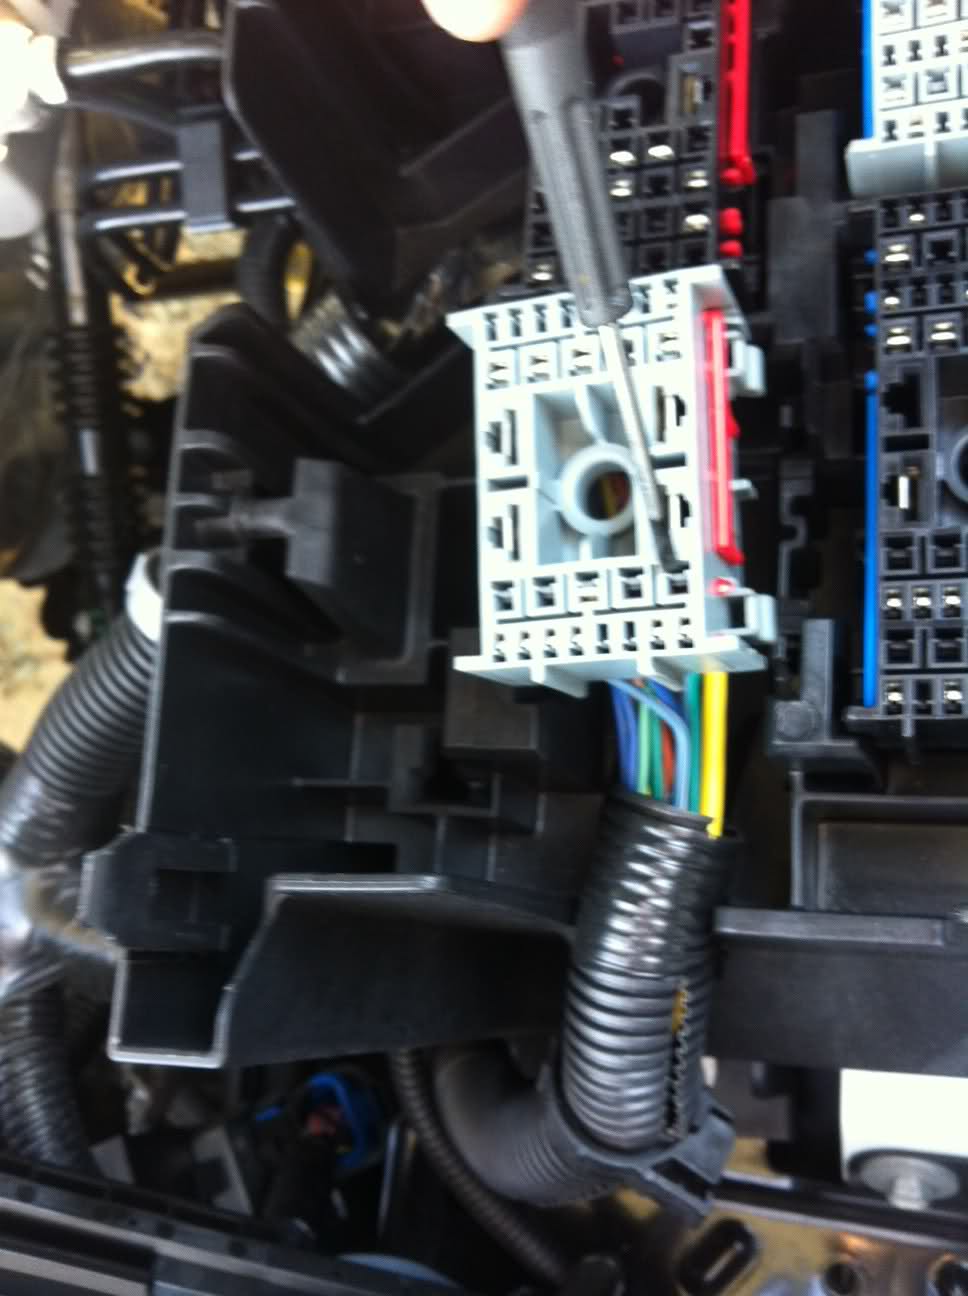
To install you must pull this red clip out enough to insert the new pin. Careful as the is what holds all the pins in place!
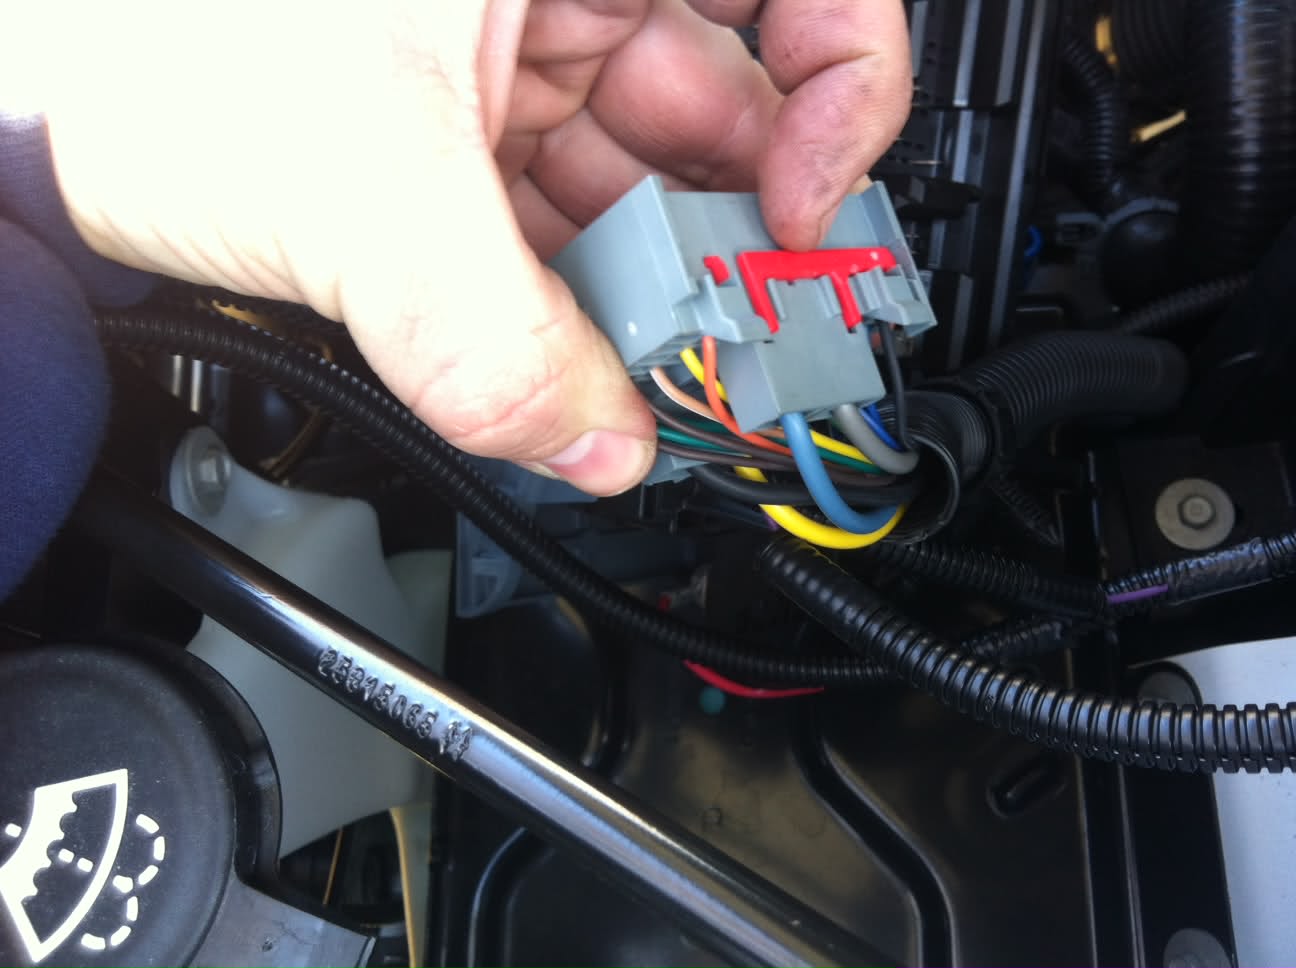
At this point you reinstall the block and then the top fuse panel.
I didn’t take pics of how I routed my wires as it’s pretty straight forward. You will need to install the new light switch which is a piece of cake as well. If you need a how too on that let me know.
Here is the finished product!!!!!!!!!!!!!!!!!!!!
I didn’t take a lot of pics of the conversion as the directions covered it pretty well. You do have to remove these two white rivets from the old piece so take care while pushing them out. I wish they would have included a new set, but they didn’t. You’ll want to compare the old cap with the new and remove the metal bolt clips and reuse them on the new cap. This process went pretty easy. I left the protective film on the new paint incase I scratched it.
There are also 3 rivets that need to be cut on the new caps. I used scraper as well and took care not to scratch anything.
Once the new color coded caps were installed I put the fog lights in. Take note to install these metal clips BEFORE you install the lights in the caps. Don’t ask me how I know! PS It’s a real PIA to take the lights out once installed!
Here is how the new bracket is placed.
Once the lights are in simply trace your steps back and install the bumper and grill
TIME TO WIRE!
Normally I would call this a 4 beer job, but since I was dealing with the fuse panel and important wiring I chose to stay sober.
Fuse panel that is located under the hood on the driver side. I have removed the cover in this pic.
The fuse panel has two handles on it. One on either end. You simply pull up on these handles to remove top portion of the box. Once removed you expose the blocks that you will need to wire the lights. At this point I took a good ½ hour to double check the wiring with the directions. You need to pop the grey block that is closest to the front and passenger side. It has 4 clips that hold it on, two on either side. Use a small screwdriver and release the block.
Here is where the new pin will be installed.
To install you must pull this red clip out enough to insert the new pin. Careful as the is what holds all the pins in place!
At this point you reinstall the block and then the top fuse panel.
I didn’t take pics of how I routed my wires as it’s pretty straight forward. You will need to install the new light switch which is a piece of cake as well. If you need a how too on that let me know.
Here is the finished product!!!!!!!!!!!!!!!!!!!!
Nice. I'm doing the same in my truck right now.
Does that void your warranty?
It depends on what the warranty service is for. It is up to the MFG to prove that anything you did caused the problem. I'm pretty meticulous with what I do so I have no problem getting in the dealers face if there is a problem
It depends on what the warranty service is for. It is up to the MFG to prove that anything you did caused the problem. I'm pretty meticulous with what I do so I have no problem getting in the dealers face if there is a problem
Gotcha. What are you putting in there for a system?
This is coppied from the GM site.
Hey guys,
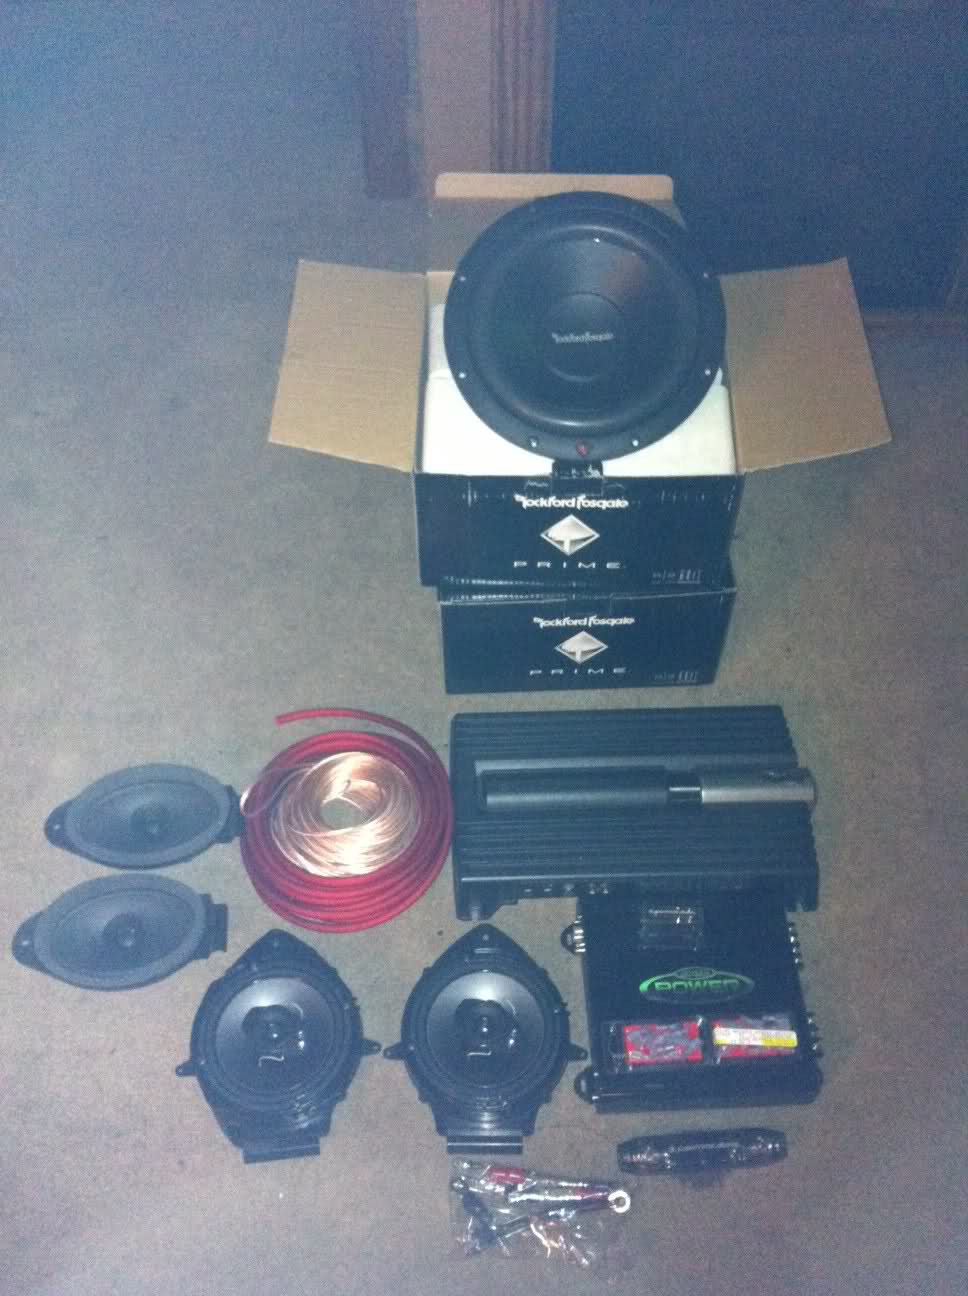
Well it's time for the next upgrade. I just ordered the rest of my sound system install. Here's what I have:
Pioneer 4x6 for the rears
Pioneer 6.5 for the doors
Jensen 400 watt amp powering the front and rears
Custom 10inch box from subthump
2 10inch Rockford Fosgate R2D4-10 Prime
Sony XM-ZR 1252 800 watt to power the subs.
PAC GM1416 harness
This will all be wired to the factory radio. I'll take lots of pics and do a tutorial if anyone is interested.
Hey guys,
Well it's time for the next upgrade. I just ordered the rest of my sound system install. Here's what I have:
Pioneer 4x6 for the rears
Pioneer 6.5 for the doors
Jensen 400 watt amp powering the front and rears
Custom 10inch box from subthump
2 10inch Rockford Fosgate R2D4-10 Prime
Sony XM-ZR 1252 800 watt to power the subs.
PAC GM1416 harness
This will all be wired to the factory radio. I'll take lots of pics and do a tutorial if anyone is interested.
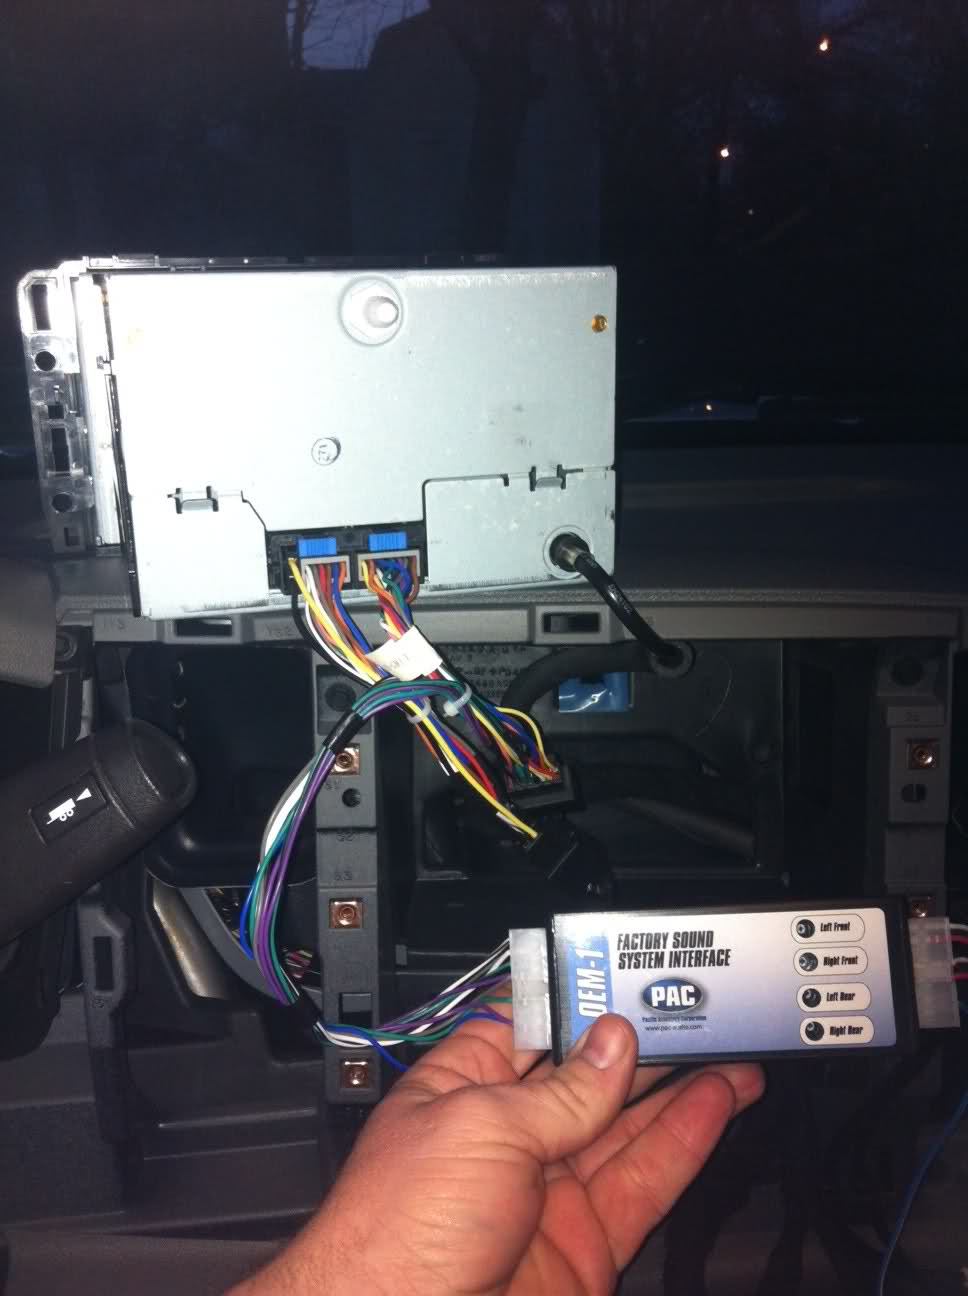
Here is the PAC install. Once again only for the chevy guys.
I got a few goodies in today so I decided to start my sound system upgrade. My PAC module came in so I thought why not install it. The good thing with the PAC is you can install it and your speakers will still work. You can pick and choose which speakers you want to amp, front-back- or both.
Here is what I’m installing. The 4x6’s are the stock ones, as I already put the Pioneers in this weekend.
I started out by removing the bezel that covers the radio and climate control. Simply pull on the upper right corner to pop the first snap and work your way around. Don’t get to sh*tty with it, you don’t want to break it. Once it’s off there are 2 screws that hold the climate control on. Pull those first, then pull the 4 that hold the radio on. Pull the climate control out first then the radio. Once the radio is out the PAC unit is simply plug and play.
Here is the unit hooked up.
I searched around the tight spot to find a place it would actually fit. I found that it will fit right between the radio and climate control with about an inch of play. Perfect! I installed some foam window sealer to take the space up and create a vibration free environment.
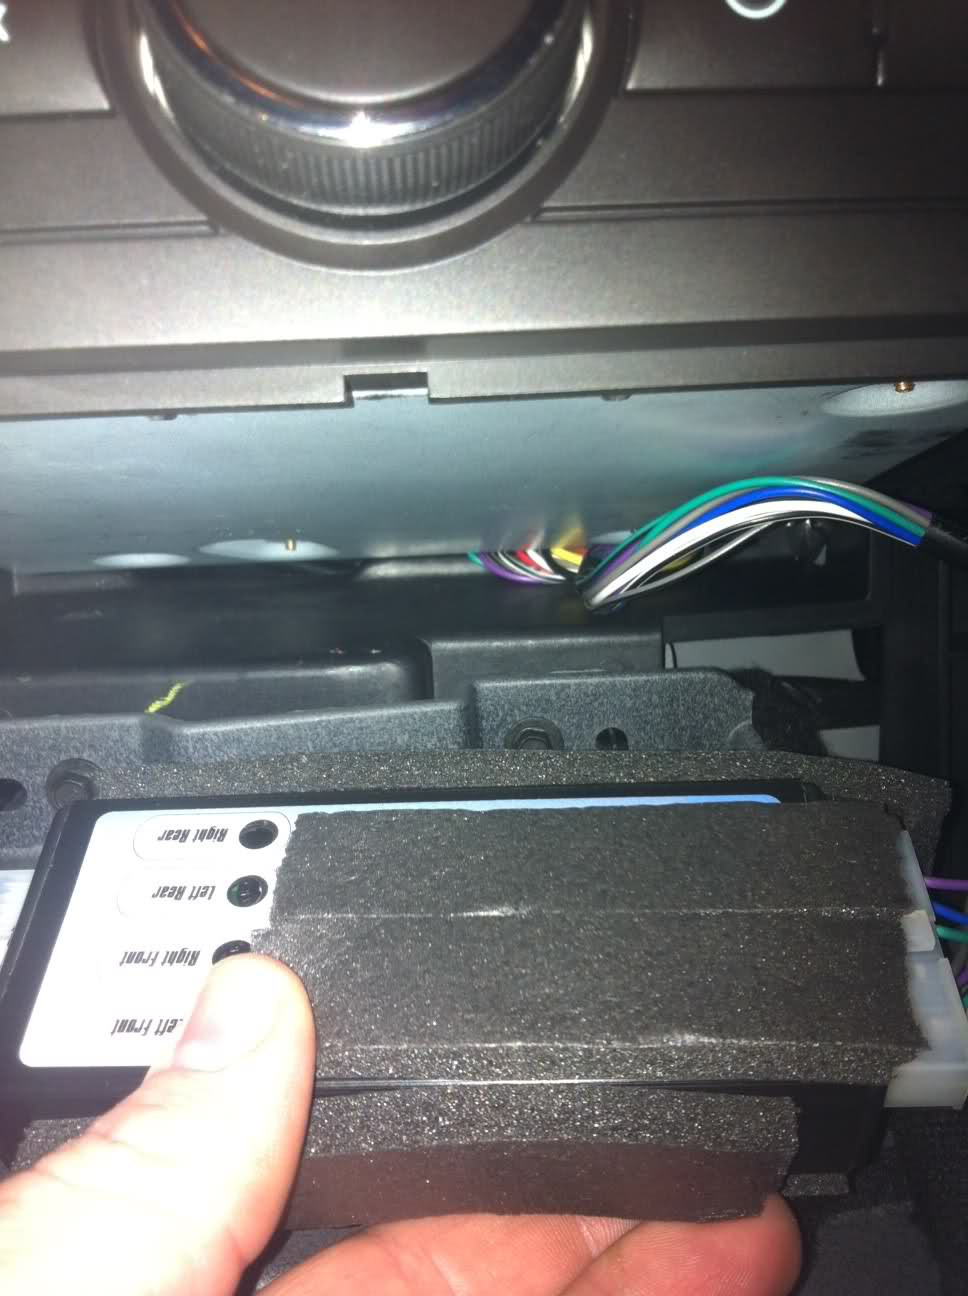
Next I pushed it into place and installed the climate control. When I need to adjust the outputs I simply pull the bezel and the two screws holding the climate control and I’m there. 2 minute job.

I then routed the wires under the dash and around the hood release under the plastic molding. It simply pulls up and even has channels to put the wires in. It was too dark to take pics, but I’ll get some tomorrow when I install the power wires to the battery.
That’s about it for tonight.
More to come!!
I got a few goodies in today so I decided to start my sound system upgrade. My PAC module came in so I thought why not install it. The good thing with the PAC is you can install it and your speakers will still work. You can pick and choose which speakers you want to amp, front-back- or both.
Here is what I’m installing. The 4x6’s are the stock ones, as I already put the Pioneers in this weekend.
I started out by removing the bezel that covers the radio and climate control. Simply pull on the upper right corner to pop the first snap and work your way around. Don’t get to sh*tty with it, you don’t want to break it. Once it’s off there are 2 screws that hold the climate control on. Pull those first, then pull the 4 that hold the radio on. Pull the climate control out first then the radio. Once the radio is out the PAC unit is simply plug and play.
Here is the unit hooked up.
I searched around the tight spot to find a place it would actually fit. I found that it will fit right between the radio and climate control with about an inch of play. Perfect! I installed some foam window sealer to take the space up and create a vibration free environment.
Next I pushed it into place and installed the climate control. When I need to adjust the outputs I simply pull the bezel and the two screws holding the climate control and I’m there. 2 minute job.
I then routed the wires under the dash and around the hood release under the plastic molding. It simply pulls up and even has channels to put the wires in. It was too dark to take pics, but I’ll get some tomorrow when I install the power wires to the battery.
That’s about it for tonight.
More to come!!
Similar threads
- Replies
- 3
- Views
- 377
- Replies
- 0
- Views
- 360
- Replies
- 0
- Views
- 15