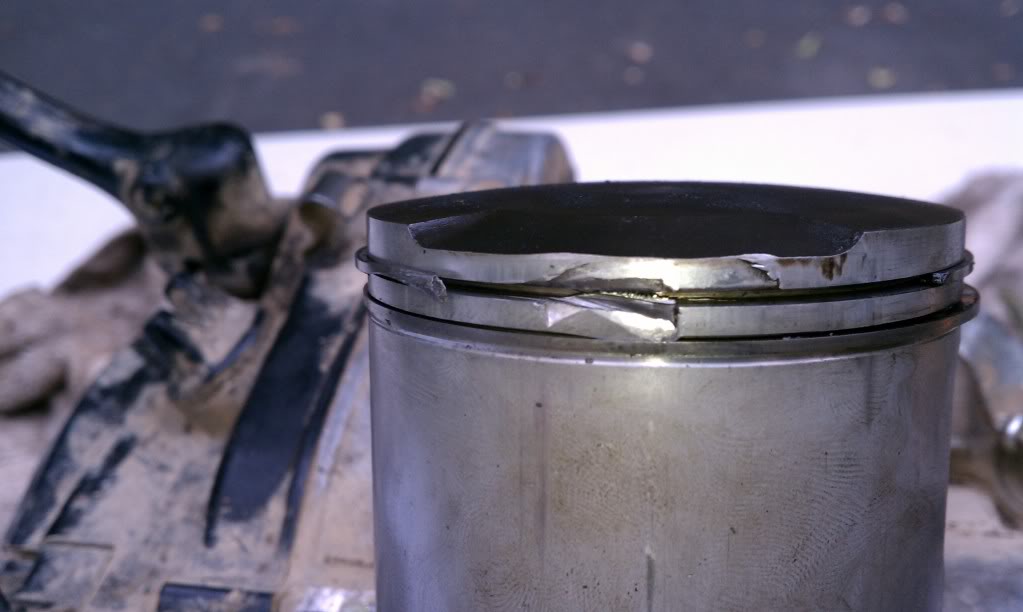
hey everyone, im putting in a new piston after the rings on my old piston let go.. when this happened i got lucky because the piston and broken rings did now fuk up my cylinder. unfortunately it did catch my exhaust port so that needs a little work and i was wondering what the exhaust chamfer is?
exhaust chamfer?
- Thread starter motorcrosmaster
- Start date
You are using an out of date browser. It may not display this or other websites correctly.
You should upgrade or use an alternative browser.
You should upgrade or use an alternative browser.
Take some pictures of the damage. If a ring snagged, it probably needs to be bored out to the next usable oversize... Most of the time rings snag because the bore is out of specification or the locator pin dislodges and allows the ring to spin relative the piston.
alright... ive never really uploaded pix onto the forum before so i gotta figure out of to do that..loll
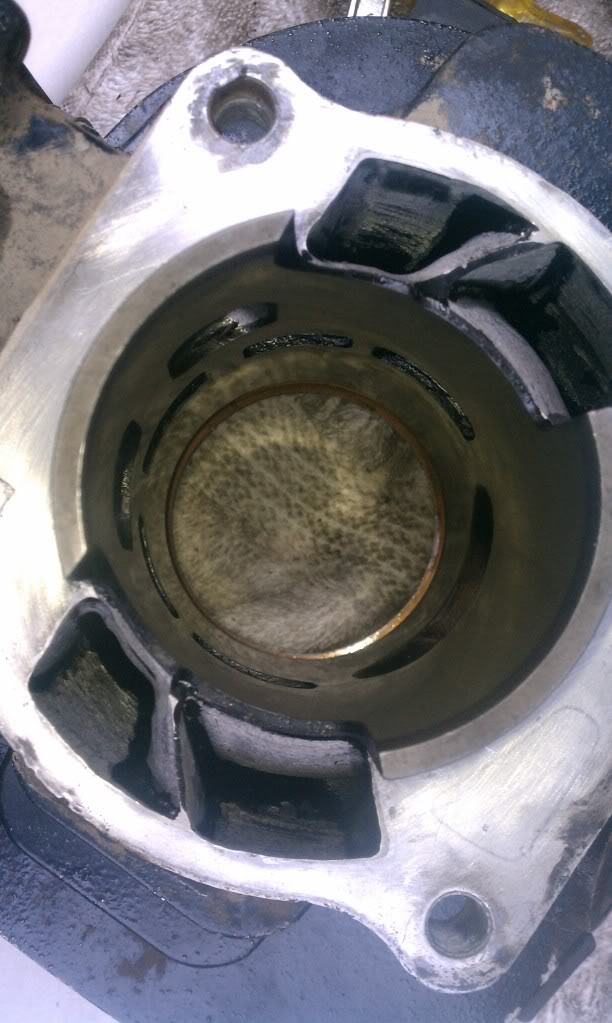
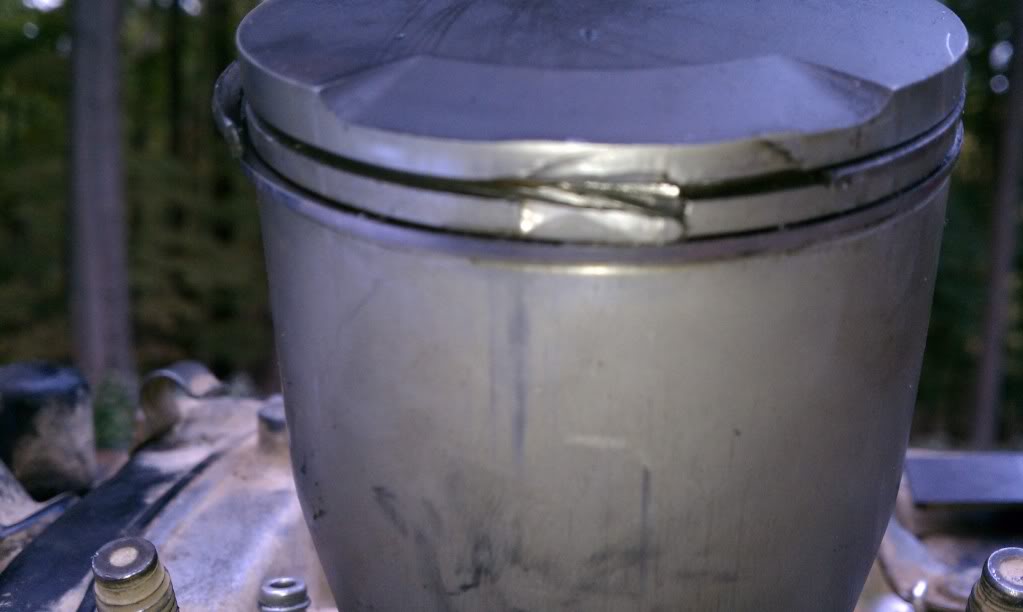
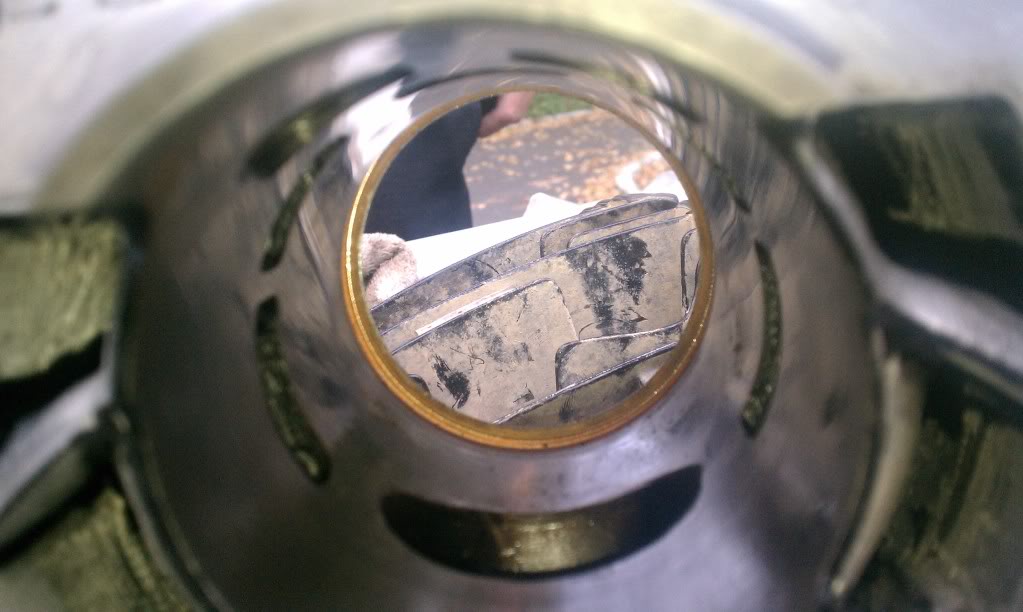
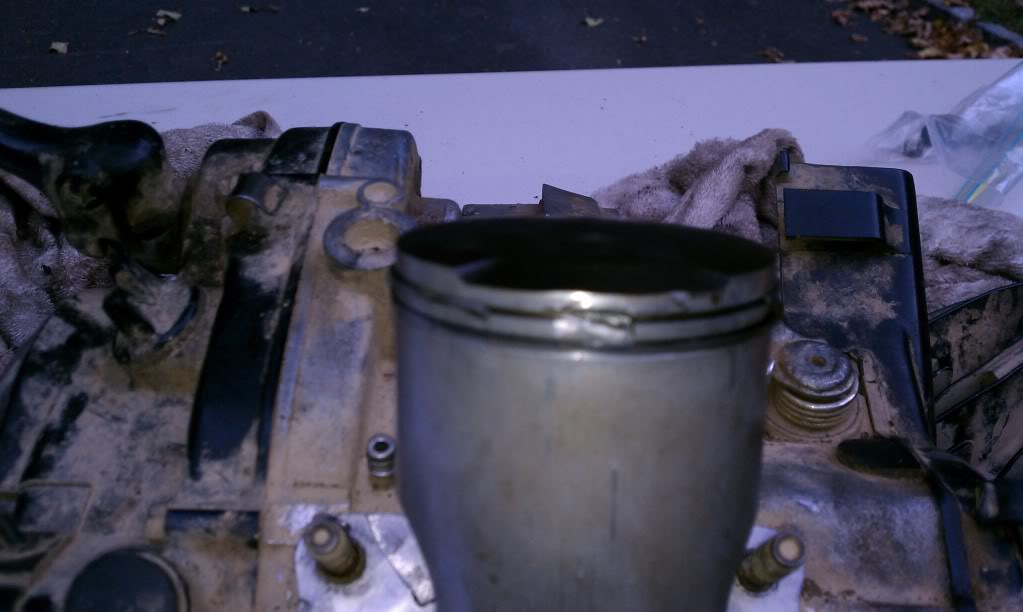
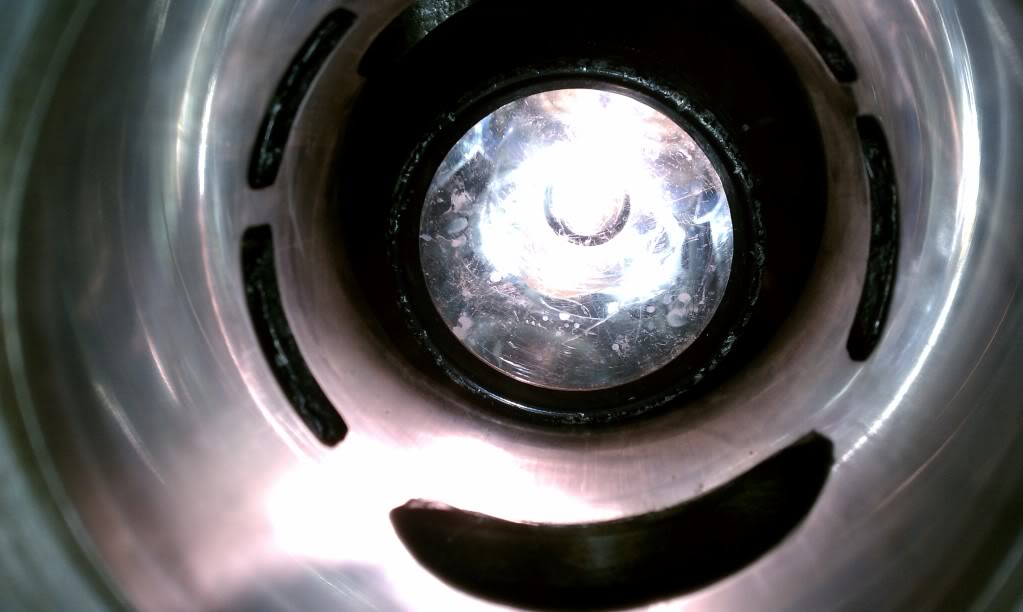
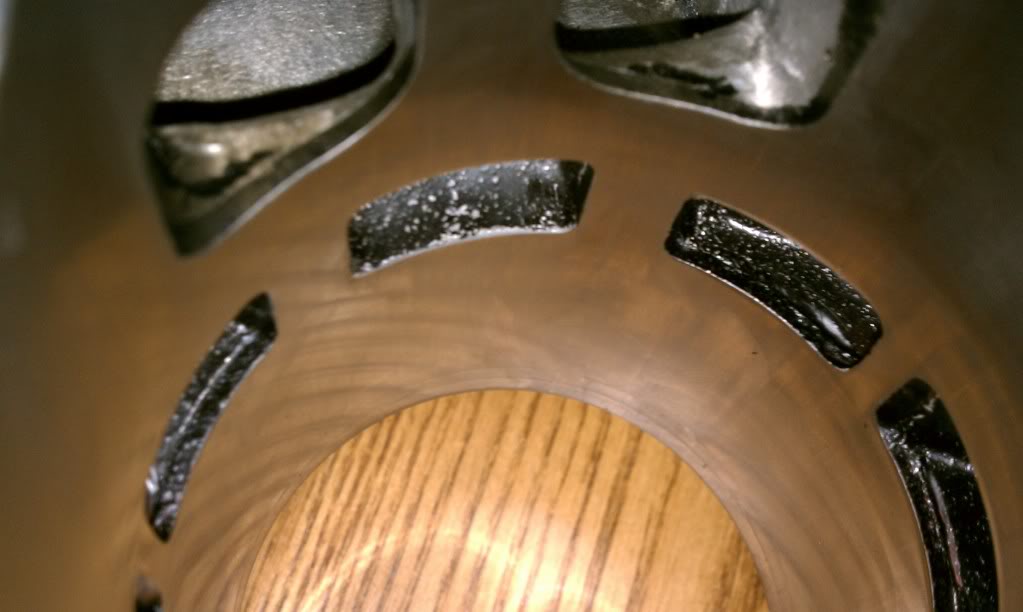
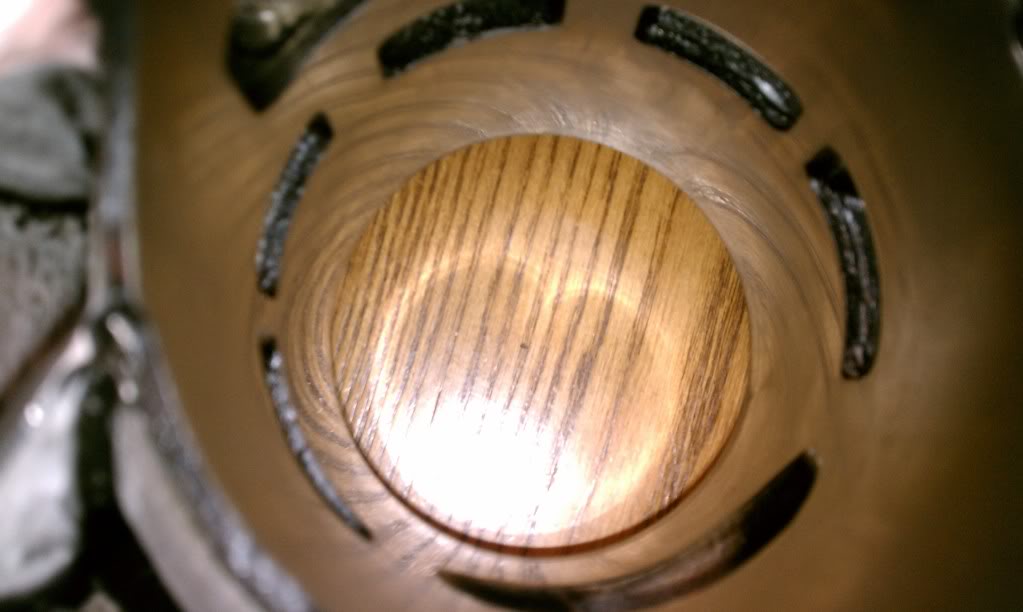
heres some of the pictures:
Login to a private Photobucket.com album
i started a job in a small engine shop about two weeks ago so my boss is the one who has been helping me fix the motor. He believes that i got extremely lucky and will be able to get away with just a hone and a new piston and rings and some work on the exhaust port. He asked me to find out what the chamfer is so if anyone knows that information that would be great. also let me know what you guys think of the damage and if better pictures are necessary.. my camera sometimes sux on focusing so i can try to get better pix but no guarantees.. loll
heres some of the pictures:
Login to a private Photobucket.com album
i started a job in a small engine shop about two weeks ago so my boss is the one who has been helping me fix the motor. He believes that i got extremely lucky and will be able to get away with just a hone and a new piston and rings and some work on the exhaust port. He asked me to find out what the chamfer is so if anyone knows that information that would be great. also let me know what you guys think of the damage and if better pictures are necessary.. my camera sometimes sux on focusing so i can try to get better pix but no guarantees.. loll
Picture FAIL!
Post up the codes from the album itself and they'll display.
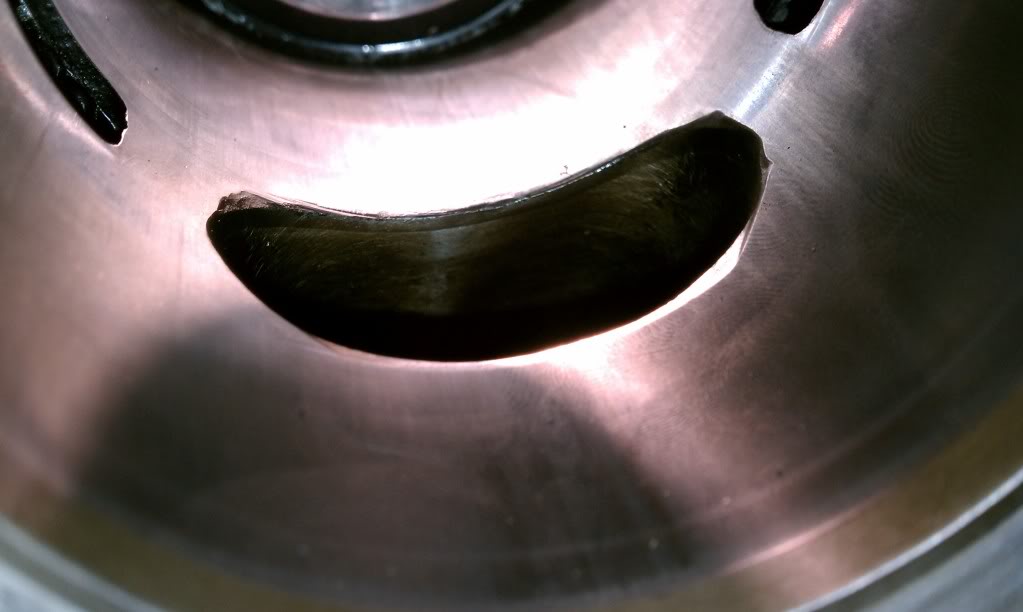
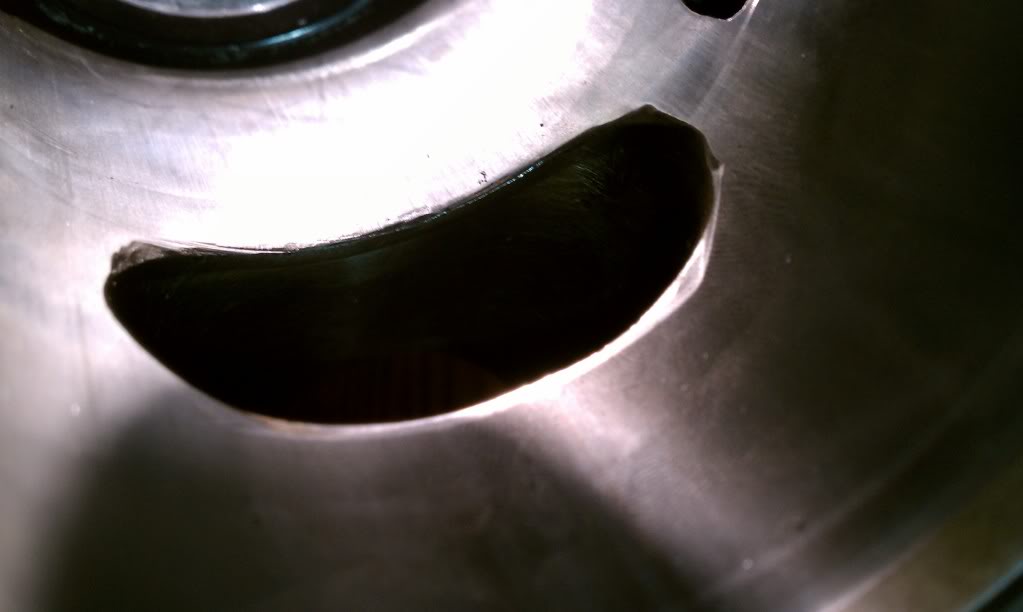
Your boss may be correct, you might have gotten VERY lucky but on an aircooled 2 stroke the tolerances are *generally* much tighter than on a lawnmower engine. Chamfering the port edge may take out some of the damage but (depending on where the damage is) it may not.
I don't believe chamfering angle is specified in the service manual. I simply run a "flame" diamond burr around the edge of each port to ensure nothing gets snagged.
appreciate u telling me how to upload photos the proper way... i always wondered how people do that.. i think im gunna try to take another picture that shows the exhaust port better
Blaner
Your Friendly South African Ambassador
that looks very similar to what happened to me...
My damage resulted from the bore being too tight!
chamfering is very important when it comes to boring. think about it, when your rings pass the exhaust port which occupies around 50% of the bore. when this happens, the rings which are under tension in the bore, expand out into the exhaust port, this is because they have the space to do so, the exhaust port opening provides a temporary reprieve of the tension and hence the rings tend to expand into the free space...normal.
Now, think about when the rings reach the top of the exhaust port....they get pushed back into place as the port closes. this is where chamfering is NB, if your port edges are sharp and rough, the rings are going to get violently forced back into position by the abrupt change in cylinder profile they encounter.
You need the exhaust port (in particular but also the transfers) to be well chamfered, IE: well beveled...the idea is to gently guide the rings back into the bore by giving them an angled surface to glide up, instead of a sharp ridge.
Now, if your bore is too tight, and the chamfering is poor, the rings get violently shoved back into place, and the ring ends slam into the locator pin! this may seem like a silly thing but think about how fast your motor is revving, the poor locator pin gets hammered from both sides by radically jumping ring ends. eventually the pin will fail as in my case.
You can run tight bore as long as the chamfering is good.
pics of chamfering:::
Blaner
Your Friendly South African Ambassador
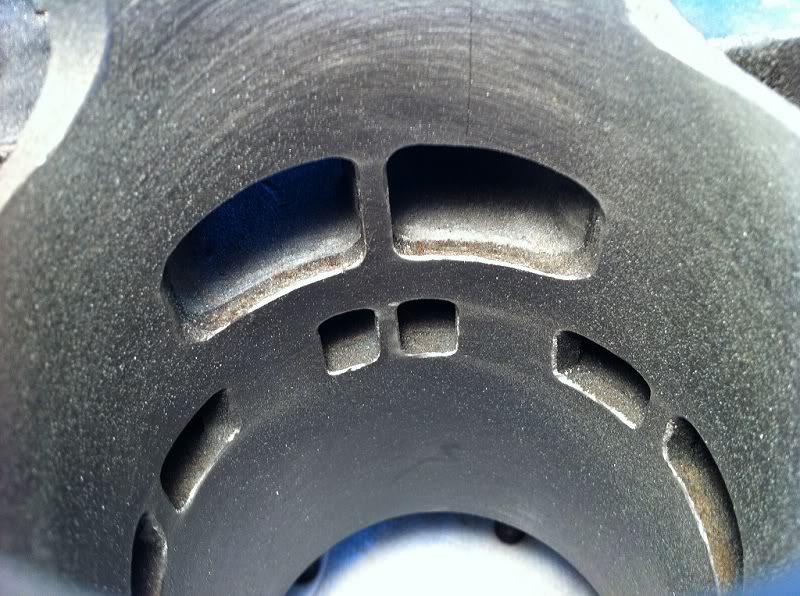
your exhaust chamfering seems so be a bit rough-factory? id go over it with a conical grinding bit in a dremel and smooth it out.
be careful when you do this not to let the bit slip and gouge the cylinder walls!
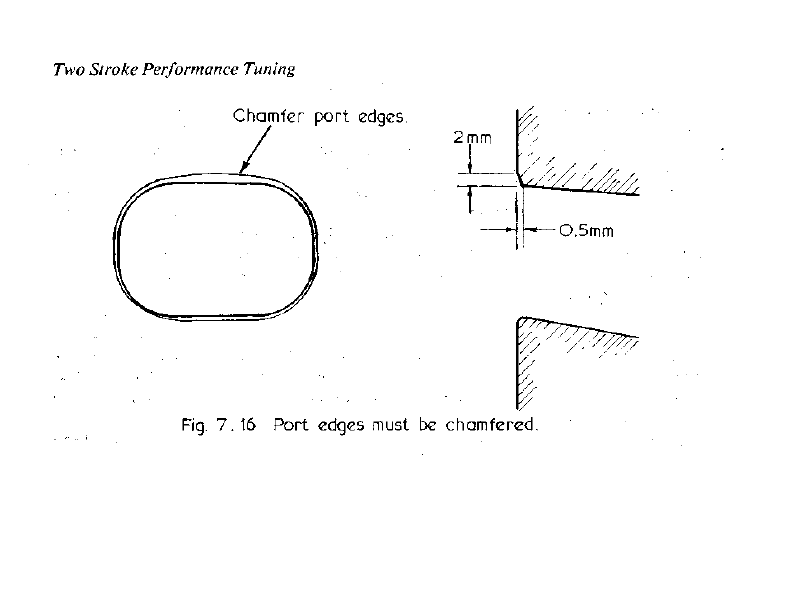
follow the guidelines in the pic i extracted from Graham Bells performance tuning book..
be careful when you do this not to let the bit slip and gouge the cylinder walls!
follow the guidelines in the pic i extracted from Graham Bells performance tuning book..
thanks for the response .. very informative and helpful.. so what do you suggest i should do when chamfering.. is there a specification to follow when doing the process?
X2 on everything blaner said.
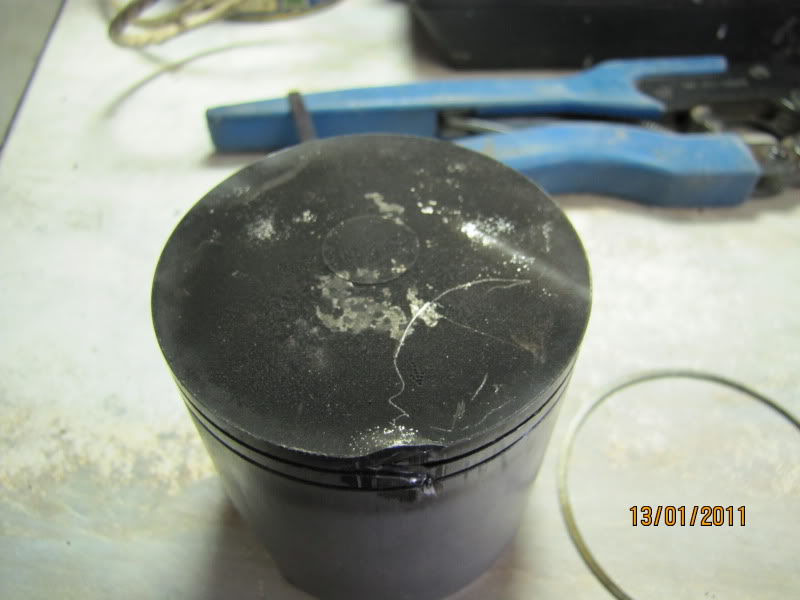
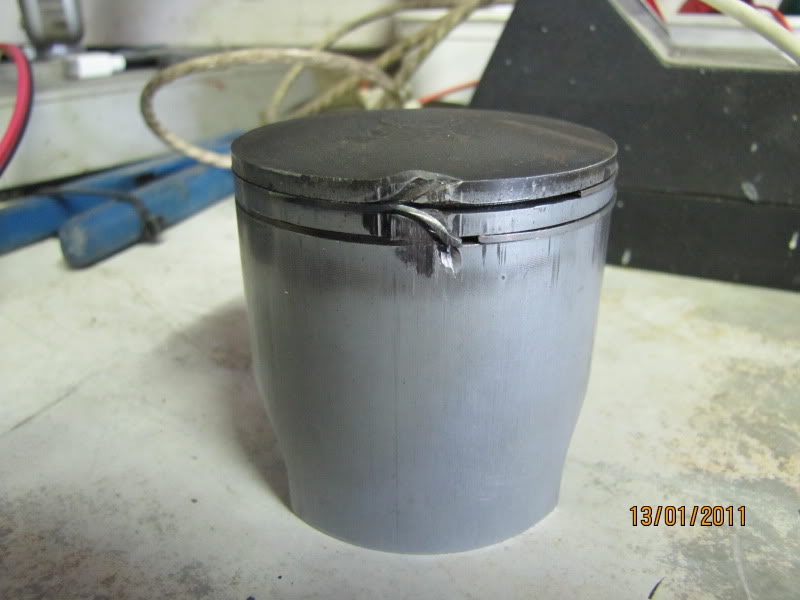
I believe your engine actually broke a ring....
Look at the last picture of the first post with pics in it, one side the ring is all torn and mangled but fresh and clean metal is exposed... the other side (right side in the pic) the ring end is dirty and not freshly ripped off. Seems you may have seen an actual ring failure... good news is, they're rare!
The damage to the exhaust port MIGHT be able to be cleaned up. It's pretty heavy, especially on the top but the good news is, you've got metal on top that you can cut away (as long as thise cylinder hasn't actually been ported) and not harm a thing, in fact you might notice a slight power increase.
Measure from the top of the exhaust port to the head gasket mating surface. If it's ~35mm, you've got enough material you can remove the damage (but only enough to remove the damage) and run it again.
Blaner
Your Friendly South African Ambassador
X2 on everything blaner said.
ehemmm....cough-rep-cough...

i think that damage is fixable in the manner you suggest Sic.
Motocrosmaster, you go about the chamfering process firstly with GREAT caution. one slight slip of the hand and that cylinder is toast.
I like to use a dremel with the flexi shaft extension, it lets you get in there, i wouldnt try it with just the machine with a bit in the end..too clumsy
I like to use those orange medium grained grind stones with the conical shape. they give you an advantage in terms of the angle you need to achieve with chamfering.
Your primary focus in the exhaust. Start there: lie the barrel horizontally on a work bench so the exhast port is flat on the bench. so you can see the port facing you. carefully guide your grinder in the cylinder (start at either end) ...be careful! when you have it in position to grind, hold steady and move your head so that you can look down the cylinder from the other side, so your hand is in one side and your head is in the other! this way you can watch what you are doing.
Gently grind the port edge in a smooth, flowing motion from left to right, right to left, do this at the flattest angle you can achieve. use the specs in the pic above for a guide. you want 2mm up the cyl face and 0.5mm into the port. this will give you the right bevel.
Repeat this proces from the other end of the cyilinder so you chamfer both top and bottom of the port. remember to do the sides too.
Do this for all the transfer ports as well, but since they are small, they are less critical.
Your intake windows do not need to chamfered as your rings never pass the openings of them. however, debur them lightly anyway.
Hope this is clear enough!
i greatly appreciate all the advice.. thanks guys.. i love this forum, its the only way i can afford to keep my blaster running !
Similar threads
- Replies
- 19
- Views
- 2K