My 2002 Blaster Rebuild and Restore.
- Thread starter Audiominer
- Start date
You are using an out of date browser. It may not display this or other websites correctly.
You should upgrade or use an alternative browser.
You should upgrade or use an alternative browser.

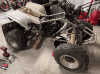
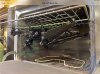
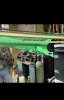
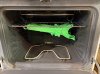
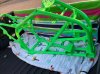
Sand Blasting and Powder Coating!
Attachments
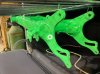

I’m currently waiting on more funds to complete the restore. But I’m just now getting the hang on how to post on here lol. I will be posting more pics and hopefully videos.Nice color !!
What's the rest of your plans ?
Is it easier to link a YouTube video than post one directly ?
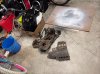
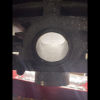
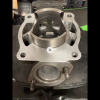
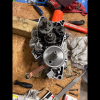
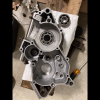
This is some pics of the engine rebuild and porting and polishing.
Attachments
I did, I did it per Yamaha's Service Manual Specification's......Did you adjust clutch push rod so. Clutch actuator arm is in the right position?
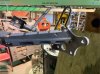
What I found was the new aftermarket outside clutch rod had welded to the ball and so I replaced it again and went to set the adjustment up and the second new rod and ball kit was OEM the 2nd go around and what I realized is the first rod when adjusted to the mark on the case to the mark on the lever arm the lock nut barely fit and the OEM 2nd rod, once adjusted had 3 threads protruding through the lock nut....... I said all that to say this I guess aftermarket is not always the right size. It's seems that the first rod kit was about a 1/16" too short. and once I was attempting to ride the quad, the clutch wouldn't disengage so i adjusted the clutch on the perch and that didn't help and the clutch pull went soft and then I decided to take it apart........ the clutch works great now...... I hope to take it out in the next week or so to break it on in.
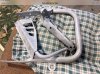
What carb you runnin on it now? Also, the original arms off the blaster tend to have play after a couple of hours on the quad. Did this happen to yours?
Similar threads
- Replies
- 11
- Views
- 613
- Replies
- 14
- Views
- 262
- Replies
- 0
- Views
- 695