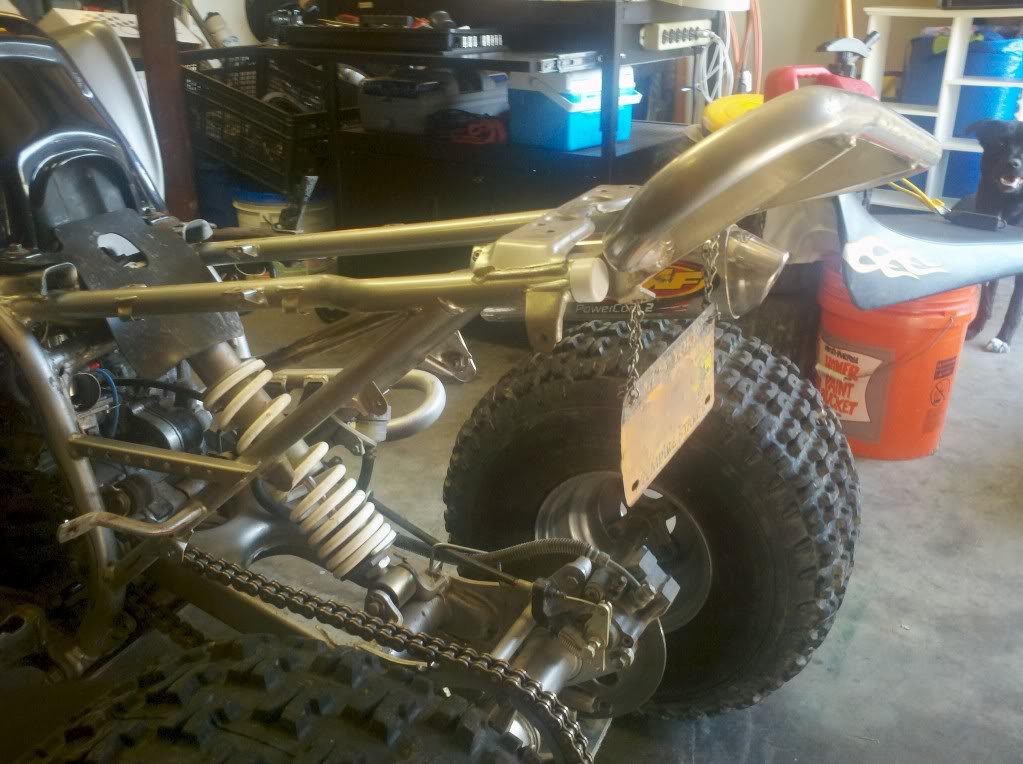
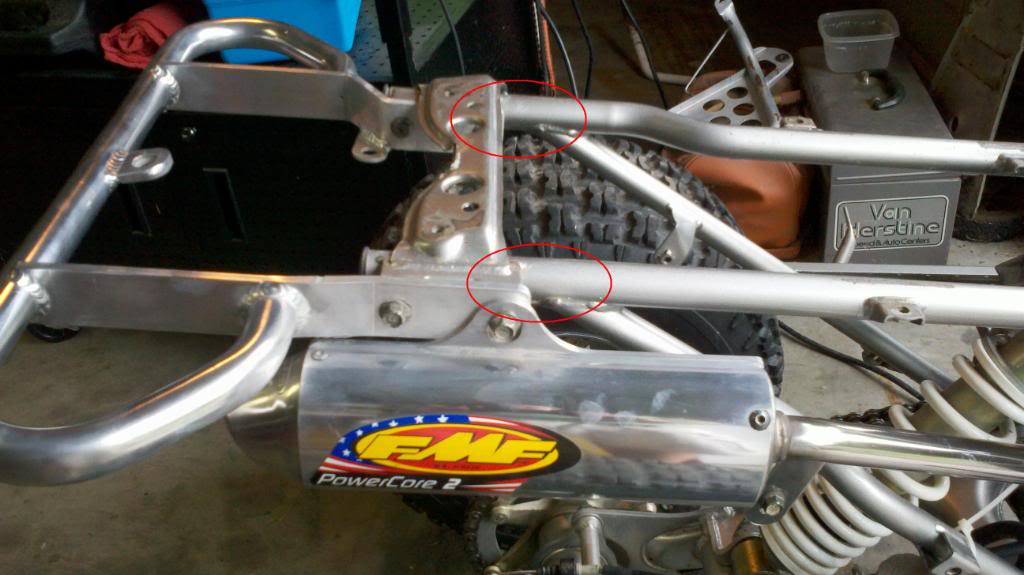
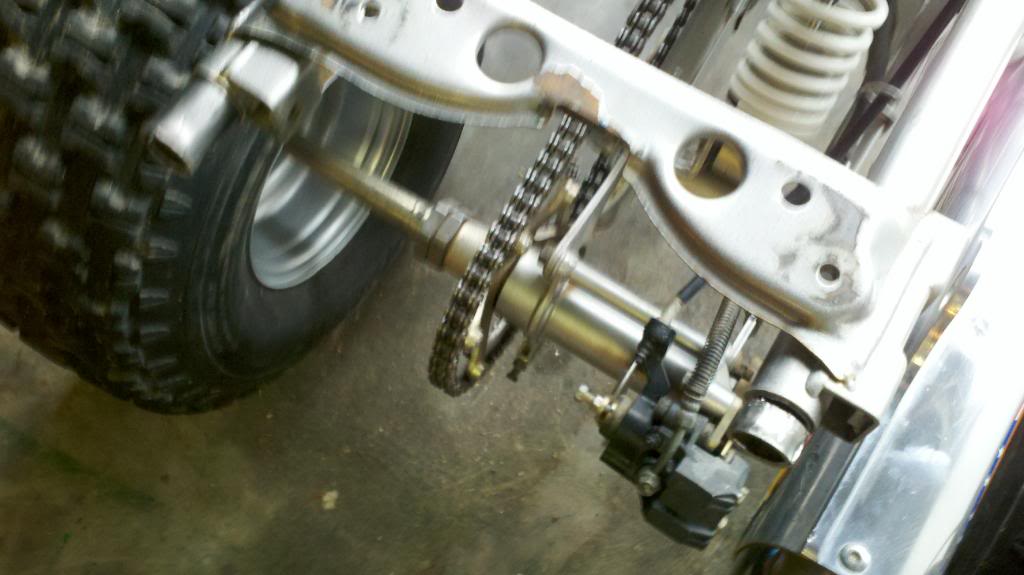
I've seen too many Blastys that've been 12 o'clocked by people tryin to learn to wheelie and they either bend or crack the frame at the spots shown in the red circles. In fact, even if you gusset the frame, these will still be your Achilles Heal:
This is a fairly simple structural reinforcement that'll only take you about 1-2 hrs and will about double the strength of the frame at it's most vulnerable point. No welding necessary but if you've already cracked your frame then this is for you too. If you're a novice welder like I am, it'll not only strengthen your frame, but keep you from blowing holes in it when you try to repair it.
My first blaster was busted and poorly repaired when I got it, so I welded it with these "sleeves": check these out. While I had a friend out riding with me, he stood that frame on it's ass and bent the s#!t out of the 1/4" thick six-pack grab bar but the frame survived. That ought to be all the proof you need that this mod is definitely worth doing.
Another friend cracked his blasty in the same spot learning to wheely so I helped him fix it the same way a couple of months ago and then I got a new '05 frame with a blown engine and decided to do this as a pre-emptive repair.
Here's what you'll need:
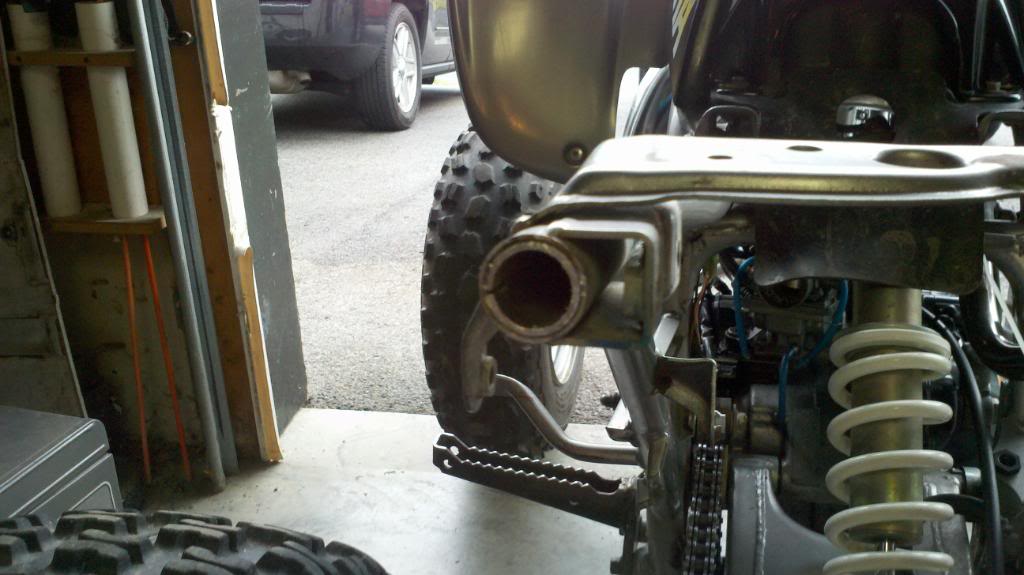
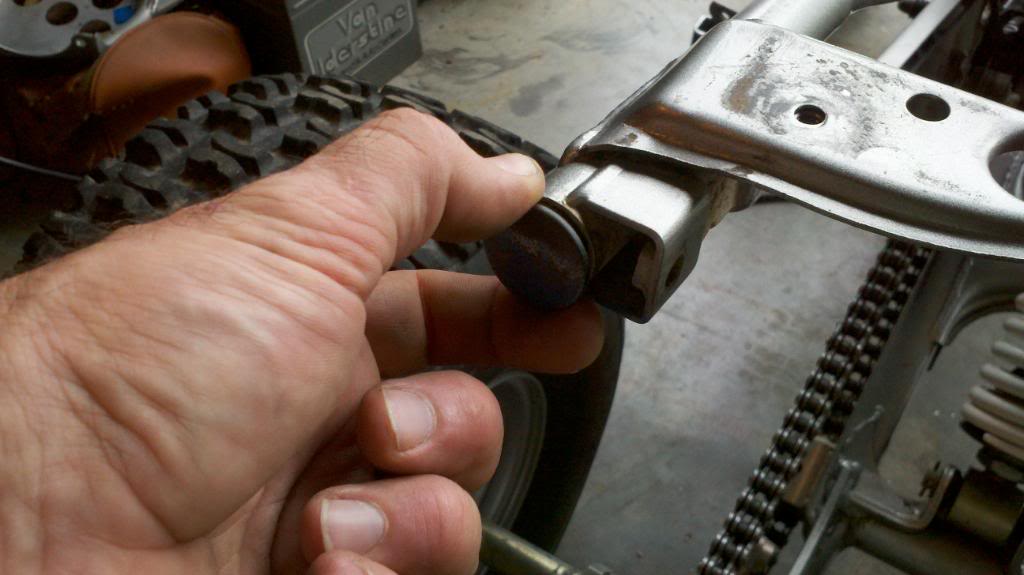
First things first: Take off the rear plastics and grab bar and pull the frame plugs out of the back of your frame. SAVE THESE!
Next cut two 5 1/2" long pieces of pipe; these are your reinforcement sleeves. Bevel one end of each sleeve with a file (or grinder). You'll need to cut a relief slot down the length of ONE side of each as straight as possible
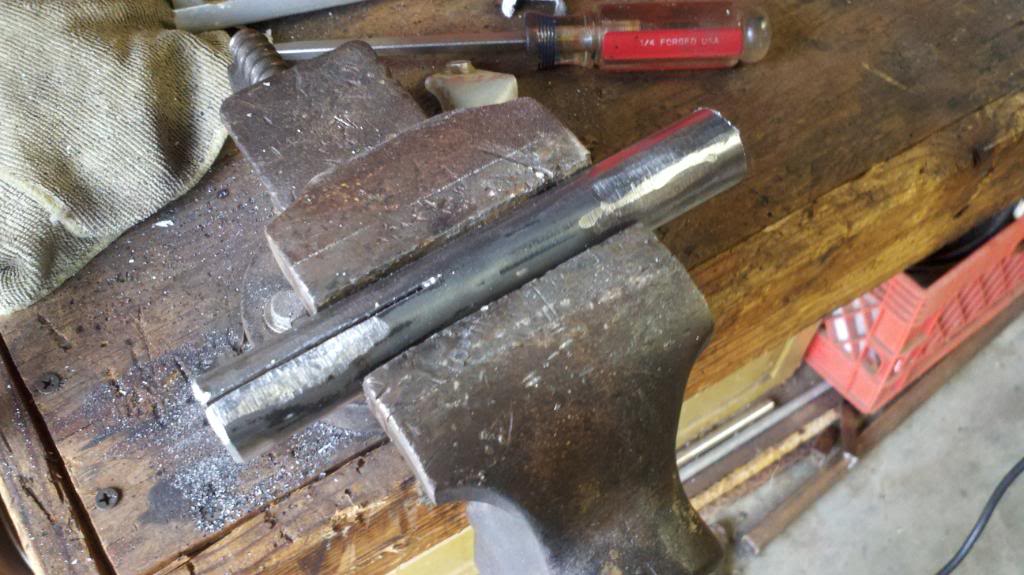
Be careful when you near the end of the cut, the pressure from the vise will pinch the blade of your Sawzall. If you get it to within a 1/16" and open the vise, the pressure relief should "pop" open the rest.:
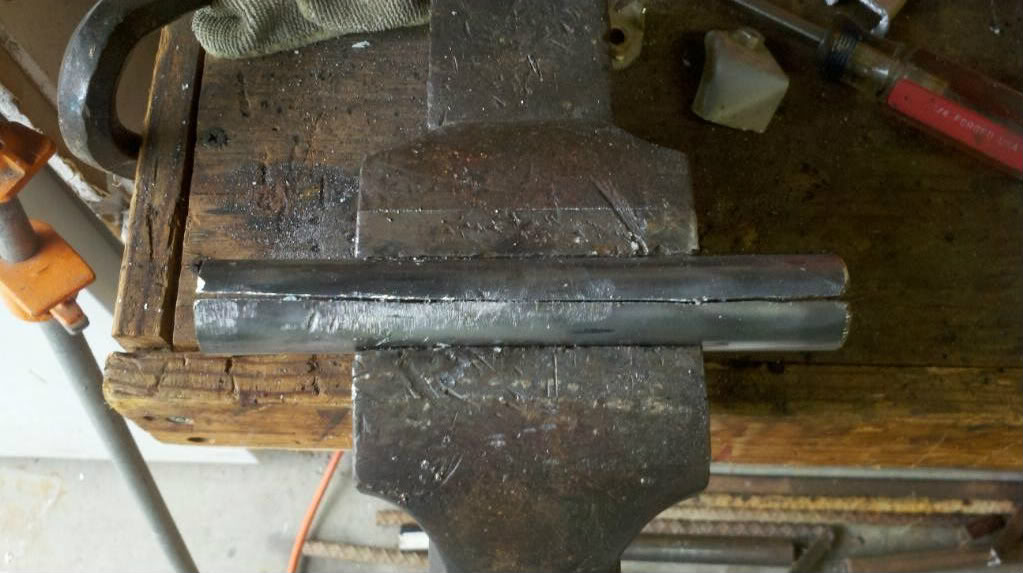
Not so straight, I know
 The reason for this relief slot is the fab seam along the inside of each frame tube. In the '05 frame I used for this DIY, they're along the outside wall (put your finger in and feel for them).
Take your sleeves and put the beveled end into the frame by hand. Match the relief slot to the seam by twisting the pipe until you feel the seam "click" into the slots;
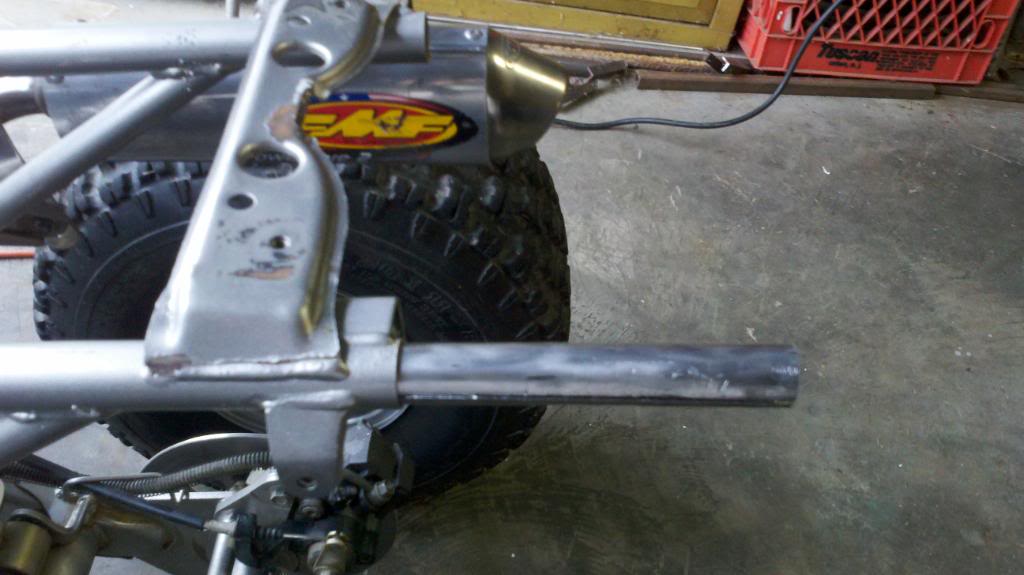
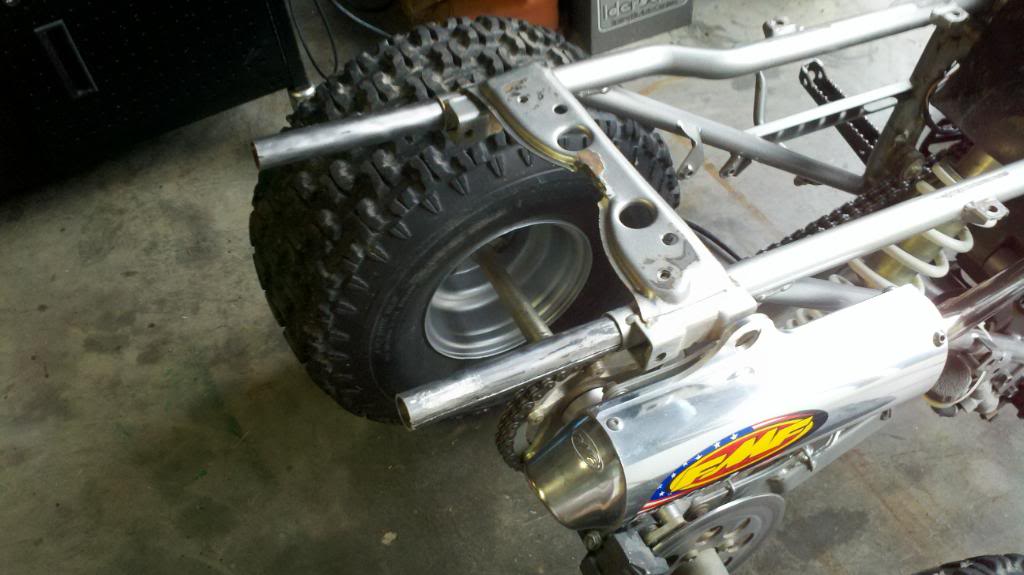
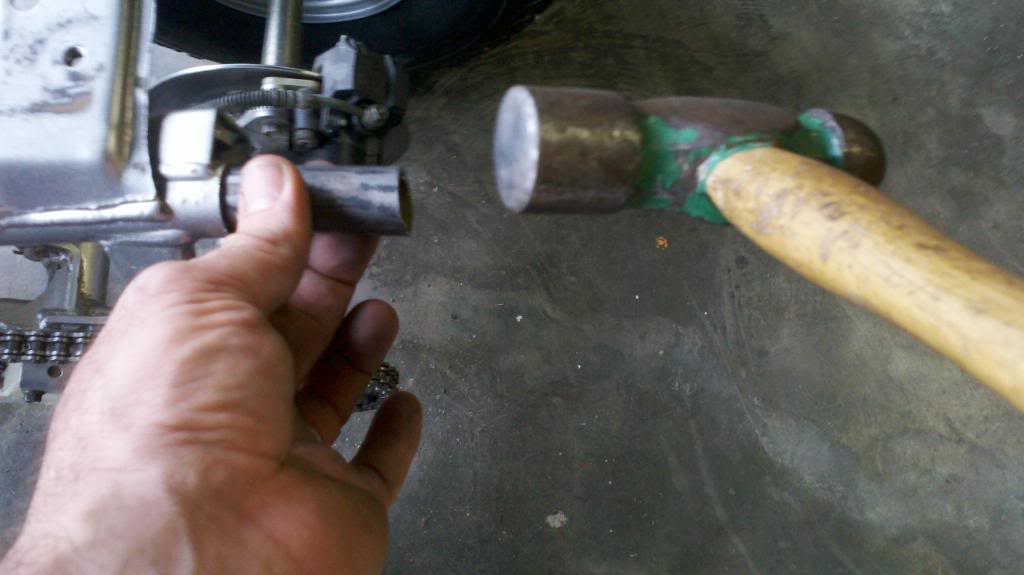
Once they're both in, pound 'em home. If possible, use a piece of the pipe to set them about 3/4" further in than the ends of the frame and put your stock end caps back that you saved from step 1 and you're done:
As luck would have it, that worked on the first two jobs I mentioned but for this DIY, not so much I:I :
Continued below.....
This is a fairly simple structural reinforcement that'll only take you about 1-2 hrs and will about double the strength of the frame at it's most vulnerable point. No welding necessary but if you've already cracked your frame then this is for you too. If you're a novice welder like I am, it'll not only strengthen your frame, but keep you from blowing holes in it when you try to repair it.
My first blaster was busted and poorly repaired when I got it, so I welded it with these "sleeves": check these out. While I had a friend out riding with me, he stood that frame on it's ass and bent the s#!t out of the 1/4" thick six-pack grab bar but the frame survived. That ought to be all the proof you need that this mod is definitely worth doing.
Another friend cracked his blasty in the same spot learning to wheely so I helped him fix it the same way a couple of months ago and then I got a new '05 frame with a blown engine and decided to do this as a pre-emptive repair.
Here's what you'll need:
- Sawzall or Jig saw with good metal cutting blade.
- Vise
- Hammer - Heavey Ball Peen or Lump Hammer preferred
- 16 in. of pipe with an ACTUAL outside diameter of 7/8"
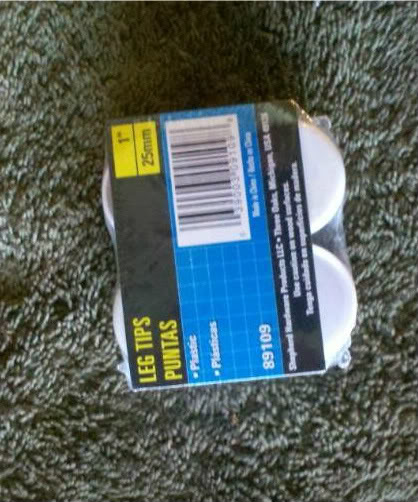
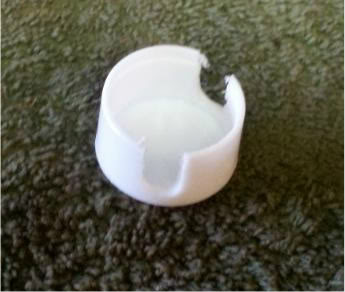
- 1 in. "Leg Tips" from Home depot or Loews, etc.. (see pick in the thread below)
- File or grinder
- and (possibly) Wire wheel on a grinder or in your drill (you'll see why later)
First things first: Take off the rear plastics and grab bar and pull the frame plugs out of the back of your frame. SAVE THESE!
Next cut two 5 1/2" long pieces of pipe; these are your reinforcement sleeves. Bevel one end of each sleeve with a file (or grinder). You'll need to cut a relief slot down the length of ONE side of each as straight as possible
Be careful when you near the end of the cut, the pressure from the vise will pinch the blade of your Sawzall. If you get it to within a 1/16" and open the vise, the pressure relief should "pop" open the rest.:
Not so straight, I know
Take your sleeves and put the beveled end into the frame by hand. Match the relief slot to the seam by twisting the pipe until you feel the seam "click" into the slots;
Once they're both in, pound 'em home. If possible, use a piece of the pipe to set them about 3/4" further in than the ends of the frame and put your stock end caps back that you saved from step 1 and you're done:
As luck would have it, that worked on the first two jobs I mentioned but for this DIY, not so much I:I :
Continued below.....
Last edited: